Planning a camper van means planning more than the vehicle itself. The production timeline affects when you can travel, when you need to make decisions, and how much time you should leave before a major trip. At The Vansmith, each project moves through a defined sequence, from design approval and vehicle preparation through systems installation, testing, inspection, and handover.
The Vansmith Production Timeline at a Glance
The exact timeline depends on the van, configuration, materials, availability, and scope of work.
For current Vansmith inventory, standard/pre-built options are listed at approximately 8–10 weeks, while tailored models are generally listed at 12–16 weeks. Tailored timing begins after the design is approved.
Within that window, your van spends about four to six weeks on our shop floor. Parts are ordered after design approval, before the build launches. A fully custom build, drawn around an empty van, takes about 18–22 weeks, and a Foundation shell (insulated and wired, ready for you to finish) about 2–3 weeks.
A typical project follows this sequence:
|
Stage |
What Happens |
|
Consultation |
Travel needs, vehicle, layout, budget, and priorities are discussed |
|
Layout planning |
Sleeping, seating, storage, kitchen, electrical, water, and equipment are planned |
|
Design approval |
Layout, materials, systems, and project scope are confirmed |
|
Vehicle preparation |
The vehicle is inspected, prepared, and organized for production |
|
Infrastructure |
Insulation, wiring routes, plumbing routes, flooring, and structural preparation begin |
|
Electrical |
Batteries, charging, solar integration, distribution, and monitoring are installed |
|
Plumbing |
Water tanks, pumps, lines, fixtures, and related components are installed |
|
Heating and ventilation |
Heating, roof ventilation, climate equipment, and related systems are installed |
|
Interior installation |
Flooring, cabinetry, sleeping systems, seating, storage, and kitchen components are fitted |
|
Exterior equipment |
Roof equipment, racks, steps, suspension components, and other exterior items are addressed |
|
Testing |
Electrical, plumbing, heating, appliances, and other systems are checked |
|
Final inspection |
The completed van is reviewed before handover |
|
Handover |
The owner receives the van, documentation, and system walkthrough |
The important point is that these stages are connected. Decisions made during design affect later installation work, which is why careful planning at the beginning can prevent unnecessary changes later.
When Does the Vansmith Production Timeline Start?
The production window should not be confused with the entire customer journey.
Before production begins, there can be consultation, vehicle selection, layout planning, material decisions, scheduling, and design approval.
For tailored Vansmith models, the current product information places the 12–16 week timeframe from design approval, rather than from the first conversation.
If you are still deciding between vehicle sizes or layouts, it is worth doing that work before the production clock begins.
Our camper van size comparison guide can help compare different van platforms, wheelbases, and space requirements before you make that decision.
Stage 1: Consultation and Project Scope
The first stage is understanding how the van will actually be used.
A weekend traveler may prioritize gear storage and simple sleeping arrangements. A couple traveling for several months may need a different balance of kitchen space, power, water, and storage. A family needs to consider seating and sleeping capacity differently again.
The conversation should establish:
- Number of travelers
- Typical trip length
- Sleeping requirements
- Seating requirements
- Cooking preferences
- Storage needs
- Electrical requirements
- Water requirements
- Climate and travel conditions
- Exterior equipment
- Budget priorities
- Target travel date
This is also the stage where unnecessary features can be separated from genuinely useful ones.
Stage 2: Layout and Design Planning
Once the requirements are understood, the interior layout can take shape.
Every decision has a space cost inside a van. A larger bed affects storage. A larger electrical system affects cabinet space. A shower affects the floor area. More exterior equipment can affect roof space and overall vehicle height.
The Vansmith's camper van layout guide covers the major layout considerations for solo travelers, couples, and families.
For families, the family camper van layout guide is also useful because seating, sleeping, and storage need to work together rather than being treated as separate decisions.
For two-person travel, the camper vans for couples guide focuses on the trade-offs that matter when two people share the same interior.
Stage 3: Design Approval
Before production moves forward, the major decisions need to be settled.
This is where the layout, materials, equipment, systems, and project scope are reviewed together.
The goal is to make sure the final plan reflects how the van will actually be used.
For travelers choosing from established Vansmith configurations, the Tailored Models page provides an overview of the DUO and FAMILY series, including different wheelbases and layouts.
This stage is particularly important because significant changes become more difficult once physical installation has started.
Stage 4: Vehicle and Component Preparation
Before interior installation begins, the vehicle needs to be prepared.
This can include:
- Vehicle inspection
- Cleaning and preparation
- Mechanical checks where required
- Component organization
- Material preparation
- Electrical component preparation
- Plumbing component preparation
- Interior surface preparation
- Planning installation routes
- Preparation may seem less visible than the finished interior, but it establishes the foundation for everything that follows.
Stage 5: Infrastructure and Interior Preparation
The next stage establishes the underlying structure of the interior.
This can include insulation, flooring preparation, wiring routes, plumbing routes, mounting points, and other infrastructure.
The sequence matters because many systems need to be installed before walls, cabinetry, and other finished surfaces cover access points.
This is also where decisions about weight, access, serviceability, and equipment placement become especially important.
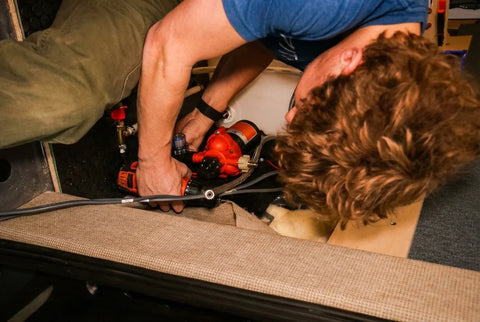
Stage 6: Electrical System Installation
Electrical work is one of the most important technical stages of the project.
The system needs to account for how much power you expect to use, how the batteries will be charged, where components will be located, and how everything can be safely serviced later.
Depending on the project, the system may include:
- House batteries
- Solar charging
- Alternator charging
- Shore power
- Inverters
- Fuses and distribution
- Monitoring equipment
- Interior lighting
- Appliance connections
- USB and 12V outlets
The Vansmith also provides dedicated solar and electrical installation services for owners who need system installation, upgrades, diagnostics, or repairs after the original project.
Our guide to camper van solar, batteries, and alternators provides additional context on how these systems work together.
Stage 7: Plumbing and Water Systems
Water systems are installed alongside the other major infrastructure.
Depending on the layout, this may include:
- Fresh water storage
- Gray water management
- Water pump
- Plumbing lines
- Sink
- Shower equipment
- Water heating
- Drainage
- Shut-off points
Accessibility matters here. A system should not only work when new. It should also be practical to inspect and service later.
That is one reason system planning happens before finished cabinetry and other interior components are permanently installed.
Stage 8: Heating, Ventilation and Climate Systems
Temperature management becomes particularly important for travelers who spend time in mountain environments or cold-weather destinations.
Heating and ventilation decisions affect electrical consumption, fuel use, moisture control, and overall comfort.
Depending on the project, this stage can include:
- Fuel heater installation
- Roof ventilation
- Air conditioning
- Ducting
- Controls
- Exhaust routing
- Temperature management
The Vansmith also handles heater installation and camper van service, including heating, ventilation, electrical, solar, and other equipment.
For owners preparing for freezing temperatures, the camper van winterization guide covers plumbing protection, battery considerations, heating, moisture, tires, and cold-weather preparation.
Stage 9: Flooring, Cabinetry and Interior Installation
Once the major infrastructure is in place, the visible interior begins to take shape.
This can include:
- Finished flooring
- Wall and ceiling surfaces
- Cabinetry
- Kitchen galley
- Countertops
- Bed platforms
- Seating
- Storage systems
- Interior trim
- Lighting
The order matters. Components are fitted around the systems already installed behind and underneath the finished surfaces.
The result should feel cohesive rather than like a collection of individual components.
Stage 10: Appliances and Interior Equipment
Appliances and equipment are installed once the surrounding infrastructure is ready.
Depending on the selected layout, this can include:
- Refrigerator
- Induction cooking equipment
- Sink
- Water heater
- Electrical outlets
- Lighting
- Ventilation controls
- Interior storage equipment
Equipment selection should always be considered alongside the electrical and spatial requirements of the van.
A refrigerator, for example, needs both physical space and sufficient electrical capacity. The same principle applies to cooking equipment, heating, air conditioning, and other higher-demand systems.
Stage 11: Exterior Equipment
Exterior equipment can include systems such as:
- Roof racks
- Solar panels
- Roof vents
- Exterior lighting
- Suspension upgrades
- Wheels and tires
- Steps
- Other adventure equipment
Exterior additions should be considered alongside the original vehicle dimensions.
For example, roof equipment can change the total height of the van, which matters for garages, parking structures, trail access, and low-clearance areas.
For a deeper look at the underlying vehicle measurements, see our Sprinter van dimensions guide and Ford Transit van dimensions guide.
Stage 12: System Testing
A finished interior is only part of the process.
The systems need to work together before the vehicle is handed over.
Testing can include:
- Electrical connections
- Battery charging
- Solar charging
- Inverter operation
- Lighting
- Water pumps
- Faucets
- Drainage
- Heating
- Ventilation
- Appliances
- Doors and drawers
- Exterior equipment
- General fit and finish
Testing is also an opportunity to identify small issues before the owner takes the van on a long trip.
Stage 13: Final Inspection and Handover
The final stage is a detailed review of the completed vehicle.
The team checks the interior, equipment, systems, and overall finish before handover.
The owner can then be walked through the major systems and their operation.
This is important because a camper van has multiple interconnected systems. Understanding how those systems work makes day-to-day ownership easier and helps identify potential issues early.
How Long Does Each Vansmith Configuration Take?
There is no single production duration that applies to every Vansmith vehicle.
Current inventory information provides a useful distinction:
|
Vansmith option |
Current listed timing |
|
Standard / pre-built |
Approximately 8–10 weeks |
|
Tailored |
Approximately 12–16 weeks |
|
Used Vansmith inventory |
Available inventory can provide a faster path |
The Camper Vans for Sale inventory currently separates standard/pre-built, tailored, and used options, making it possible to compare vehicles based on both configuration and availability.
For travelers who need a vehicle sooner, used camper vans can provide another route. Vansmith-inspected used inventory is sold with condition information covering major systems such as electrical, plumbing, appliances, and the base vehicle.
What Does Each Option Cost?
Timing and budget usually get decided together. These are the current starting prices (October 2026). Duo, Family and Bivy prices include the van and the build.
|
Option |
Starting price |
Listed timing |
|
Foundation shell, on your van |
$9,970 |
About 2–3 weeks |
|
Conversion on a van you own |
From $46,950 |
12–16 weeks |
|
Duo (tailored, for couples) |
From $113,950 (Transit) or $115,950 (Sprinter) |
12–16 weeks |
|
Family (tailored) |
From $118,950 (Transit) or $120,950 (Sprinter) |
12–16 weeks |
|
Bivy (pre-built) |
From $119,700 |
8–10 weeks |
|
Fully custom |
Priced per build |
About 18–22 weeks |
Prices change, so check the model pages for the current figure. Our RV loan calculator shows what each works out to per month.
Why Do Some Vans Take Longer Than Others?
Production time can vary because every vehicle has different requirements.
Common factors include:
Vehicle availability
The timeline depends partly on having the correct vehicle available and ready for the project.
Layout complexity
More systems and more intricate interior arrangements require additional planning and installation time.
Electrical requirements
A simple power setup takes less installation work than a larger system involving additional batteries, solar, charging equipment, inverter capacity, and monitoring.
Plumbing requirements
A van with a simple sink system has different installation requirements from one with a larger water system and enclosed shower.
Exterior equipment
Roof equipment, suspension work, wheels, tires, racks, and other additions can introduce additional installation steps.
Component availability
Special-order components can affect scheduling when their arrival is required before a particular stage can begin.
Design changes
Changes after production has started can require earlier work to be revisited. Finalizing important decisions before production helps keep the project moving in sequence.
Pre-Built vs Tailored: Which Has the Shorter Timeline?
If your priority is getting on the road sooner, a standard/pre-built option can provide a more predictable path.
If you want a specific combination of layout, wheelbase, sleeping arrangement, storage, and equipment, a tailored model may be the better fit.
The current Vansmith inventory lists standard/pre-built options at approximately 8–10 weeks and tailored options at approximately 12–16 weeks.
The right choice depends on whether speed or specification is the stronger priority.
What Should You Prepare Before Production Begins?
The more decisions you can settle before production, the easier it is to keep the project moving.
Before the production window begins, confirm:
- How many people will travel in the van
- Where you expect to travel
- How often you will use the van
- Sleeping requirements
- Seating requirements
- Storage needs
- Electrical usage
- Water requirements
- Heating and cooling needs
- Cooking preferences
- Gear requirements
- Roof equipment
- Garage or parking restrictions
- Target delivery date
It is also worth checking the physical dimensions of your preferred van before committing to a particular configuration.
A 144-inch Sprinter and a 170-inch Sprinter can feel very different in everyday parking and maneuvering. The same applies to different Ford Transit wheelbases and roof heights.
Can Changes Be Made After Production Starts?
Some changes may be possible, but the timing matters.
A change to a component that has not yet been installed is very different from changing something that requires finished cabinetry, flooring, wiring, or plumbing to be revisited.
For that reason, major decisions should be resolved during the planning and approval stages whenever possible.
If you are still comparing layouts, it is better to resolve those questions before production begins rather than after installation has started.
What Can You Prepare While Your Van Is in Production?
There is plenty to do while the vehicle is being prepared.
Plan your first trip
Think about where you will travel, what weather you may encounter, and what equipment you will actually use.
Check your storage requirements
Create a simple list of the gear you regularly carry. This can reveal whether you need more dedicated storage or whether existing space will be sufficient.
Prepare your electrical habits
Understand the power requirements of cameras, laptops, refrigeration, cooking equipment, and other devices.
Review your vehicle dimensions
Know the overall height and length of your van before your first trip. This is especially important if you use parking garages or have a low-clearance driveway.
What If Your Travel Date Is Fixed?
A fixed travel date should be part of the conversation from the beginning.
Avoid planning a major cross-country trip immediately after the expected handover date. Give yourself time for:
- Final inspection
- Owner orientation
- Packing
- Insurance
- Registration
- Travel preparation
- A short local test trip
- Any small adjustments
A little margin can make the difference between starting a trip calmly and starting it under pressure.
What If You Need a Van Sooner?
If your travel date is approaching, start with currently available inventory rather than assuming a new tailored project is the only option.
You can also review small camper vans if maneuverability and everyday usability are priorities. The Vansmith's smaller options are based around shorter platforms designed to be easier to drive and park while retaining practical camping systems.
For travelers considering a Sprinter specifically, the Sprinter camper van inventory provides another way to compare available options.
Production Timeline vs. Ordering Process
These two timelines are related, but they are not the same.
Ordering process:
Consultation → vehicle selection → layout discussion → pricing → design → approval → scheduling
Production process:
Vehicle preparation → infrastructure → electrical → plumbing → climate systems → interior installation → exterior equipment → testing → inspection → handover
For an overview of the company's broader workflow, see The Vansmith process.
Keeping these two concepts separate makes the timeline easier to understand.
The Vansmith Timeline in One View
Here is the simplest way to think about the process:
1. Consultation
Define how you travel.
2. Layout planning
Decide how the available space should work.
3. Design approval
Confirm the major project decisions.
4. Vehicle preparation
Prepare the van and components.
5. Infrastructure
Install the underlying systems and prepare the interior.
6. Electrical and plumbing
Install the core utility systems.
7. Heating and ventilation
Add climate and airflow systems.
8. Interior installation
Install flooring, cabinetry, sleeping, seating, storage, and kitchen elements.
9. Exterior equipment
Complete roof, suspension, wheel, tire, and other exterior work as applicable.
10. Testing
Check systems individually and together.
11. Final inspection
Review the finished vehicle.
12. Handover
Walk through the van and prepare for ownership.
Questions to Ask About Your Production Timeline
Before committing to a production window, ask:
- When does my production timeline officially begin?
- What is included in the quoted timeframe?
- Does the timeframe start after design approval?
- Which decisions need to be finalized before production?
- Which components could affect scheduling?
- What happens if a component is delayed?
- When should I expect a final inspection?
- How much time should I leave before a major trip?
- What documentation will I receive at handover?
- What service support is available after delivery?
These questions help turn a general estimate into a practical travel plan.
Plan Your Production Window Around Your Travel
The best production timeline is one that gives you enough time to make thoughtful decisions without forcing your first trip into a narrow window.
Start with how you travel, choose the vehicle and layout around those needs, finalize the important decisions before production begins, and leave some margin between handover and your first major trip.
The Vansmith's current inventory provides different paths depending on how quickly you need a van and how specific your requirements are, from standard/pre-built options to tailored models and available used inventory.
If you are ready to discuss a project, start with The Vansmith's current camper van options or contact the Vansmith team to discuss your vehicle, layout, timing, and travel plans.
FAQs About the Vansmith Production Timeline
How long does a Vansmith camper van take?
The current Vansmith inventory lists standard/pre-built options at approximately 8–10 weeks and tailored options at approximately 12–16 weeks. Exact timing depends on the vehicle, configuration, components, and project schedule.
How much does a Vansmith camper van cost?
As of October 2026, a Foundation shell starts at $9,970 and a conversion on a van you own at $46,950. With the van included, the Duo starts at $113,950 on a Ford Transit and $115,950 on a Mercedes Sprinter, the Family at $118,950 and $120,950, and the pre-built Bivy at $119,700.
When does the 12–16 week tailored timeline start?
For tailored Vansmith models, the current product information states approximately 12–16 weeks from design approval.
Is a pre-built Vansmith van faster?
Generally, a standard/pre-built option has a shorter listed production window than a tailored model. Current inventory lists standard/pre-built options at approximately 8–10 weeks.
Can I make changes after production starts?
Some changes may be possible depending on the production stage. However, changes become more difficult once related electrical, plumbing, flooring, cabinetry, or finished surfaces have already been installed.
Does the production timeline include delivery?
The exact handover and delivery arrangement depends on the project and vehicle. Confirm the expected handover date and delivery arrangements with the Vansmith team when scheduling your project.
What should I do before taking delivery?
Prepare insurance, registration requirements, travel equipment, storage organization, and your first short test trip. It is also useful to understand the basic operation of your electrical, water, heating, and other major systems before leaving for an extended journey.
About the author

Eugene Smit
CEO
Eugene is the CEO of The Vansmith, based in Boulder, Colorado. He writes across topics related to van builds, ownership, and the camper van industry.
Read more about Eugene