A reliable camper van electrical system starts with correct battery connections. A loose terminal, damaged cable, or incorrect connection can affect everything from interior lighting to refrigeration and charging equipment. At The Vansmith, careful electrical planning is an important part of creating adventure vans that perform reliably beyond the first trip. Knowing how to hook up RV batteries safely is an important part of responsible ownership.
How to Hook Up RV Batteries Safely
Before connecting a battery, understand how it fits into the camper's electrical system. A single 12V house battery has a simpler connection process than a battery bank linked to solar panels, an inverter, an alternator charger, and other equipment.
The following steps cover general guidance for connecting a single 12V battery in a typical negative-ground system. Always follow the vehicle, battery, and electrical equipment manufacturers' instructions. If your system uses a different grounding arrangement, stop and confirm the correct procedure before working on it.
1. Turn Off All Power Sources
Start by isolating the electrical system. Never connect or remove battery cables while charging equipment or electrical loads are active.
Before you begin:
- Turn off the engine and ignition.
- Switch off interior lights and appliances.
- Disconnect shore power.
- Turn off the battery disconnect switch.
- Isolate solar charging and DC-to-DC charging according to their manufacturers' instructions.
- Turn off the inverter and other major electrical loads.
This reduces the risk of sparks and accidental short circuits.
If your camper has several charging sources, check the equipment manuals before isolating them. Some systems require a specific shutdown sequence.
2. Identify the Positive and Negative Terminals
Locate the two battery terminals before connecting any cables.
Most batteries use these markings:
- Positive (+): Marked with a plus sign and often covered by a red cap.
- Negative (-): Marked with a minus sign and often covered by a black cap.
Never rely on cable color alone. Previous repairs or different wiring standards can make colors misleading.
Check the markings on the battery itself. If the terminals or cables are unclear, do not guess. Have the connections identified by a qualified technician.
3. Inspect the Battery and Cables
A safe camper battery hookup starts with clean, undamaged connections.
Check the following:
- Look for cracks, swelling, leaks, or other visible battery damage.
- Inspect cables for worn insulation, cuts, or exposed wire.
- Check terminals for corrosion or loose hardware.
- Make sure cable connectors fit the battery terminals correctly.
- Confirm that the battery is secured in its tray or mounting area.
- Check that cables are protected from sharp edges, heat, and movement.
Do not connect a damaged battery. If you see leaking, swelling, unusual heat, or signs of a short circuit, stop and seek professional help.
For lead-acid batteries, follow the manufacturer's ventilation and handling instructions. These batteries can release hydrogen gas, which is flammable.
Battery condition also affects how reliably it accepts and holds a charge. Our guide to how long an RV battery lasts explains battery lifespan, common battery types, and factors that affect long-term performance.
4. Connect the Positive Cable First
Once the system is isolated and the terminals are identified, begin with the positive connection.
For a typical negative-ground 12V installation:
- Locate the positive cable.
- Match it to the positive (+) battery terminal.
- Place the cable connector securely on the terminal.
- Tighten it to the battery manufacturer's specified torque.
- Check that the connection does not move.
Use the correct terminal hardware and tools. Avoid placing metal tools across the battery terminals.
Do not guess the tightening torque. Over-tightening can damage the terminal, while a loose connection can create heat and electrical problems.
5. Connect the Negative Cable
After securing the positive connection, connect the negative cable.
- Identify the negative cable.
- Match it to the negative (-) terminal or the approved grounding point specified by the vehicle manufacturer.
- Secure the connection using the correct hardware.
- Tighten it to the specified torque.
- Check that the cable is secure and protected from movement.
This is the usual connection sequence for a negative-ground battery installation: positive first, negative second.
If your RV uses a different grounding arrangement or a more complex electrical system, do not assume this sequence applies. Follow the system manufacturer's instructions.
6. Check the Connections Before Restoring Power
Before switching the electrical system back on, inspect the complete battery connection.
Confirm that:
- Positive and negative cables are connected to the correct terminals.
- No exposed cable can touch the opposite terminal.
- All terminal hardware is secure.
- Protective terminal covers are in place.
- Cables are supported and protected from movement, sharp edges, and heat.
- The battery is firmly secured.
If you have the right training and equipment, use a suitable multimeter to verify battery voltage and polarity. A voltage reading alone does not confirm that the entire system is wired correctly.
Cable routing deserves attention too. A connection that looks secure while parked may experience movement and vibration during travel. Proper cable support and terminal protection help reduce the risk of damage over time.
7. Restore Power and Test the System
Once the connections have been checked, restore the system according to the vehicle and equipment manufacturer's instructions.
Start with a basic check:
- Turn on the battery disconnect switch.
- Check the battery monitor, if installed.
- Test interior lights.
- Check the water pump and other 12V equipment.
- Confirm that the charging system reports normal operation.
Watch for warning lights, unusual sounds, heat, smoke, or a burning smell. If anything seems wrong, switch the system off and investigate before continuing.
A successful connection is only the first step. The battery must also work correctly with the charger, inverter, solar controller, and other equipment in the system.
How to Hook Up a Battery to a Camper With Two Batteries
Some campers use two or more batteries to provide additional storage capacity. The connection method depends on the battery voltage and the required system voltage.
Two common arrangements are:
Parallel connection
- Positive connects to positive.
- Negative connects to negative.
- System voltage stays the same.
- Total battery capacity increases.
Series connection
- Positive of one battery connects to negative of the other.
- The remaining terminals supply the system.
- System voltage increases.
- Battery capacity in amp-hours remains the same for matched batteries.
These arrangements are not interchangeable. Using the wrong connection can damage electrical equipment.
When connecting a battery bank, use the wiring diagram supplied for the exact battery and system. Battery chemistry, voltage, capacity, cable sizing, fusing, and charging compatibility all matter.
For example, two batteries connected in parallel need suitable cable sizing and balanced connections. A larger battery bank also requires compatible charging equipment and correctly rated protection.
The Vansmith's RV wiring system guide explains broader electrical connections and how different parts of an RV power system work together.
Common Mistakes When Hooking Up an RV Battery
Small mistakes can cause major electrical problems. Pay attention to these common issues:
- Reversing the terminals: Connecting positive to negative can damage electrical equipment.
- Leaving charging sources active: Shore power or other charging equipment can create risks during battery work.
- Using damaged cables: Worn insulation and loose connections can lead to heat and electrical faults.
- Ignoring fuse protection: Battery circuits need correctly rated overcurrent protection.
- Mixing incompatible batteries: Different battery types and specifications may require different charging settings.
- Guessing wire connections: Never assume a cable's function from its color alone.
- Poor cable routing: Unsupported cables can rub against surfaces or become damaged by vibration.
- Skipping the final inspection: A loose terminal can cause problems after the system is switched on.
For a broader understanding of electrical planning, read The Vansmith's van electrical system guide.
Does Battery Type Change the Hookup Process?
The basic positive and negative terminals are common to many battery types. However, installation requirements can vary.
Flooded lead-acid batteries: These require attention to ventilation, orientation, maintenance, and acid safety. Follow the manufacturer's handling instructions.
AGM batteries: These are sealed lead-acid batteries. They still need correct charging settings, suitable cables, and secure mounting.
Lithium batteries: These often include a battery management system (BMS). They require compatible charging equipment, suitable fusing, and installation within the manufacturer's temperature and operating limits.
Before connecting a replacement battery, confirm that its chemistry and specifications match the vehicle's charging system.
Temperature is another important consideration, especially for lithium batteries. Standard lithium batteries may not accept charging below their specified minimum temperature. Some models include low-temperature protection or built-in heating.
This matters when traveling through colder areas or leaving a van parked during winter. Review the battery manufacturer's charging limits before reconnecting or charging it in low temperatures.
How Does a DC-to-DC Charger Affect Your Camper Battery?
Some campers have a starting battery and a separate house battery. The starting battery supports the vehicle, while the house battery powers equipment such as refrigerators, lights, fans, and other appliances.
A DC-to-DC charger regulates power from the vehicle's alternator before sending it to the house battery. This is especially useful in systems with lithium batteries or modern vehicles with smart alternators.
If your camper uses this setup, connecting the battery is only one part of the system. The charger, alternator, cables, fuses, and battery must all be compatible.
Read our guide to DC-to-DC battery chargers for RVs and camper vans to understand how alternator charging works and why the right charger matters.
How to Charge an RV Battery After Connecting It
Once the battery is connected and the system has passed its initial checks, make sure the charging equipment is compatible with the battery.
Common charging methods include:
- Shore power through an appropriate RV charger or converter
- Solar panels with a compatible charge controller
- Vehicle alternator charging through a suitable DC-to-DC charger
- A standalone smart battery charger
Select the correct battery chemistry and charging profile. The wrong settings can shorten battery life or cause damage.
For a step-by-step explanation of charger connections, monitoring, and charging methods, read our guide to charging an RV battery with a battery charger.
Choosing the Right Camper Van Platform and Electrical Setup
The battery system is only one part of choosing a camper van. The base vehicle also affects available space, electrical requirements, and how you plan to travel.
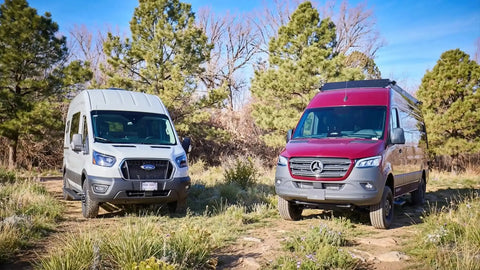
The Vansmith works with both Ford Transit and Mercedes-Benz Sprinter platforms. Each offers different possibilities for interior space, equipment placement, and travel needs.
If you are comparing options, explore our Ford van conversion range and Ford Transit for sale inventory.
For buyers considering a Mercedes platform, our Sprinter van conversion collection includes different layouts and equipment options. You can also explore our Sprinter camper for sale selection.
Travel requirements matter too. If your plans include mountain roads, remote campsites, and off-grid trips, review our 4x4 rv for sale options.
When Should You Ask a Professional for Help?
A simple battery replacement may be manageable for someone with the right experience and a clearly documented system. More complex installations need greater care.
Ask a qualified RV electrical technician for help if:
- You cannot identify the positive and negative cables.
- The existing wiring does not match the battery diagram.
- You are connecting multiple batteries.
- Your system includes a large inverter or high-current equipment.
- You need to change the battery chemistry or capacity.
- You notice damaged cables, repeated fuse failures, or signs of overheating.
Battery access, cable routing, charging compatibility, and fuse protection all matter when planning an electrical system. These details should be considered together rather than treated as separate installation tasks.
The Vansmith offers technical services and installations for adventure vans. You can review the Installations & Repairs page to understand the types of work covered. If you are planning future upgrades, explore Customize Your Van for more information about available installation and service options.
Check the current service status before making plans, as new service bookings may be paused.
Final Thoughts: Safe Battery Connections Support Reliable Travel
Knowing how to hook up a camper battery safely starts with preparation. Isolate the power sources, identify the terminals, inspect the cables, and follow the correct connection sequence for your system.
However, a reliable electrical system depends on more than a secure battery connection. Cable protection, charging compatibility, battery access, and correct fuse ratings all affect how the system performs over time.
At The Vansmith, we consider these details when planning adventure van electrical systems. Our focus is on thoughtful layouts, quality components, and practical access that supports long-term ownership.
When a system is beyond your experience, getting qualified help is the safer choice.
Frequently Asked Questions
How do you hook up an RV battery?
For a typical negative-ground 12V battery installation, isolate all power sources, identify the terminals, inspect the cables, connect positive first, and then connect negative. Follow the vehicle and battery manufacturer's instructions.
How do you hook up a battery to a camper?
Turn off the electrical loads and charging sources first. Connect the positive cable to the positive terminal, followed by the negative cable to the approved negative connection. Check all connections before restoring power.
Which battery terminal should you connect first?
For a typical negative-ground installation, connect the positive terminal first and the negative terminal second. When removing the battery, disconnect negative first and positive second.
Can I hook up an RV battery without disconnecting shore power?
No. Disconnect shore power and isolate other charging sources according to the equipment manufacturer's instructions before working on battery connections.
Can I connect two RV batteries together?
Yes, if the batteries and electrical system are designed for it. They may be connected in series or parallel, depending on the required voltage and capacity. Always use the correct system diagram and compatible batteries.
How do I know if my camper battery is connected correctly?
Check the positive and negative markings, cable routing, terminal security, and system polarity. A suitable multimeter can help verify voltage and polarity, but a correct reading does not replace a full wiring inspection.
About the author

Eugene Smit
CEO
Eugene is the CEO of The Vansmith, based in Boulder, Colorado. He writes across topics related to van builds, ownership, and the camper van industry.
Read more about Eugene