We get this question often. Where do you start with camper trailer projects without spending too much?
Most people come in thinking they need a full rebuild. In real life, a smart RV redo is about choosing the right changes, not doing it all at once. A thoughtful budget camper remodel or low-cost camper renovation focuses on impact, not just volume of work.
Budgeting & Planning Your RV Remodel

The biggest mistake we see is skipping the planning phase. A clear budget shapes every choice that follows in any thrifty camper makeover or RV refresh.
Stages to think through
-
Inspection and prep
-
Structural fixes
-
Interior upgrades
-
Comfort improvements
DIY vs. Professional
A do-it-yourself RV remodel works well for:
-
Painting
-
Hardware swaps
-
Decor updates
But electrical, plumbing, and sealing work often needs skilled hands (Family Handyman). We’ve fixed many vans where small DIY errors caused bigger issues later, and safety guidelines from organizations like the National Highway Traffic Safety Administration (NHTSA) underline how critical proper wiring and gas line work are in any vehicle-based project.
Cost breakdown
-
Low budget ($500–$1,000): Paint, hardware, lighting
-
Mid-range ($2,000–$6,000): Flooring, upholstery, fixtures
-
High budget ($10k+): Full RV renovation with layout changes
Important tip. Always keep 15 to 20 percent aside for hidden repairs.
Key Remodel Areas in Remodeling Camper Trailer Projects

Walls and Cabinets
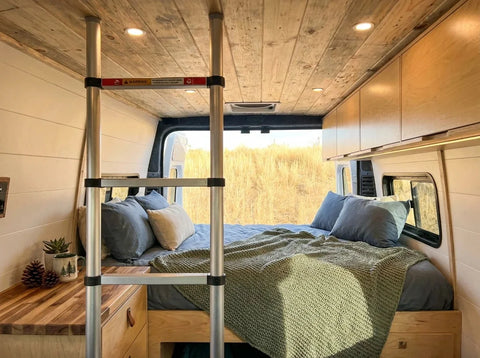
Painting is the fastest way to transform a space. We’ve seen inside spaces go from dated to clean in a single weekend.
Use light colors like white or soft grey. They reflect light and make small interiors feel larger.
Flooring
Replace old carpet with vinyl flooring. It handles dirt, snow, and moisture much better (This Old House), even in tough Colorado weather.
Lighting and Fixtures
Swap outdated fixtures for warm LED lighting. This improves both mood and battery efficiency. According to the U.S. Department of Energy, LED bulbs use at least 75% less energy and last up to 25 times longer than incandescent lighting, which matters when you’re running off limited battery or solar power.
Backsplash and Countertops
Peel-and-stick wall panels are one of the easiest RV update ideas. They add texture without adding weight.
Furniture and Upholstery
Reupholster cushions instead of replacing them. It saves money and keeps layouts functional.
Window Treatments
Thermal curtains help with insulation. This matters more than most expect in mountain climates.
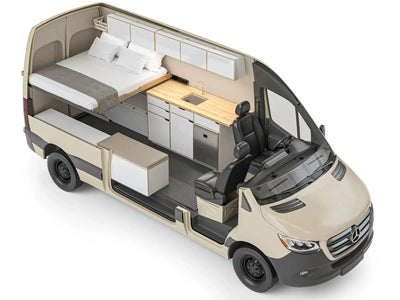
Interior Small Camper Remodel: Making Space Work
When working on an interior small camper remodel, space is always the constraint.
We focus on function first.
Smart space upgrades
-
Foldable tables for work and meals
-
Hidden storage under seating
-
Wall-mounted organizers
-
Multi-use furniture
A good layout supports real travel needs, whether you’re tackling a diy camper conversion or hiring help for an affordable campervan remodel. It’s one of the core rules we follow when designing vans that are meant to be lived in, not just photographed.
Small Budget Changes That Make a Big Difference
Not every RV remodeling project needs major changes.
Quick wins
-
Replace cabinet handles
-
Add vinyl decals
-
Upgrade soft furnishings
-
Use removable wallpaper
These changes take a few hours but can shift the entire feel of the space.
Functional & Comfort Improvements
A good remodel a camper project balances design with daily use.
Kitchen
-
Compact sinks with covers
-
Better storage for utensils
Bathroom
If you plan to redo RV bathroom spaces, focus on water-tight parts and proper sealing (DoItYourself). Poor sealing is one of the most common repair issues we see.
Storage
-
Add drawers instead of deep cabinets
-
Use vertical space
Comfort
-
Upgrade mattress or cushions
-
Improve ventilation
These upgrades fit with one of our core rules. Comfort should support longer journeys without adding extra layers or fuss. Even simple changes like better airflow and seating can reduce driver fatigue, something organizations like AAA highlight as a key factor in road safety on longer trips.
Common DIY RV Remodel Upgrades
These are the upgrades most people successfully handle on their own:
-
Painting cabinets and walls
-
Installing peel-and-stick backsplashes
-
Replacing cabinet hardware and faucets
-
Adding trim to clean up edges
We often guide clients through these steps when they want to stay hands-on but still avoid errors.
Step-by-Step RV Renovation Process
1. Preparation
Clean thoroughly. Remove old fixtures and damaged materials.
2. Repairs
Fix leaks, cracks, or structural issues first.
3. Painting
Use proper primer. RV surfaces are different from home interiors.
4. Flooring
Install vinyl or laminate. Avoid heavy materials. Keeping materials light helps protect fuel economy and handling; for example, EPA fuel economy guidance notes that extra weight can reduce miles per gallon, which adds up quickly on long road trips.
5. Fixture Installation
Add lighting, handles, and updated fittings.
6. Sealant
Seal all edges. This step protects your work long-term.
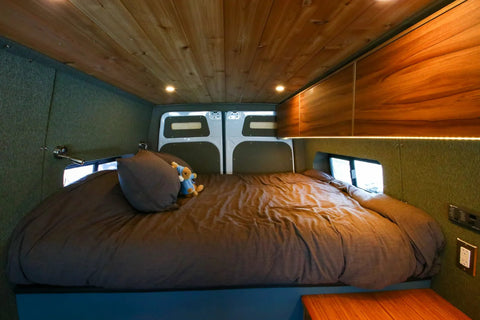
Before and After Camper Remodel: What Actually Changes
The best before-and-after camper remodel projects do not rely on expensive materials.
They rely on:
-
Better light
-
Cleaner layouts
-
Smarter storage
We’ve seen simple upgrades completely change how a space feels on the road.
Pro Tips from Years of RV Renovation Work
-
Keep it lightweight: Heavy materials affect fuel use and handling
-
Use proper primer: Especially on laminate surfaces
-
Focus on functionality: Looks fade. Function stays
-
Safety first: Always check wiring and gas lines
Potential Pitfalls to Avoid
Water damage
This is the most costly issue in any rv redo. Always check seals, windows, and roof joints.
Over-improving
Spending too much can hurt resale value. Keep upgrades practical.
Ignoring layout flow
Even small changes can disrupt movement inside the camper.
Final Thoughts
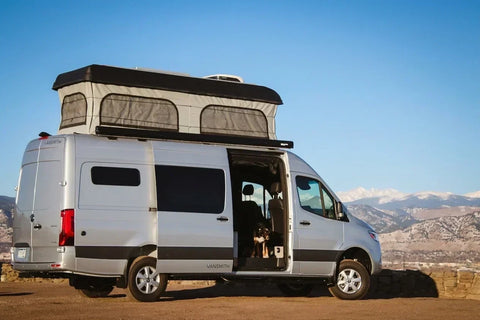
A good camper trailer project is not about chasing trends. It is about making the space work better for how you travel. A well-planned budget camper remodel, whether it’s a compact rig refresh or a full RV makeover, should match your routes, seasons, and daily routines.
At The Vansmith, we’ve spent years fine-tuning layouts and fixing what doesn’t work in real use. The best results always come from thoughtful choices, not bigger budgets.
FAQs
How much does it cost to completely renovate a camper?
It ranges from $1,000 for basic updates to over $10,000 for full rv remodeling projects or a complete budget camper remodel on a larger rig.
Is it worth it to renovate an old RV?
Yes, if the structure is sound. Redoing a trailer home can extend its life and make it easier to use.
What is the best material to replace camper walls?
Lightweight plywood or composite panels work best. They balance durability and weight.
Which RV upgrades add the most value?
Flooring, lighting, and kitchen improvements typically offer the best return.
How to modernize an RV?
Use neutral colors, upgrade fixtures, and improve lighting. Keep the layout simple.
What is the 30% rule in remodeling?
It suggests not spending more than 30% of the RV’s value on renovations.
How to redo the interior of an RV?
Start with repairs, then paint, flooring, and fixtures. Focus on function before design for any cost-conscious camper renovation.