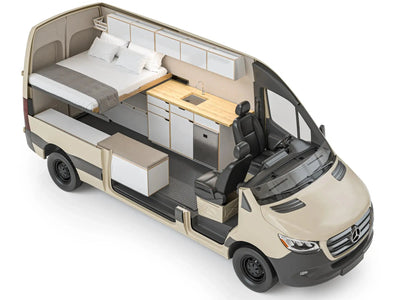
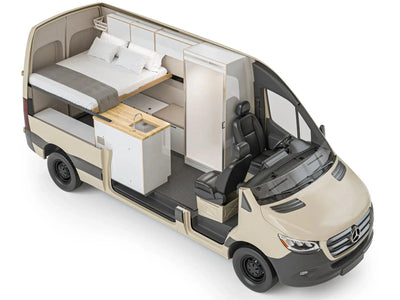
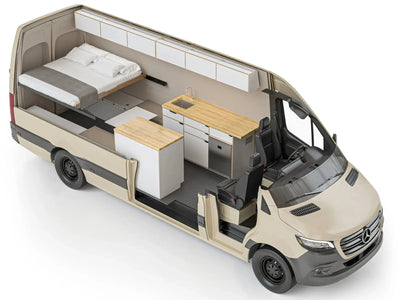
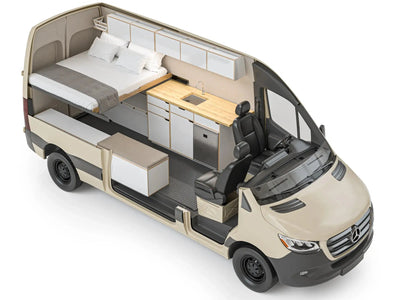
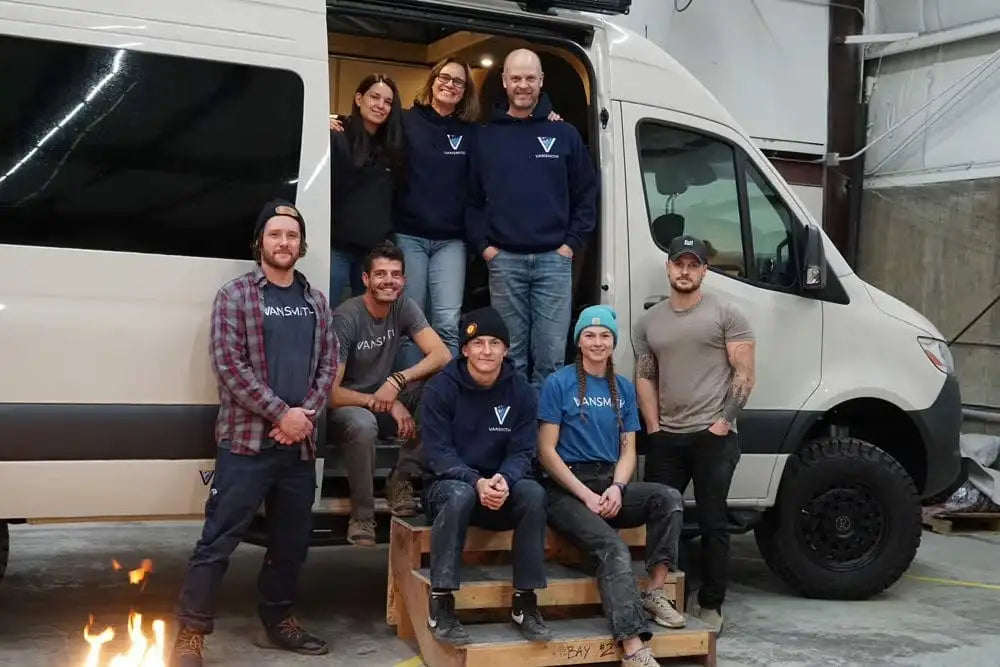
A strong work van build out starts with your daily job flow, not a shelf catalog or accessory list. Which setup fits you comes down to how you work all day: what you grab most, what stays in the van, and whether clients ever step inside. Get that order right and the van feels faster, quieter, and easier to live with. Get it wrong and even a well-equipped van can waste time at every stop.
Start a work van build out with the job flow, not the shelving
 Work Truck Online makes a simple point that holds up in real use: spec the upfit from the work you do each day, not from a generic list of van accessories. That matters because most layout mistakes start when storage gets picked before workflow does. You end up buying shelves first, then trying to force your tools and habits to fit them.
NTEA frames upfitting as a full process. It ties chassis choice, body and equipment choice, and the actual job together. That's a good way to think about any van build. The van is a system, not a pile of parts.
You can see that same logic in the 2026 Ford Pro Transit trade package brochure. Ford splits packages by wheelbase, roof height, and trade use, not by one universal shelving recipe. Ranger Design does the same thing with contractor, HVAC, delivery, and mobile service categories. Different work needs different layouts. Simple as that.
In our Boulder shop, the best planning meetings usually start with a written inventory list and a step-by-step service call sequence. Those customers almost always land on cleaner layouts with fewer regrets. The ones who start by naming products often ask for more stuff than they need. Then we have to work backward.
One rule helps fast: rank every item by how often you use it. Put multiple-times-per-day items near the side door. Keep daily-use gear at standing height. Move rare-use tools higher up or farther aft. That one move can shape the whole van.
Map the van around your trade or mobile business
Ford Pro labels Transit packages for fixed shelving and general contractor use. That is a practical reminder that a plumber, courier, and finish carpenter should not copy the same interior. Their work rhythms are different, so their van should be different too.
Ranger Design groups its solutions by trade, including contractor, HVAC, delivery, and mobile service. That trade split is helpful because it pushes you to think about tool mix and stop style. A low-voltage installer who carries labeled bins and test gear has very different needs than a delivery van moving stacked goods all day.
A mobile service van often works best with fast side-door access to parts bins and small kits. A contractor van may care more about rear access for long tools, sheet goods, or bulk material. Same van class, very different use. Big difference.
A sprinter work van setup for a tech often needs a small laptop or paperwork zone. It should stay compact, though, so it doesn't eat the standing room you need for storage and service tasks. We've found that once a desk starts growing, aisle space disappears fast.
Some vans aren't classic trade rigs at all. A sprinter dressing room or mobile styling setup usually needs a clean bench, a prep wall or mirror, hanging space for garments, and open circulation room. In those builds, more shelves can actually make the van worse because they crowd the client zone and make the space feel busy.
One thing a lot of builders overlook is the 80 percent job. Customers often regret overbuilding for the rare one-off task. The van gets harder to move through every single day just to handle occasional cargo. Not worth it.
Choose the right platform before you choose the interior
The Ford Pro trade brochure is organized around Transit roof height and wheelbase combinations for a reason. Platform size decides which shelving packages fit and how much aisle room is left after they go in. Roof choice matters too, and in our shop high roof is the clear favorite. Most mid-roof buyers later ask about a pop-top.
Stellantis Pro One has a dedicated upfitting guide for commercial vehicles, including ProMaster fleet installs and electrical packages. That shows how each maker has its own approved path for adding gear. You can't assume one platform's plan transfers cleanly to another.
Ranger Design's vehicle-specific guides make the same point. Transit, Sprinter, and ProMaster upfits are not interchangeable. Mounting points, body shape, and available accessories all change what makes sense.
At The Vansmith, work-focused service tends to center on Sprinter and Transit platforms. They usually give the strongest support for refined cabinetry, integrated power, and finished mobile-business interiors. ProMaster still has a place, mostly for more straightforward service work where the goal is simple function over a polished client-facing space.
If the van needs room for wardrobe changes, consultations, or branded demos, platform feel becomes part of the choice. Noise control matters. Wall shape matters. The way the side door opens into the work zone matters too. Those things show up every day.
If you want to compare platform directions, our Sprinter conversions and Transit conversions pages show where each base van tends to shine.
Shelving, drawers, and PACKOUT: which storage system works best?
 For most buyers, fixed shelving is the baseline because Ford Pro's Transit brochure includes fixed shelving and contractor package concepts right in the factory-minded planning material. That makes sense. Shelves are familiar, easy to picture, and simple to price at first glance.
But a real work van build out is usually a mixed system. Ranger Design sells shelving, fold-away shelves, workbenches, bottle holders, and trade accessories because most vans need more than one storage type. A van that only has shelves often leaves awkward gaps in the workflow.
Milwaukee's PACKOUT Mounting Plate gives useful hard numbers. It is rated to 50 pounds when mounted to a floor and 30 pounds when mounted to a wall. Milwaukee also calls out impact-resistant polymer and metal-reinforced mounting holes, which matters in a moving vehicle where vibration never really stops.
In our experience, modular systems work best for techs who restock kits, carry boxes into the jobsite, or share tools across vehicles. Fixed cabinetry tends to win when the van carries the same parts stock every day. Most efficient interiors blend both: fixed upper storage for inventory, then removable boxes or drawers for task-based kits.
People sometimes copy a workshop wall inside a van and expect it to work the same way. It usually doesn't. Once the vehicle moves, retention, latch quality, and side-door access matter more than raw storage count. That changes everything.
When fixed shelving is the better choice
Ford Pro's fixed shelving examples show the appeal of a repeatable layout. You get predictable zones, easy labeling, and a setup that can be installed across Transit sizes with less guesswork. For fleets and solo operators alike, that consistency helps with restocking.
Ranger Design pairs shelving with bottle holders, workbenches, and other trade accessories. That makes fixed systems a strong fit for businesses carrying fittings, chemicals, tanks, or lots of organized parts bins. If the same inventory lives in the van full time, a permanent home for each item saves time.
Work Truck Online ties productivity to matching the upfit to the work being done. Fixed shelving fits trades where the inventory doesn't change much from week to week. It also makes visual checks easy. You can spot what's missing in seconds.
The downside is flexibility. Deep shelves can lock the van into one service line and make large one-off loads harder to handle. For customer-facing interiors, dense industrial shelving can also make the van feel cramped and visually noisy, even if the cubic storage number looks great on paper.
When a Milwaukee PACKOUT van build makes more sense
Milwaukee's 50-pound floor rating and 30-pound wall rating give you a real threshold for deciding what belongs in modular boxes. Heavier stock or bulky gear may still want a fixed cabinet. Lighter task kits and hand tools are where PACKOUT starts to make a lot of sense.
Milwaukee positions PACKOUT around mobility and customization, which lines up well with service tech work. If your tools leave the van and go into buildings all day, grab-and-go boxes can beat fixed drawers. That's why electricians, AV installers, bike mechanics, and field-service techs often like this format.
A Milwaukee PACKOUT van build does have tradeoffs. Boxes can eat floor space faster than wall shelves if you don't plan stacking height and door swing carefully. PACKOUT alone also won't solve long-item storage, battery charging, or the need for a clean work surface. Most pro builds still need at least one fixed cabinet, bench, or wall panel.
If you're sorting out that mix, our Customize your van page is a good place to start because it shows how storage and electrical choices get scoped together, not as separate add-ons.
Power your work van build out safely and realistically
 Electrical planning is where a lot of otherwise smart vans go sideways. The GM Body Builder Manual covers wiring systems, power distribution, grounds, relays, and upfitter provisions in detail. The big takeaway is simple: accessory power should be planned into the van's architecture, not patched in after the cabinets are built.
Stellantis Pro One also provides electrical package resources for commercial vehicles. NTEA makes the same system-level point from a broader work-truck angle. Added equipment interacts with the chassis, so inverters, lights, and charging gear should be treated as part of one plan.
For many trades, the right electrical setup is modest. You may need good LED lights, cordless battery charging, USB-C charging, one inverter-fed AC outlet, and maybe a rooftop vent for heat control. That's a long way from a big camper-style off-grid system, and most service vans don't need that extra battery capacity.
We see one mistake over and over. People assume every van needs camper-level power because that's what they see online. Then they pay for battery capacity that never gets used in a normal service week. Keep it simple.
If the van has mirrors, styling tools, task lights, or other client-facing gear, neat wire routing matters just as much as total output. Service access matters too. Electrical planning should happen before cabinetry is finalized, so fuse access, ventilation, and charging locations don't become expensive afterthoughts.
What most trade vans actually need for power
GM's manual goes deep on accessory and control integration, even for simple loads like work lights and switched outlets. That reinforces a basic rule: small additions still deserve real planning. They draw power, need protection, and have to live somewhere serviceable.
A realistic trade-van power list is usually pretty short. Think LED area lighting, cordless battery charging, USB-C ports, one AC outlet on an inverter, and in some cases a vent fan. A mobile office or dressing-room van may add monitor power, mirror lights, and low-draw climate accessories, but that still doesn't always call for a camper-grade system.
Dedicated charging zones help more than people expect. They cut down on loose batteries and cords rolling around shelves. They also make the van easier to reset at the end of the day, which helps when the business depends on uptime.
Simpler systems are often the better systems. They are faster to diagnose and less likely to sideline the van over a nonessential accessory. In a work van, that matters more than feature count.
Wiring and mounting details that should not be improvised
GM provides schematics and guidance for grounds, relays, and power feeds because those details matter in real use. NTEA's overview backs that up by treating upfitting as a full system exercise. The lesson for van owners is clear: wiring, mounts, and service access should be designed together.
Milwaukee's in-vehicle mounting approach is a good reminder that storage and power compete for the same wall space. Charging stations, wall plates, removable boxes, and outlet locations all want prime real estate. If you don't plan that overlap early, the van gets cluttered fast.
The cleanest work vans keep a dedicated service chase or panel area. That way future troubleshooting doesn't mean tearing apart finished cabinetry. Switches, outlets, and chargers should also be reachable from the side door or workbench without blocking cargo flow.
Secure mounting and protected wire routing are not cosmetic details. They are the difference between a durable commercial interior and a rattling DIY one. If you want to see how layout and systems are sequenced, our process page breaks down the planning flow.
Layout rules that make a sprinter work van setup faster to use
Work Truck Online advises buyers to think through what the driver actually does all day. That's the right lens for layout. A van can look packed with good gear and still waste time on every stop if the path through it is awkward.
Ford Pro's package logic is useful here because it encourages standardized zones for shelving, flooring, and trade accessories. Ranger Design's guides support the same idea from the body-fit side. Think in workflow lanes, not random add-ons.
The best sprinter work van setup usually keeps one clear standing and loading path from the side door to the rear. That path is easy to give away on paper because deep shelves on both sides look efficient. In use, though, those shelves often force twisting, crouching, and unloading one zone just to reach another.
For customer-facing vans, one clean presentation zone can matter more than another row of bins. We've seen that in dressing-room and service-consult builds again and again. A good layout should also leave access to batteries, fuse blocks, and mounting hardware after the build is done. Future you will care.
Driver-side vs passenger-side storage strategy
Ranger Design's trade resources show just how many sidewall accessories can be added, which is why left-right planning matters so much. Ford Pro's shelving examples reinforce that sidewall storage is a core design move, not an afterthought. Where each item lives changes how many steps you take every day.
Many service vans work best with small parts and daily-use bins on the sliding-door side. That lets you grab common items without entering the full van. Long tools, ladders, or less-frequent gear often fit better on the opposite side so they don't block the fastest grab points.
If the van serves clients directly, the cleaner side can be reserved for presentation, wardrobe access, or branded interaction. The denser utility side can handle tools and stock. This split gets even more important in shorter wheelbase vans where every inch of side-door access counts.
One oddly specific thing we've heard in planning meetings is, "I just don't want to climb over a vacuum hose every Tuesday." That's the kind of sentence that usually leads to a better layout. It points straight at the daily friction you want to remove.
How to build van shelving without building yourself into a corner
Work Truck Online warns buyers to think through future use before buying an upfit package. That applies directly to permanent shelving. Once big cabinets go in, changing the van later gets harder and more expensive.
Ranger Design's catalogs show just how many shelf widths, heights, and accessory combos exist. There is no one-size-fits-all recipe. The smartest first move is often low-tech: mock up shelf depth and aisle width with tape or cardboard before committing to a cabinet footprint.
Design shelves around the biggest awkward item you carry every week, not the smallest bins you can stack on day one. Leave at least one flexible zone for a charger bank, small bench, hanging rack, or specialty case. In custom builds, removable lower sections usually age better than fully fixed interiors because the business can change without replacing the whole van.
If you want more planning ideas before a full build, our van build blog and DIY blog are good places to compare layout thinking.
Costs, timelines, and when custom equipment vans are worth it
Work Truck Online frames upfit buying as a productivity decision, and that's the right way to price it. The question is not only what the accessories cost. The bigger question is what a slower service call, a missing tool, or a cluttered client interaction costs over a year.
Ford Pro's package approach shows the value of a standardized starting point. Ranger Design sits in that same off-the-shelf ecosystem with modular shelving and accessories. For many owners, the real choice is standardized package versus custom interior, not DIY versus pro alone.
| Approach | Best for | Tradeoffs |
|---|---|---|
| OEM-style package | Straightforward shelving and fast deployment | Less tailored to mixed-use workflow |
| Modular add-ons | Owners who want to add storage over time | Needs a base plan to avoid clutter |
| PACKOUT-first setup | Grab-and-go kits and shared tools | Can eat floor space, still needs fixed support pieces |
| Full custom interior | Tool storage plus power plus client-facing space | See current pricing |
Custom equipment vans make the most sense when the business needs a blended interior. Maybe that means tool storage plus power plus a clean service counter. Maybe it means a changing area, consultation zone, or branded workspace. That's where fixed package logic starts to run out.
At The Vansmith, semi-custom builds typically run 8 to 10 weeks. That timeline is longer than a basic shelf install, but it gives the storage, electrical plan, and workflow layout time to be designed together. In our experience, that's where the value shows up later.
Budget tiers: standardized package vs modular add-ons vs full custom
An OEM or catalog-based package is usually the fastest path if your goal is basic shelving and accessories with minimal design time. Ranger Design's catalog ecosystem is useful for pricing that modular middle ground. A PACKOUT-first setup can also spread purchases over time, though it still needs mounting hardware and a layout plan from the start.
Custom builds cost more than bolt-in shelves because they include design labor, finish integration, electrical planning, and better use of awkward wall and wheel-well space. Owners tend to feel that value most when the van does double duty as a tool hauler and client-facing environment. That's where the price gap buys you something real: less wasted motion, cleaner access, and a space that works both in back-of-house and in front of customers.
If that blended approach is what you need, our Foundation builds page shows how a custom shell can become the right starting point, and our work-van planning can build from there.
What to ask a builder before you commit
NTEA's educational role makes one thing clear: upfitting is technical work. GM and Stellantis both publish OEM guidance because mounting, electrical integration, and serviceability are not side issues. Ask how the builder handles those topics before you sign off on the interior.
Also ask where chargers, outlets, and fuse access will live before cabinetry is finalized. Those are expensive to move later. Ask how the layout can adapt if your service line changes in a year, and ask who handles future service if a latch, charger, vent, or electrical part fails.
A practical next step is to review The Vansmith's Foundation builds approach, then use the contact page to scope the van around your actual workflow. Start with the work. The parts come next.
FAQ
What is the best work van build out for a small trade business?
The best work van build out starts with your daily workflow, not a generic shelf kit. Work Truck Online recommends spec'ing the upfit from the actual work being done, and the 2026 Ford Pro Transit trade brochure shows that OEM packages are organized by trade use, wheelbase, and roof setup. That tells you there is no one universal layout. The right answer depends on what you grab most, where you enter the van, and whether clients ever step inside.
Is a Milwaukee PACKOUT van build better than fixed shelving?
It depends on how often tools leave the van. Milwaukee rates the PACKOUT Mounting Plate to 50 pounds on the floor and 30 pounds on the wall, which makes it a strong fit for grab-and-go kits and shared tools. Fixed shelving is usually better for permanent parts stock, fittings, and consumables that stay in the van every day. Many of the best vans use both.
How should I build van shelving for a Sprinter work van setup?
Start by placing your most-used items near the sliding door, then keep one clear aisle from the side door to the rear. Ranger Design's vehicle-specific guides and Ford Pro's trade-package layouts both support planning shelves around the van body and access path instead of filling every wall with deep cabinets. Mocking up shelf depth with tape or cardboard helps more than most people expect. It shows you right away if the aisle is too tight.
Do custom equipment vans need a big electrical system?
Usually not. GM Upfitter and Stellantis Pro One both provide OEM electrical-upfit guidance, and for many trade vans the real needs are LED work lights, battery charging, USB power, and maybe one small inverter. A larger system can make sense for a more client-facing mobile business, but many service vans work better with a simpler setup. Less gear is often easier to diagnose and keep running.
Can a Sprinter dressing room use a work-van style build?
Yes, but the priorities change. Instead of trying to maximize shelf count, a sprinter dressing room usually needs cleaner wall finishes, open floor space, hanging storage, task lighting, and a client-friendly zone. That pushes the design away from a dense contractor package and toward a more custom layout. The workflow is still the driver, but the workflow is about people and presentation, not just tools.
How long does a custom work van build usually take?
Timelines vary by scope, but at The Vansmith semi-custom builds typically take 8 to 10 weeks. That is longer than installing a basic shelf package, but it gives the storage, power, and workflow layout time to be planned together. In practice, that usually means fewer compromises later. It also leaves room to build in service access instead of hiding it behind finished panels.
About the author

Santiago Pere
Chief Design Engineer
Santiago is Chief Design Engineer at The Vansmith. He writes on topics spanning van design, builds, and life on the road.
Read more about Santiago