By Caleb, March 23, 2026
Van roof racks are a useful way to carry bikes, kayaks, rooftop tents, and bulky gear. The single most key rule is this: always design your setup around your van maker's roof load limits (Mercedes-Benz) and the total weight of rack hardware plus cargo. Choosing the right system - platform, crossbar, ladder, or bonded track - depends on your van roof type, the loads you plan to carry, and how often you’ll install or remove gear.
This guide walks through rack types, weight math, frame details, install checkpoints, and daily tie-down methods so you can carry what you need without compromising safety or handling. A quick note from real-world use: customers who double-check mount points and torque specs before a long trip avoid the most common headaches.
- Start with your van’s official roof load rating – Look up the dynamic and static roof limits in your owner’s manual before buying any camper van roof rack or roof storage system. Every decision (rack type, tent, kayaks, boxes) has to fit under that number. According to Mercedes-Benz Sprinter specifications, roof load ratings vary by wheelbase and roof height, so always confirm your exact model’s limits.
- Do the full weight math – Add up rack weight + mounting hardware + accessories (awning, solar, lights) + your heaviest expected cargo. Keep a safety margin of at least 15–20% under the rated limit, especially on tall, high-roof vans.
- Match rack style to your use case – Choose low-profile crossbars for occasional bikes or a cargo box; go with a full platform camper roof rack setup if you’re running a rooftop tent, multiple boards, or lots of bulky gear.
- Choose mounts that suit your roof type – Use rail-clamp systems on raised or flush rails; on bare roofs, stick with bonded tracks or factory threaded points from trusted brands and follow their install instructions exactly.
- Respect the van’s structure – When in doubt, shift heavy loads to ladder-mounted or bulkhead-mounted carriers that tie into the van’s uprights instead of overloading thin roof sheet metal.
- Plan for access and tie-downs – Add a rear or side ladder, plenty of tie-down points, and quality straps so you can safely load, unload, and secure gear in bad weather or low light.
- Check hardware before big drives – Before long trips, inspect all mounting points, re-check torque on fasteners, and look for sealant cracks or movement in your camper van roof rack system.
- Watch wind, height, and handling – Keep tall items centered and as low as possible, know your new overall height for parking garages and trees, and be ready for the van to feel different in crosswinds.
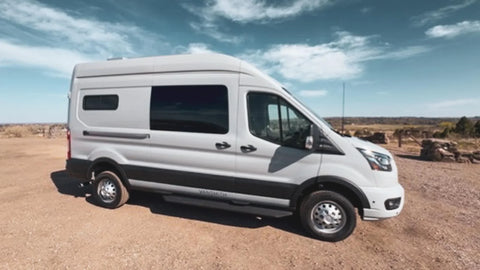
Types of Roof Rack Systems and Camper Van Roof Racks
Raised rails vs. flush rails vs. no-rail (bonded tracks)
Raised rails give you secure anchor points for clamp-style crossbars; they’re common on many Transit and some Sprinter trims. Flush rails accept low, compact feet that clamp in another way and can be better for wind loads.
No-rail roofs use bonded track systems or maker-set threaded points - these are common on modern Sprinter and Transit no-rail roofs and often need glue-on bonding or bolted backing plates. For no-rail roofs, follow maker directions closely and favor bonded tracks from trusted suppliers. If you’re unsure, take photos of your roof and compare them to supplier diagrams before buying parts.
Ladder-mounted and bulkhead-mounted solutions
When roof mount points are tight, ladder racks and bulkhead carriers move load support to stronger upright areas. These systems are great for regular heavy use because they spread forces down the van’s frame.
Ladder mounts are handy for carrying bikes and light cargo and often pair with rear carriers for shared capacity. A small tip: ladders make loading and tying down gear much easier, so keep them in mind if you plan frequent access.
Full-platform vs. crossbar-only systems
Crossbar systems are lighter, create less drag, and are simpler for now-and-then gear. Full-platform racks give the most surface area for rooftop tents, many kayaks, or large boxes and are the top choice for heavy adventure builds. Full platforms focus more load and wind forces, so they need close attention to mounting points and weight math.
Matching Rack Type to Your Van and Use Case

Daily drivers and light gear vs. overlanding/adventure setups
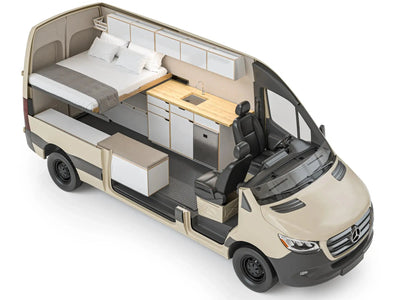
If you carry a roof box or now-and-then bikes, low, slim crossbars are often the best balance between space and drag. For overlanding - roof tents, many skis, or heavy kayaks - choose a full platform with proven rated mounting points. Remember that most Vansmith customers opt for high-roof configurations for interior standing room and often pair those choices with more robust roof systems in the build.
Considerations for high-profile loads (kayaks, bikes, rooftop tents)
Tall or bulky items greatly raise wind drag and center of gravity. Use low, slim rails for bikes where you can, and for rooftop tents choose strong platform racks with proven load ratings.
Plan for storage when the tent is not in use; taking off large items on long highway stretches cuts drag and noise. Also, test-fit gear at home before a trip to confirm clearance and fit. According to NHTSA vehicle loading guidance, improperly secured or overloaded roof cargo can significantly affect stability and stopping distance.
Understanding Weight: Roof Load Limits, Payload, and Center of Gravity
Manufacturer roof load vs. dynamic load vs. static load
Makers publish static and moving roof load limits (Ford). Static load is the weight the roof can hold while parked; moving load is what’s safe while driving.
Always use the lower of the posted numbers when working out safe cargo, whether you’re running a Sprinter roof rack, Transit roof rack, or another camper roof storage system. Subtract the weight of the rack itself from the allowed load before adding gear.
Calculating total weight (rack + accessories + gear) and how it affects handling
Add rack hardware, mounts, and all extras to your gear weight. Think about where that weight sits front to back and side to side; high, rearward loads change handling more than evenly spread loads.
If you plan heavier roof systems often, budget some of your van’s payload for added support or use a rear hitch rack for very heavy items. Weigh gear on a bathroom or garage scale if you need a quick guide. As AAA road trip safety tips note, keeping heavy items low and centered in the vehicle helps maintain predictable handling and braking.
Structural Considerations and Reinforcement Options
Identifying factory mounting points and reinforced sections
Locate factory-recommended mounting points—these are the safest anchors. If your van lacks obvious points, bonded track systems or backing plates that spread load into roof structure are common fixes. When in doubt, talk with a pro installer or look to The Vansmith’s install services to check support needs.
When to add crossbars, backing plates, or internal reinforcement
Add backing plates, inside bracing, or welded brackets for rooftop tents and repeat heavy use. These fixes spread load into the van’s ribs or frame and cut stress on skin and bolts. If you plan a long-term adventure setup, plan extra support in the build stage rather than after the fact.
Installation: Tools, Checklist, and Common Pitfalls
Pre-install checklist (measuring, parts, torque specs, sealants)
Measure mounting spots carefully, confirm torque specs for bolts, and prepare the right sealants for bonded track or drilled installs. Keep a torque wrench, thread locker where needed, and boat-grade butyl or maker-approved sealant on hand.
Verify that wiring for solar panels or antennas won’t be pinched during install. Writing down torque specs and checking them again after a test drive is worth the time.
Installation steps for popular systems (bonded track, clamp bars, ladder mounts)
Follow maker steps: clean surface, place bonding glue or backing plate, torque hardware to spec, and recheck after 50–100 miles. For clamp bars, confirm clamp fit and that rail lips are not damaged. For bonded track, allow full cure time before loading the rack.
Common mistakes to avoid (over-torquing, missing seals, ignoring wiring for solar)
Do not over-tighten bolts—this can crush roof structure. Never skip proper sealing; leaks often start where tracks or feet compress paint. If you have roof solar or antenna wiring, route and protect cables before final hardware runs.
Accessories and Securing Gear
Rooftop cargo boxes and soft bags—pros and cons
Cargo boxes are secure and low-drag; soft bags stow easier when not in use. Choose boxes sized to fit between rails and under low roof spots like parking garages if that’s part of your travel profile.
Tie-downs, recommended hardware, and anti-shift strategies
Use cam straps, soft shackles, and rated anchor points. Cross straps and no-slip padding help prevent movement. Check straps after the first few miles and at steady check points; sun and wear damage webbing with time.
Aerodynamics, Noise, Maintenance, and Legal Considerations
Expect more wind noise and some MPG loss with roof loads - choose low, slim systems to cut these downsides. According to EPA fuel economy guidance, roof racks and cargo boxes can reduce highway MPG by double-digit percentages, especially at higher speeds. Inspect bolts and coatings a few times a year and touch up rust quickly. Always follow local height limits and mark tall rigs when needed; know local overhang and load sign rules for safe travel.
FAQ
How much weight can I safely put on my van roof?
Check your van maker's stated static and moving roof load limits and subtract the weight of the rack system; never exceed these limits and account for high-center effects on handling.
What type of roof rack is best for mounting a rooftop tent?
Full platform racks or heavy crossbar systems with proven rated mounting points are best for rooftop tents; check rack and van ratings as a set and think about extra support if needed.
Can I install a roof rack on a van without rails?
Yes - bonded tracks or clamp systems can be used on no-rail roofs, but install must follow maker instructions and often needs glue-on bonding or drilling into strong points.
How do roof racks affect fuel economy and noise?
Roof racks and mounted gear increase wind drag; low, slim racks and smooth cargo boxes cut the hit, while tall or bulky items (roof tents, kayaks) increase wind noise and MPG loss.
Conclusion and Next Steps
Choose a rack that matches both your van roof type and the loads you expect to carry. Do the math: rack weight plus gear should stay within maker limits.
For full platform adventure builds or repeat heavy use, plan extra support during the build rather than adding it later. If you want help checking mounting points, support options, or a complete adventure-ready setup, The Vansmith offers install and support services. We can advise on layouts for Sprinter and Transit platforms and our Vansmith Off-Road Package builds. If you’re ready to start a project or have questions about your specific roof and rack combo, reach out through our contact page.