By Santi, Head Van Engineer, February 2, 2026
Quick summary, are pop-top campers safe and practical?

Short answer: Yes. Pop-top campers are useful, lightweight, and completely safe when you get the limits and follow a few simple checks. This guide turns common claims into clear limits, targeted advice for pop top camper owners (like models under 1,500 lbs), and ranked, lightweight upgrades to improve comfort and durability. According to the RV Industry Association, modern RV and camper designs are tested against strict safety and performance standards, which pop-top systems are engineered to meet when used as intended.
Think of this as tech-informed guidance you can run through in five minutes before you set up camp. I’ve slept in pop-tops at windy lake shores and found they do very well when prepped right, whether they’re compact motorhomes, micro campers, or other small rigs.
Brief myth/result table (wind / leaks / heat)
- Wind: Myth - "Any wind will flip or ruin a pop-top." Reality - set conservative operational thresholds and use anchoring and orientation to reduce risk.
- Leaks: Myth - "Pop-tops always leak." Reality - most leaks are at predictable points and are preventable with inspection and targeted maintenance.
- Comfort: Myth - "Pop-tops can’t be insulated." Reality - lightweight radiant barriers, insulated curtains, and smart ventilation make them comfortable year-round without heavy mods.
Myth #1, Wind will flip or destroy my pop-top camper

Understanding forces: sustained wind vs gusts and why gusts matter
Gusts create the sudden, short bursts of force that cause most trouble. (Weather.gov) Steady wind loads predict steady pressure, and gusts produce spikes that can dislodge anchors or lift fabrics. For lightweight rigs the gust effect is much larger because there’s less mass to resist sudden forces.
Practical thresholds for deployed pop-tops (recommended safe limits and rationale)
We suggest simple safety limits: avoid camping with the top up when steady winds go over 25 mph or when gusts go over 35–40 mph. (Weather.gov) These limits are cautious and fit common campsite exposure. The National Highway Traffic Safety Administration also notes that high winds can significantly affect the stability of taller, lighter vehicles, which is why conservative thresholds are smart for pop-top owners.
If you expect steady winds in the high 20s or gusts over 35–40 mph, plan to collapse the top. That said, things that change these numbers include how open the site is (ridge top vs trees), camper weight, and how solid your tie-downs are.
How weight and low-profile designs (pop up camper under 1500 lbs) change handling and what to check
Low weight helps fuel use and ease of towing, but it also means less resistance against gusts. (AAA) For pop up camper under 1,500 lbs, focus on: good tie-downs, chocks, and steering clear of end-on wind at your site. Check that lift mechanisms and straps are in good condition, and confirm the camper sits level, since an uneven stance makes cross-wind effects worse.
Prevention and on-site checks: anchoring, wheel chocks, orientation, when to collapse the top
- Anchoring: use at least four tie-downs rated for outdoor use; stake to soil or use weighted anchors on hard surfaces.
- Wheel chocks: deploy chocks on both sides to prevent creep from gusts or vibration.
- Orientation: park with the narrow profile into prevailing winds when possible; avoid exposing the broad face directly to forecasted gusts.
- When to collapse: fold for overnight stays if sustained winds approach 25 mph or gust forecasts show 35–40 mph. Also collapse if anchoring or seals are damaged or untested.
Myth #2, Pop-tops always leak

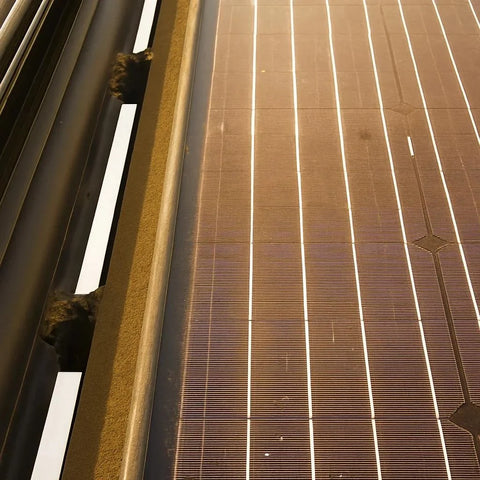
Common leak pathways (seams, zippers, gaskets, vents, cabinetry penetrations)
Leaks almost always follow clear routes: fabric-to-frame seams, zippers, worn gaskets around dividers or windows, roof vents, and cabinet or service-port holes where water can track along inside surfaces. Knowing the common paths turns a scary unknown into a simple checklist you can inspect.
Simple diagnostic walkthrough (water hose test, interior inspection, dye/marker method)
Quick diagnostics you can run in a parking lot or at home:
- Visual interior check: look for streaks, soft spots, or mildew at seams and corners.
- Water hose test: have someone spray seams while you watch inside for ingress; simulate wind-driven spray by angling the nozzle.
- Dye or marker: place a small, dry towel beneath a seam and spray from outside to catch any slow leaks; it helps locate hairline paths.
Durable fixes and upgrades (sealants, gasket replacement, zipper care, seam sealing, roof-over options)
High-impact, lightweight fixes:
- Replace worn gaskets and seals rather than patching repeatedly—new gaskets restore proper compression and are inexpensive.
- Use OEM-grade zipper lubricants and inspect zipper channels for torn fabric; replace zipped panels when teeth fail.
- Seam-seal high-stress joints with a flexible, UV-stable sealant. For fabric roofs, re-taping seams with a proven seam tape is often more durable than silicone alone.
- Consider a minimal roof-over or awning for constant-exposure sites; an awning reduces direct rain load on vulnerable seams without adding significant weight.
Maintenance schedule and cost/benefit for owners of sub-1,500-lb campers
A simple maintenance rhythm preserves water-tightness without big spend:
- Spring and fall: inspect gaskets, zippers, and seam conditions; re-seal or replace where elasticity is lost.
- After heavy storms or long-term storage: run a hose test and inspect interior corners.
- Budget: basic materials (sealant, zipper lubricant, gasket kit) are typically under a few hundred dollars; replacement of major roof fabric or professional seam work is higher but infrequent.
Myth #3, Pop-tops can’t be insulated or stay comfortable
Basic thermal science for tiny spaces: R-values, air changes, and radiant heat
Small spaces are mostly driven by air changes and radiant heat transfer, whether you’re in a pop-top on a class B RV, a compact campervan, or a Mercedes Sprinter camper. R-value matters, but in a pop-top the easy gains often come from cutting drafts and bouncing radiant heat away, which also supports overall pop-top roof safety in rough weather. Cutting random airflow and adding shiny barriers lowers heating and cooling loads far more than bulk insulation alone. While you’re at it, a quick elevating roof inspection to spot gaps, loose seals, worn fabric, or issues with the pop-top locking mechanism or hardware helps keep the whole system working the way it should and operating within the intended pop-top roof weight limit. For example, Mercedes-Benz van engineering emphasizes managing heat transfer and airflow in compact interiors, which aligns with these lightweight insulation strategies.
Lightweight insulation solutions suitable for pop-tops (reflective radiant barriers, closed-cell foam panels, insulated curtains/thermal blinds)
Options that balance weight and performance:
- Reflective radiant barriers: very light, simple to install behind fabric panels or under the topper to cut radiant heat in summer.
- Closed-cell foam panels: cut to fit, removable for storage; closed-cell resists moisture and adds R-value with minimal weight.
- Insulated curtains or thermal blinds: block drafts at windows and zipped panels and add occupant comfort quickly.
Quick wins like lined curtains and a radiant barrier often give the biggest comfort boost per ounce added.
Ventilation and passive cooling strategies (roof vents, cross-ventilation, awnings & shade)
Comfort is a mix of shading and managed airflow. Use a rooftop vent fan to move hot air, orient the camper for cross-breeze when possible, and deploy an awning or park in shade to cut solar load. These steps reduce reliance on electric cooling and suit small payload budgets. According to the U.S. Department of Energy, shading and ventilation can significantly reduce cooling loads even in small spaces, which directly benefits pop-top campers.
Heating strategies for cold weather (efficient small heaters, reducing drafts, mattress/cupboard insulation)
For cold trips use a small, low-use diesel or catalytic heater put in per maker guidance, add lined bedding layers, and cut drafts with taped seams and lined storage compartments. Lining the mattress and under-bench spaces gives big comfort gains with little added weight.
Specific advice for pop up camper under 1500 lbs
Trade-offs: payload, anchoring, and upgrade weight budgeting
Every pound counts. Focus on lightweight, big-gain upgrades: replace worn gaskets first, add lined curtains, and use radiant barriers before committing to heavy foam builds. Keep an eye on payload when adding anchors or larger awnings; balance safety anchors against payload to avoid overloading axles on your compact camper or mini RV.
Lightweight materials and prioritized upgrades (what to do first)
- Replace seals and gaskets (safety and leak prevention).
- Add insulated curtains and reflective radiant barrier (comfort, low weight).
- Upgrade zippers and tape high-stress seams (durability).
- Install a modest vent fan and test ventilation strategy (comfort control).
Inspection checklist & decision flow, collapse, camp, or upgrade?
Quick decision flow:
- Check forecast: sustained winds >25 mph or gusts >35–40 mph — fold the top for safety.
- Inspect seals and zippers: if brittle or torn, repair before a wet trip.
- Assess payload and anchoring ability: if you can’t deploy rated anchors, pick a sheltered site or collapse the top.
- For comfort: add insulated curtains and a reflective barrier as step-one upgrades.
Quick pre-trip checklist (wind, seals, vents, interior dry-run)
- Forecast check, anchor and chock presence, zipper and gasket quick inspection, vent operation test, and a rapid interior dry-run for obvious drafts.
When to seek professional repair or retrofit
Seek pro help when frame parts (frame, lift hardware) show play or rust, or when major fabric panels or cabinet holes need rework. For heater work, vent installs, or any electrical hookup, rely on a qualified technician to ensure safety and code compliance.
Materials & tools list
Easy shopping list for DIY and pros:
If you’re thinking about a pop-top build and want it engineered for real-world safety, stability, and comfort, contact us to talk through your options.
If you’re thinking about a pop-top build for small RVs, compact motorhomes, and compact camper vans and want it engineered for real-world wind, weather, and comfort, explore our custom van build services to see how we design and install safe, durable systems.
- Flexible seam sealant (UV-stable), seam tape
- Replacement gaskets and zipper kits
- Reflective radiant barrier sheets and closed-cell foam panels
- Zipper lubricant and small hand tools
- Stake anchors or weight anchors for hard surfaces
- Rattle-free chocks and a compact vent fan
Short case studies
Windy shore campsite
Scenario: gusty lake shore with steady afternoon gusts in the 30s. Outcome: owner dropped the pop-top for the night, tied down the trailer during the day, and used an awning to cut direct spray. Lesson: collapse when gust forecasts beat cautious limits and turn the rig to cut face-on wind.
If you’re thinking about a pop-top build and want pro-level guidance on wind, leaks, and heat control, contact us. We’ll talk through a safe, lightweight setup that fits how you really camp, whether you’re in a tiny RV, a micro camper, or a custom van build.
Cold mountain trip
Scenario: nighttime temps near freezing at a high mountain site. Outcome: added lined curtains, mattress padding, and a small, low-use heater.
Result: cozy sleeping with modest fuel use and no heavy frame mods. Lesson: lightweight padding and draft control are high-value fixes for cold-weather comfort. If you’d rather not DIY, our van service and upgrade team can handle heater installs, insulation tweaks, and weatherproofing for you.
Takeaways & 5-minute actions to improve safety and comfort
- Check the forecast; fold for sustained winds over 25 mph or gusts over 35–40 mph.
- Replace worn gaskets and lubricate zippers before a wet season.
- Add insulated curtains and a reflective barrier for immediate comfort gains.
- Carry rated anchors and chocks; test them at home so setup is smooth at camp.
- When in doubt, collapse the top, it’s quick insurance that keeps your rig serviceable and safe.
Context notes: For more on pop-top roof options see Van Pop Top Guide: Best Pop Up Roofs for Your Conversion. For padding and methods, refer to How to Insulate Your Van: Best Materials and Methods. If you’re planning heater work or winter trips, our Sprinter Van Heater Guide: Best Heating Solutions for Van Life has relevant details and service guidance.
Ready to reinforce seals or improve padding? Book a service visit and we’ll assess your pop-top, suggest lightweight upgrades, and provide a repair or install quote. If you’re still deciding whether a pop-top or full-height build is right for you, browse our camper van build packages and completed van gallery for real-world layouts and roof options.
FAQ
How much wind is too much for a deployed pop-top camper?
We suggest cautious use limits: avoid sleeping with the top up when steady winds go over 25 mph or gusts go over 35–40 mph. Adjust downward for open sites or if anchors and weight are low. Factors that change these numbers include campsite exposure, camper weight, and quality of anchoring; treat the thresholds as a safety-first guideline rather than a guarantee.
Do pop-top campers leak more than hard-sided trailers?
Pop-tops have more possible leak points, but most leaks are avoidable with routine checks and focused fixes. Common fixes include swapping gaskets, re-sealing seams, caring for zippers, and fixing cabinet holes. Regular maintenance and a quick water-hose test will catch most problems before they worsen.
Can I make my pop-top comfortable in winter and summer without heavy mods?
Yes. Lightweight options—shiny heat barriers, lined curtains, closed-cell foam panels, and better airflow—deliver big comfort gains without heavy frame changes. Combine draft control with a small low-use heater for cold trips, and use venting and shade for cooling in summer.
What upgrades work best for a pop up camper under 1500 lbs?
Put lightweight, big-gain upgrades first: replace seals and gaskets; add lined curtains and a radiant barrier; upgrade zippers and seam tape; install a compact vent fan. Budget weight and payload with care—pick parts that resist moisture and add very little mass.
When should I fold the pop-top down or avoid camping with it deployed?
Fold the top for night stays if steady wind forecasts are above 25 mph or gusts exceed 35–40 mph. Also collapse for long highway towing in windy weather, when anchors are not available, or when you suspect seal or lift hardware damage. When in doubt, folding the top is the safest option.