By Santi - February 22, 2026
Introduction: What makes a van four-season usable?


A true four season camper van keeps you comfy, safe, and dry from early-season chills through deep winter nights. That needs three things working together: steady, well-done insulation; a reliable heating system sized to the van; and thoughtful moisture and ventilation management. For example, NHTSA winter driving guidance stresses planning for cold-weather safety, which includes dependable cabin heat and clear windows.
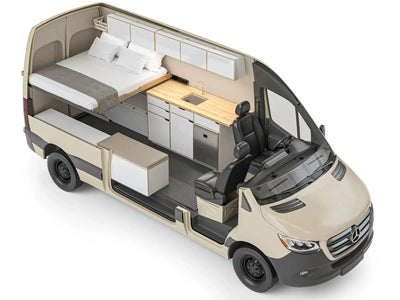
For most owners who want serious winter capability we suggest a high roof configuration. High roof vans give the insulation thickness and storage flexibility that make year-round comfort realistic. According to Mercedes-Benz Sprinter specifications, high-roof models offer significantly more interior height, which makes it easier to add thicker insulation layers without sacrificing standing room.
I once spent a week testing a high-roof build at below-zero temps and the change was clear - less cycling from the heater and far drier vents.
Insulation fundamentals for vans (van insulation)

In a van the goal is steady thermal cover and reduced thermal bridging. R-values are a useful guide but are less helpful in vans than in houses (NREL).
For a true four season family camper van, focus on air-tight layers, steady cover over the roof and floor, and keeping insulation away from trapped moisture. Pay special care to seams, window openings, and the floor edge where heat loss adds up quickly. Research from the U.S. Department of Energy on insulation performance shows that gaps and compression can dramatically reduce effective R-value, which is even more noticeable in small spaces like vans.
A small amount of extra attention at seams repays itself every cold night you spend in the van.
Choosing insulation materials
Common options include closed cell spray foam, rigid foam board, wool, and shiny products. Each has tradeoffs:
- Closed-cell spray foam seals and adds structural stiffness but is permanent and heavier.
- Rigid foam board gives predictable R-value for limited thickness and is easy to layer in ceilings and floors.
- Natural wool breathes, resists moisture, and is friendly to interior finishes (Havelock Wool), but it takes more space for similar R-value.
- Reflective products can help when paired with an air gap but do not replace bulk insulation in cold climates.
For many Vansmith builds we use a layered approach that evens out thermal performance, moisture control, and weight. That keeps the cabin warm without giving up usable inside volume.
Managing thermal bridging and framing details
Thermal bridges at studs, ribs, and metal pass-throughs are where vans lose the most heat. Use steady insulation layers over framing when you can and add thermal breaks at screw points and mounting plates.
Where wiring or mechanical parts pass through insulation, seal gaps and avoid pressing down insulating materials. The goal is to keep the insulated layer steady from roof to floor.
In practice, take a bit more time around penetrations and you will notice fewer cold spots later.
Vapor control, moisture management, and condensation prevention
Condensation happens when warm inside air meets cold surfaces. In any family campervan or 4-berth campervan, control moisture by using air-flow-friendly outer layers where they make sense, inside air-flow-friendly finishes, and targeted ventilation. Avoid tight double barriers that trap moisture.
Small trickle vents, now and then airing, and keeping cold surfaces above dew point are useful steps. In cold weather, manage wet gear with outside drying options and inside hanging points so damp items do not soak the insulation.
A quick daily airing routine can prevent most mold issues before they start.
Floor, wall, and ceiling priorities
Put the roof and floor first. The roof is a large open surface and gains most from thicker, steady insulation.
The floor often sits above chilled chassis parts; insulating the floor and under-cabinet areas pays big comfort gains. In practice aim for the best useful insulation while keeping panels slim enough to keep inside space.
Windows, doors, and seals: glazing and thermal curtains
Windows and doors are frequent weak points, mainly in a four season van conversion. Double-pane windows help but are heavier and costlier. Many owners use insulated window panels or thermal curtains at night to reduce heat loss and get closer to a true winter-ready camper van.
For doors and hatches, install strong seals and threshold updates to stop drafts. Simple insulated panels that fit into window openings at night give big comfort gains for modest cost.
Door and hatch sealing techniques
Check stock seals and add extra soft seals where needed. Use a good tight threshold and trim around the cargo-door edge.
Seal vent openings with care while keeping needed air paths for burn-type heaters and fresh air intake. A quick seal check after a drive can catch wear before it turns into a problem on a cold night.
Heating systems compared
Heating options include diesel air heaters, hydronic diesel heaters, propane or catalytic heaters, and electric heaters. For steady off-grid winter use diesel air and hydronic systems are the most common choices among seasoned van owners. Think about how you plan to use the van - day trips only, remote multi night trips, or long-term living - that will drive the best choice.
Diesel air heaters
Diesel air heaters are compact, draw from the van fuel supply, and warm the cabin quickly. They are fuel-efficient and well suited to long cold-weather use. Installation needs safe exhaust routing, proper fuel line fittings, and care with fresh-air intake placement. Many modern diesel vans, like the Ford Transit, are designed to support auxiliary heaters that tap into the main fuel tank, which simplifies winter-ready builds.
Hydronic diesel heaters
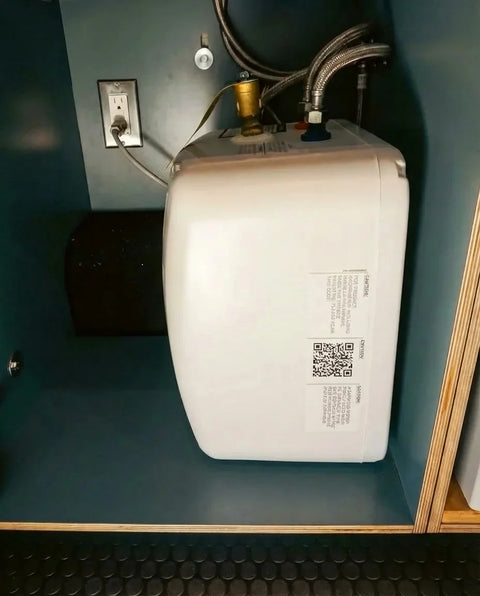
Hydronic systems heat moving fluid to warm air and provide home hot water. They are great if you want built-in hot-water ability and engine preheat. Hydronic units add complexity but offer flexible comfort, especially for owners who put hot showers and steady cabin temperatures first.
Propane and electric options
Propane heaters are simple but need safe storage and airflow. Electric resistive heaters are simple but need large battery size or shore power. Use electric only if your charging plan and battery bank can support it reliably. According to U.S. Department of Energy guidance on electric vehicle energy use, electric heating can be one of the largest loads in a small vehicle, so sizing your battery bank conservatively is important.
Sizing a heater
Heater sizing starts with a heat-loss guess. Real-world rules of thumb are helpful: smaller vans need less output; larger, high-roof Sprinter and Transit builds often require stronger heaters.
Work with a pro to match heater output to insulated volume and planned low-temperature conditions. Cautious sizing is smart in very cold places.
Power, fuel, and ventilation considerations
Plan charging plans around your heating choice. Diesel heaters draw low electric power but do use van fuel. Electric heaters need strong battery banks and alternator or shore charging.
For hydronic systems account for fuel use and the need for safe exhaust. Install CO and burn-safety sensors, and provide set fresh-air paths for any combustion heater. The U.S. Consumer Product Safety Commission recommends CO alarms in any enclosed space using fuel-burning appliances, which absolutely includes winter-ready camper vans.
In short, pair your heater choice with a charging and safety plan before you finish the install.
Installation tips and common retrofit strategies
Retrofits work well when ranked. Start by sealing drafts, insulating the roof and floor, and adding insulated window covers. Then install a heater sized to the van.
Keep wiring runs tidy and avoid pressing down insulation near heat sources. When routing exhausts, follow best habits to prevent heat soak in nearby parts. Small, staged upgrades are often easier and more budget friendly than a single large retrofit.
Ready to build your own four season family camper van or upgrade your current rig for winter? explore our services to see how we can help, or browse our camper van conversion packages to find a layout that fits your family.
Winter van travel checklist and on-road practices
- Choose campsites with some wind protection and avoid low-lying cold pockets.
- Use a thermal skirt when stationary in deep snow to reduce under-van heat loss.
- Manage condensation by airing the van each morning and keeping wet gear outside when possible.
- Monitor battery state and maintain a conservative reserve for heating nights.
Troubleshooting: common winter problems and fixes
- If you have persistent cold spots, look for thermal bridges or compressed insulation at fasteners.
- For excess condensation, inspect ventilation and remove impermeable layers that trap moisture.
- If the heater struggles, check fuel lines, exhaust routing, and electrical supply under load.
Conclusion: balancing comfort, safety, and weight and cost
Making a van truly four season is a test in systems thinking. Put steady insulation first, pick a heating system that matches your use and fuel plan, and design moisture control into the build. Most Vansmith customers choose high roof builds for the clear long-term comfort gains.
If you want help choosing insulation, sizing and putting in a heater, or planning a winter-ready electric system, we can help. Our service options include heater install and heater service, window and seal upgrades, and battery and charging setups to support confident winter travel. Drop us a note and we can talk through options based on how and where you plan to use your van, or take a look at our recent work in the camper van build gallery for real-world four-season layouts.
FAQ
What R-value do I need for a four-season camper van?
Aim for higher useful insulation in roof and floor and focus on steady cover and reduced thermal bridges. Exact number R-values are less useful in vans than in houses. Steady cover and insulating windows deliver the best practical gains.
Are diesel heaters the best option for winter van travel?
Diesel air and hydronic heaters are common because they are fuel-efficient, draw from the van fuel tank, and provide steady heat in very cold conditions. Choose diesel air heaters for space heating and hydronic systems if you also want hot water and engine preheat.
How do I prevent condensation and mold in cold weather?
Combine set airflow, moisture control with air-flow friendly layers, and heat zoning. Keep cold surfaces above dew point with enough insulation and direct airflow to problem areas.
Can I use electric space heaters in a four-season van?
Electric heaters work but need big battery size or shore power. Use electric heating only if you have steady shore power or a very large, well-run battery and charging system.
What are quick, high-impact insulation upgrades for an existing van?
Seal drafts and seams, add insulated window inserts or thermal curtains, insulate the floor under cabinets, and install good door thresholds and seals. These changes give big comfort gains with fairly low cost.
Get expert help to outfit your family camper van for winter. Schedule a heater or insulation consult with The Vansmith to plan a safe, efficient winter-ready system. Schedule a Winter-Ready Consult or start by reviewing our camper van services overview to see which upgrade path fits your rig.