Intro — Why "luxury" needs to be tested in a Sprinter

High-end stuff looks good in photos. Real-world comfort, trust, and off-grid capability do not always. This guide takes a useful tour through luxury Sprinter insides and sorts out parts that truly improve life on the road from those that are mostly style.
Think design first, looks second. How a van performs under load, on long drives, and in cold nights makes the change. It's the line between a weekend toy and a steady home on wheels.
This piece looks at inside luxury Mercedes Sprinter van parts that affect ease of use, how it works, and off-grid capability. Along the way, we’ll separate meaningful luxury Sprinter van features from flashy extras in a premium camper build.
I’ve spent time living in and checking out many Sprinter builds, and small useful choices often made the biggest change day to day.
What readers expect vs what matters in real-world use
Readers often expect soft leather, high-gloss trim, and accent lighting to define a luxury build. Those things feel good for a photo but rarely change daily comfort.
Instead, focus on wall and floor padding, layout ease, steady heating, useful storage, and a well-sized power system. For shoppers, this often means choosing systems and stuff that cut HVAC runtime, lower noise, and reduce extra weight.
In practice, that shift also makes maintenance simpler and resale less risky.
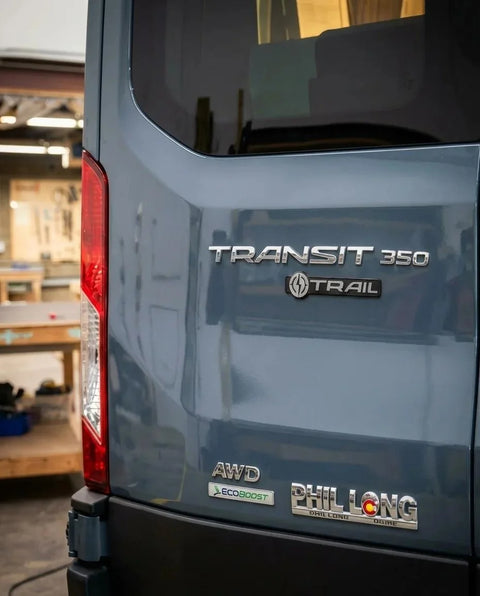
Overview: Sprinter variants that matter (cargo heights, wheelbases, 2500/3500, 4x4)

When checking out a luxury Sprinter, the platform choice drives long-term use. Most Vansmith buyers choose high roof configurations for the headroom and usable storage they provide, often starting from a Mercedes Sprinter 3500 cargo van platform for added payload.
If you expect heavy builds, move toward a 3500/VS30 or higher GVWR variant; many buyers who start with a mid roof later add a pop-top for extra space. Think about wheelbase and roof height as a pair, since longer wheelbases give layout options but change parking and handling trade-offs. According to Mercedes-Benz Sprinter specifications, higher-GVWR 3500 models offer significantly more payload capacity than 2500 models, which matters once you add cabinetry, water, and batteries.
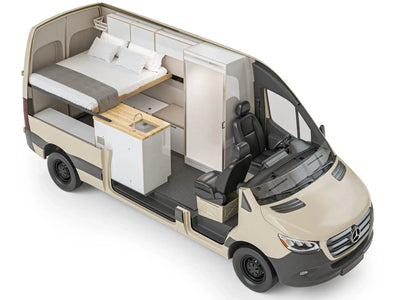
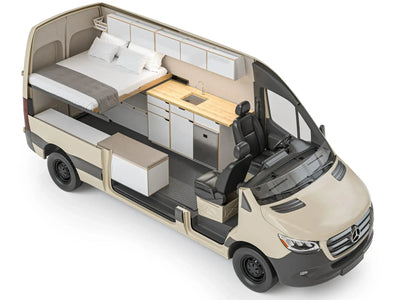
Photo tour: Features that actually matter inside of sprinter van

Insulation and thermal performance (materials, R-values, real-world benefits)
Proper insulation and ventilation reduce HVAC runtime and improve comfort more than an extra layer of fancy trim. Choose foam padding where moisture control matters (MotorTrend). Pair it with a vent plan: roof vents and screened windows for passive flow plus a diesel or simple fuel-fired heater for quick warmups.
In practice, wall and floor padding cuts down on moisture, lowers heating runtime, and keeps a quiet cabin. One useful note: even small upgrades in padding often let you run smaller heaters or use less battery power over a season.
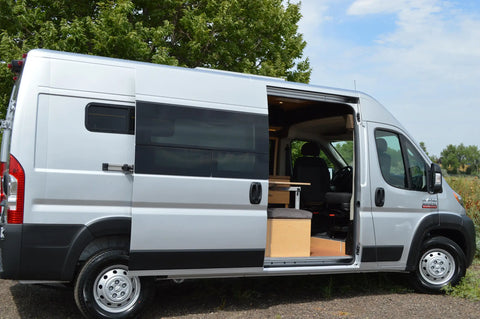
Layout efficiency: kitchen, bed, and circulation — what maximizes livability
Design kitchen work triangles with flow in mind. A compact, well-set galley with easy-to-get-to storage beats sprawling counters that become dead space.
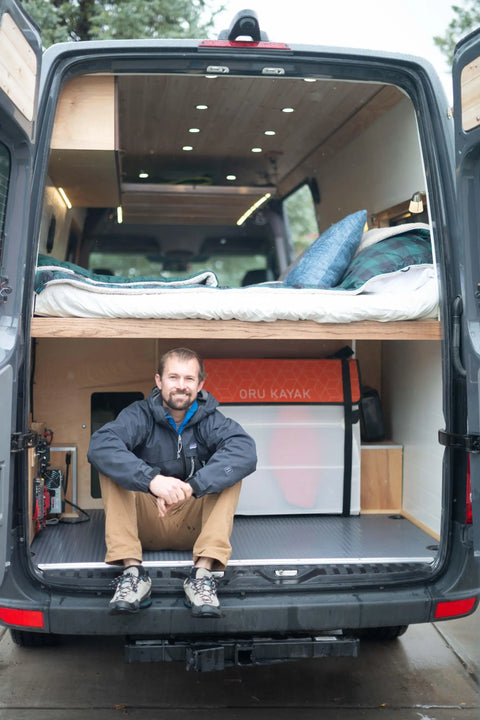
Beds should offer usable storage under the bed and be sized to actual sleep habits, not social media sizes. For two people, focus on clear paths and easy-to-get-to controls for heaters and water pumps.
A small design habit we suggest is briefly marking flow paths on the van floor during layout planning to confirm real motion before choosing cabinets.
Real storage vs show storage (accessible, lockable, weight distribution)
Lockable, easy-to-get-to storage that keeps weight low and in the middle is the main focus. Top cabinets look good but can move heavy items high and back, which hurts handling.
Real storage in a Mercedes Sprinter luxury conversion means neat space for tools, kitchen gear, and clothing, with latching hardware and weight spread smartly over the axles. The best luxury camper van features and sprinter van extras put daily items in easy-to-get-to spots, not buried behind panels that can’t be worked on.
Comfort systems that count: diesel/Webasto heaters, roof A/C choices, ventilation
Diesel heaters give strong warm starts and low draw compared to running a power box and electric heater. For cooling, think about 12V pump rooftop units or plug-in-friendly rooftop A/Cs; rooftop home A/Cs use a lot of power and greatly increase battery and power box needs.
Air fans with changeable speed and rain cover are cheap, quiet, and very helpful. Also, matching a small active system with good passive airflow often cuts runtime and boosts comfort.
Plumbing basics that improve life on the road (fresh/grey tank sizes, pump types)
Choose tank sizes based on your duty cycle. Weekend vans can get by with smaller tanks and simpler pumps. Full-time rigs need larger fresh and grey tanks and steady pumps with easy-to-clean filters.
Easy-to-get-to drain valves and well-aired greywater systems matter more than a shiny sink surround. A simple habit: check pump filter access during a checkup. Hard-to-get-to filters make routine service annoying.
Noise and vibration control — what to prioritize for comfort
Focus on splitting and damping near the engine bay and wheel wells. Insulation choices that include sound-blocking layers at key pitches will pay bigger comfort rewards than fancy sound panels.
Address rattles with strong latches and proper fittings, because loose trim gets louder with miles. A short road test at highway speeds often shows noise issues you would not notice sitting in a parked, staged inside.
Photo tour: Pretty but low-impact features (the hype)
Accent lighting, excessive trim, mirrored finishes
Accent lighting creates mood but adds extra parts and can add extra loads if left on. Shiny and high-gloss finishes look great in photos yet often show wear quickly in active use. Keep lighting simple and able to dim; treat high-gloss trim as a now-and-then accent rather than a main finish.
Non-structural ‘glass’ or acrylic partitions
Glass or plastic walls look clean but reduce usable mounting areas, add weight high in the van, and make living layouts harder. If you want visual separation, think about light, removable fabric or snap-together panels that can be stored. In our experience, removable pieces often win for give and ease of repair.
Overbuilt decorative cabinetry that reduces usable storage and adds weight
Thick solid-wood cabinets look luxury but add weight with little real gain. Lightweight made stuff with strong joints provides the same daily use and long-term strength while keeping payload in check. It is worth asking builders for a weight guess on cabinet choices during planning.
High-gloss flooring or carpet choices that trade maintenance for looks
In active use, matte, textured surfaces in a luxury Sprinter camper hide scuffs and are easier to maintain. High-gloss floors show chips and trap dirt. Opt for stuff rated for marine or trailer use in your custom camper van for long life.
Weight, payload and mechanical implications
Understanding GVWR, payload, and how to calculate remaining payload
Always start with the van’s GVWR. Add curb weight, planned build weight, people, and fluids to guess extra payload. According to the National Highway Traffic Safety Administration’s guidance on vehicle weight and loading, exceeding GVWR can negatively affect braking, handling, and tire safety.
Many luxury builds add 700–1,200 lb. Heavy builds with lithium, large water tanks, and fixed parts can exceed 1,500 lb.
If you near or exceed GVWR, upgrade to a 3500-class chassis or think about suspension and braking upgrades.
Estimated weights for common luxury add-ons (solar, batteries, water, cabinetry, appliances)
Common benchmarks: a multi-kWh lithium bank and heavy power box can add a few hundred pounds; a home fridge and cabinet system can add 200–500 lb based on materials. Remember that decorative stuff often adds weight without real gain, so choose made alternatives where possible.
How added weight affects braking, tires, fuel economy, and drivability
Added weight raises braking distance, cuts speed gain, raises rolling drag, and lowers fuel mileage. Suspension upgrades, proper tire choice, and matching GVWR choices lessen the worst effects, but the simplest stop is careful material choice and spread of weight over axles. As EPA fuel economy guidance notes, extra weight and roof-mounted accessories both reduce MPG, which matters on long road trips.
When to choose a higher-rated Sprinter (3500 vs 2500) or consider chassis upgrades
If your planned build weight and payload needs push past safe margins for a 2500, choose the 3500. For extreme weights, think about 4500-class cab setups or strong add-on suspension and braking upgrades. The upfront choice changes long-term reliability and resale value.
Power & electrical: sizing for real use
How to calculate continuous vs surge loads (fridge, microwave, induction, A/C, heaters)
List steady loads apart from surge draws. A pump fridge uses tens of watts; rooftop A/Cs and electric cooktops pull thousands of watts during use.
Match power box steady ratings with margins for surge start currents. In practice, many real off-grid setups avoid using high-draw devices at the same time without shore power or a huge battery/power box bank.
Battery bank sizing guidelines (AGM vs lithium) and real-world run times
For fridge use only off-grid 24 hours, expect to need a few hundred amp-hours of lithium; adding A/C pushes needs into many kWh and large converters. Lithium gives much higher usable power per pound than AGM and longer cycle life, so it pays off for frequent off-grid users despite higher upfront cost. If you plan now-and-then boondocking, a smaller lithium bank plus careful use and good insulation will often be enough.
Inverter sizing and continuous/surge margins
Size converters for steady loads plus a 20-30 percent margin for safety. Keep in mind surge power matters for motors and induction parts; matching converter surge specs to appliance start currents prevents nuisance shutdowns.
Charging strategy: alternator charging, DC-DC chargers, solar, shore power
A mixed charging plan is best: alternator/DC-DC for while driving, solar for long boondocking, and shore for strong recharge. For large battery banks, invest in good DC-DC chargers and MPPT solar controllers. Strong charging cuts generator use and keeps battery health.
Thermal loads and HVAC energy trade-offs
Thermal control, with proper wall and roof padding, shiny roof coatings, and smart airflow, cuts the need to run A/C or heaters. That straight cuts battery and generator needs and extends off-grid use.
Design choices by user goal
Weekend/short-trip luxury — what to prioritize
Keep systems simple and ready to use: comfy mattress, steady heater, modest battery and converter, and strong storage. Focus on quick setup and low upkeep over longest off-grid time.
Full-time vanlife — durability, serviceability, and long-term systems
Choose strong materials, backup systems, and top-quality parts. Bigger battery and solar banks, easy-to-fix pumps and filters, and easy-to-get-to wiring are worth the upfront spend for full-time use.
Road-trip/luxury touring — weight vs range trade-offs and creature comforts
Balance creature comforts like a larger fridge or better seating with the drawbacks they impose on fuel mileage and payload. For touring, plan charging and fueling breaks around heavier loads and think about a higher-GVWR chassis where needed. Resources like Edmunds’ guides to vehicle weight and towing are helpful context when you’re estimating how close you are to a van’s limits.
To transform your high end Sprinter van dreams into reality, explore our services today or browse our latest ready-to-drive camper vans for sale if you want a faster path to a finished luxury build.
Photo checklist & spec cheat-sheet for buyers
Photos to take when evaluating a luxury Sprinter interior
Photo: storage under the bed with contents, power/battery bay labels, heater and fuel lines, fresh and grey tank fills/vents, padding details behind panels, and mounting points for cabinets. These images show build quality more than staged wide shots.
Quick spec checks: battery state, inverter size, water tank volumes, insulation type, overall measured payload
Ask for power box steady and surge ratings, battery type and usable amp-hours, checked fresh/grey tank sizes, and a checked payload guess. If those numbers are missing, treat them as red flags.
Red flags to walk away from
Missing or unclear papers on electric sizing, weak cabinets, foil-covered padding without thermal break, and builds that add large, fixed home appliances without matching charging and battery systems.
Conclusion — Practical takeaways
Three priorities to focus on during a purchase or build
- Insulation and thermal strategy that reduces HVAC runtime
- Electrical sizing matched to your real appliance use, not aspirational power draws
- Thoughtful weight management: keep heavy items low and centered and choose high-GVWR platforms when needed
Balance tips: where to spend and where to save
Spend on systems you’ll use every day: heating, steady power, and good mechanics. Save on non-essential trim parts that add weight and upkeep. For guidance on wall and roof methods and materials, see the Vansmith guide to insulating your van; for practical electric sizing reference, consult our Complete Van Power Guide. Explore our luxury camper vans for sale to see fully equipped off-grid van builds designed for long-term travel and everyday comfort.
FAQ
What’s the single most important upgrade for comfort inside a Sprinter van?
Proper wall and roof padding and airflow — it cuts HVAC runtime, boosts noise comfort, and often has the largest real-world impact per pound added.
How much payload does a typical luxury build add to a Sprinter?
A well-planned luxury build often adds 700–1,200 lb. Heavy builds with lithium, large water tanks, and fixed fixtures can exceed 1,500 lb; always figure against the van’s GVWR.
Can a Sprinter handle a full-size residential fridge, induction stove, and rooftop A/C off-grid?
Not easily. Home fridge plus induction plus rooftop A/C need large battery banks and big converters with big charging sources. Think about pump fridges and low-draw cooking options for real off-grid use.
How do luxury interior materials affect fuel economy and handling?
Heavier materials increase rolling drag, cut speed gain, raise braking distance, and lower MPG. Choose lightweight made finishes where you can to keep performance.
Which Sprinter model should I choose if I want a heavy luxury conversion?
Choose the highest GVWR variant you can get - 3500/VS30 or factory high-GVWR chassis - and match wheelbase/roof height to your layout needs. For extreme weights, think about chassis upgrades or higher-class setups.
Ready to move from research to action? Start a custom design with The Vansmith to put wall padding, power, and payload first for your goals, or contact our team to talk through which Sprinter platform and layout best fit your travel plans.
Mentions for further reading: Conversion Van, How to Power Your Van: Solar, Batteries & Electrical Explained, and Guide to Insulating Your Van: Best Materials and Methods.