By Santi, December 31, 2025
Why off-grid power matters for weekenders and small rvs

Weekend van folks and small RV owners want simple systems that let them leave the grid behind for a night or a long weekend without fuss. We often tell people to focus on steady power for the few things that matter most: lighting, phone and laptop charging, and a small fridge.
A modest solar array, the right battery, and a simple charge plan will often get you there. For more clear guidance on power systems, check out Van Life Essentials: Power & Charging 101. According to the RV Industry Association, most RVers rely on a mix of battery, solar, and shore power for flexible off-grid and campground use, which matches what we see in weekend Transit builds.

Typical weekend energy needs (lights, fridge, phone, cooktop, heater/AC considerations)
For most weekend trips you’re running LED lights, phones, a small 12V fridge, and sometimes USB-powered gear. Aim for a weekend-ready starting point of about 150–400 watts of roof solar paired with 100–200 amp-hours of usable battery storage. That range covers simple setups for one night and minimal fridge use up to multi-night trips with moderate fridge and gear use.
- LED lights
- Phones
- Small 12V fridge
- Occasional USB-charged devices
- Electric heater or AC (requires larger system)
If you plan to run a powered heater or AC, your system needs to be much larger and heavier, so most weekend setups avoid those loads.
Mention: Van Service and Upgrades, Beginners’ guide to the vanlife, and How to Power Your Van: Solar, Batteries & Electrical Explained are great extra reads for deeper system choices.
Constraints in small RVs — space, weight, budget
Small RVs have tight roof space and tight payload budgets. Focus on easy wins: a compact MPPT controller, a single LiFePO4 battery around 100 Ah if you can afford it, or a 100–120 Ah AGM if you’re aiming to save up front.
Keep wiring short and fuses close to the battery to save weight and reduce voltage drop. For more on choosing the right camper, see Best Camper for Full-Time Living. The National Highway Traffic Safety Administration notes that staying within your vehicle’s gross vehicle weight rating (GVWR) is critical for safe handling and braking, so always factor electrical system weight into your payload.
In our experience, moving the battery a few inches for better balance makes a bigger change to handling than most people expect.
Note that how much solar you can install depends on what else is mounted to the roof. If you have an AC and a vent fan already taking up space you might only have room for about 200 watts of panels. Roof layout and add-on location are often the main limit, not panel supply.
Quick decision checklist — choose the right setup for your weekend trips

Before buying, answer these questions: How many nights without charging? Which items are key? Will you spend time driving enough to recharge from the alternator?
Your answers guide whether you choose a simple solar-only setup, a well-rounded solar + DC-DC system, or a larger hybrid build. For more on off-grid living, explore Off-Grid RV Living: How to Live Off-Grid in an RV.
How many nights and what appliances? A simple worksheet
Figure out nightly draws: fridge (12–40 Ah), lights (5–20 Ah), phone and laptop charging (5–15 Ah). Multiply by nights and add a safety margin. For 1–2 nights most weekend folks land in the 150–400 watt solar and 100–200 Ah usable battery window.
A quick sanity check: if your fridge is the largest draw, try running a full day at home to measure a real amp-hour number before sizing the whole system.
Budget vs performance vs weight tradeoffs
Budget builds use AGM batteries and smaller solar arrays to save up-front cost at the expense of weight and cycle life. Mid-range builds use a 100 Ah LiFePO4 and 300 watts of solar for far better cycle life in a compact package. High-end compact setups push to 200 Ah LiFePO4 and 400 watts of roof panels for several nights and heavier loads.
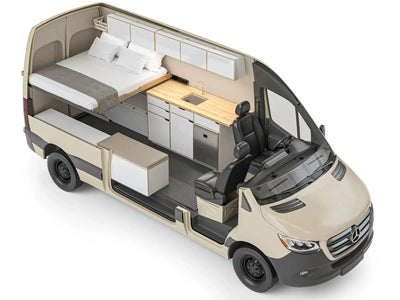
Core components explained (simple, non-technical language)
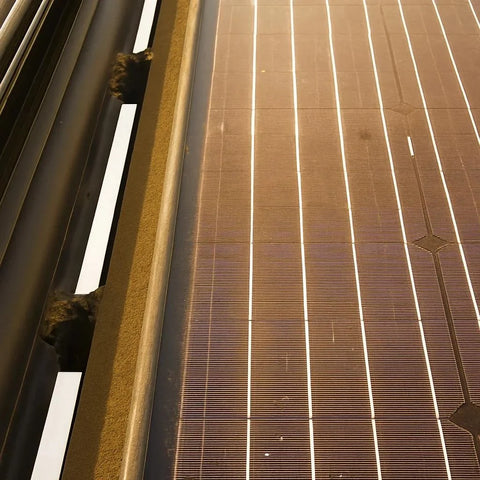
Solar panels - panel types, placement, typical watt ranges for small RVs (100–400 W)
Panels come rigid or flexible. Rigid panels tend to last longer and are easier to mount cleanly on small roofs. For weekend trips, 100–400 watts on the roof is a good range, 100–200 W for light users and 300–400 W for a few nights of use.
Keep panels free of shade and clean for best results. A quick wipe after a dusty day can clearly improve output. According to the U.S. Department of Energy, even partial shading on a solar panel can significantly reduce power production, which is why roof layout matters so much on compact vans.
Charge controllers — MPPT vs PWM and why MPPT is usually worth it
MPPT controllers are more efficient and pull much more power, especially when panel voltage is higher than battery voltage or weather shifts. For compact weekend systems the extra harvest makes MPPT worth the price, and you will see better charging during mornings, evenings, and cloudy days.
Batteries — lead-acid/AGM vs LiFePO4 (cycle life, usable capacity, charging needs, cost)
AGM is cheaper up front but heavier and offers less usable storage per rated amp-hour. LiFePO4 costs more at first but gives far more usable storage, more cycles, and lighter weight. For weekend folks running a ford transit 250 or a transit 250 cargo van who value trust and a system that lasts, a 100 Ah LiFePO4 is often the sweet spot.
At The Vansmith our most common install is a 400 Ah battery paired with a 3,000 W inverter. The most common battery upgrade customers choose takes that to about 800 Ah. If you plan to have an AC and intend to run it from the battery, you should plan on no less than 800 Ah of battery storage. AC loads draw a lot of energy and smaller battery banks will deplete quickly.
Inverters — pure sine vs modified, when you need one
If you only run 12V gear and a small inverter for rare AC charging, you can keep the inverter small or skip it fully. If you plan to run picky AC gear, choose a pure sine inverter. For most weekenders we recommend cutting inverter use to save battery draw and complexity.
DC-DC/alternator chargers — purpose, smart alternator compatibility, recommended features
DC-DC chargers allow the alternator to charge your house battery with a proper multi-step profile. They are key when using LiFePO4 batteries and helpful for AGM setups that gain from controlled charging. Choose a DC-DC unit with LiFePO4-ready profiles if you plan that chemistry, and make sure it is rated for the current you need while driving.
Example simple builds for small RVs (clear, comparable options)
Budget weekend setup
200 W solar, 100–120 Ah AGM, MPPT 20–40 A controller, small inverter or no inverter. Low upfront cost, heavier, shorter life, OK for rare weekend use.
Balanced weekend setup
300 W solar, 100 Ah LiFePO4, MPPT 30–60 A, DC-DC charger for driving. Good cycle life, compact footprint, solid for 1–3 nights without shore power.
High-end compact setup
400 W roof panels, 200 Ah LiFePO4, hybrid inverter/charger, smart battery monitor. Great for long weekend runs, remote camping, and heavier loads, but heavier and pricier.
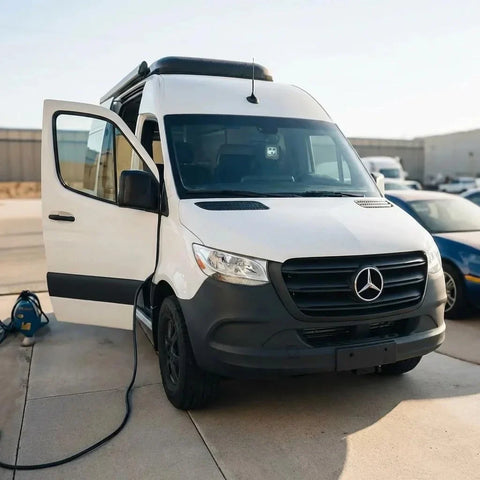
Charging on the road — alternator charging best practices
Why you should not rely on the vehicle alternator alone
The alternator is built to charge the starter battery first. Relying on it alone risks low charging of house batteries and can shorten battery life unless you use a proper DC-DC charger with the right charging profile. AAA recommends using a DC-DC charger for best battery care.
DC-DC chargers vs isolator — why DC-DC with multi-stage charging is preferred for LiFePO4
DC-DC chargers provide stable, multi-step charging that LiFePO4 cells need. Simple isolators only connect circuits and do not manage charge voltage well, so they are not a good match for modern lithium batteries.
Wiring, voltage drop, and charging profiles
Keep wire runs short and use the right gauge. Fuse positive runs at the battery.
Voltage drop cuts charging efficiency; using thicker wire for long runs avoids that loss. When in doubt, measure voltage at both ends of a run to check for drop under load.
Shore power and AC charging basics
Shore hookup types, cords, and breakers
Shore power is handy for quick top-ups, running heavy loads, or rainy stretches. Ensure your shore cord and inlet match the campsite standard and include a proper shore breaker and shore-power safety steps.
Onboard AC chargers and transfer switches — what they do
An onboard AC charger takes shore power and charges your house battery. A transfer switch or auto-transfer system keeps the inverter and shore source from feeding power back into each other. For weekend folks who use campsites now and then, an onboard AC charger is a useful extra.
When shore power is preferable vs solar
Choose shore power for heavy AC loads or fast top-ups. For brief weekend trips with modest draws, a good-sized solar + battery system often keeps you comfortable without shore power.
Wiring, safety, and installation tips
Sizing wires and fuses, placement of breakers/fuses
Fuse every positive run at the battery and use correct wire gauges for current. Place breakers where they are easy to reach for service. If you are unsure, get a pro to verify the wiring; safety matters.
Ventilation and battery placement (especially for lead-acid)
Lead-acid batteries need vents to avoid gas buildup. LiFePO4 are safer in tight boxes but still gain from smart placement and secure mounting. Keep batteries low and central for good weight distribution.
Grounding and shore-power safety
Follow local electrical codes for grounding and shore power. Use GFCI-protected circuits where needed and avoid DIY shortcuts that bypass safety devices. The Occupational Safety and Health Administration highlights the importance of GFCI protection and proper grounding for portable and RV electrical setups.
Monitoring: battery monitors, shunts, smartphone apps
A good battery monitor and shunt give real-time state-of-charge and amp-hour use. Smartphone apps that pair with your inverter or battery management system make it easy to track your system on the road.
Maintenance, troubleshooting, and common mistakes
Seasonal maintenance checklist
Check panel mounts and cleanliness, verify wiring and fuse strength, confirm battery terminals are tight and free of corrosion, and test the DC-DC and charge controller settings before a long weekend.
Troubleshooting low-charge issues (shading, wiring faults, bad charge profile)
Shading and dirty panels are common causes of low charge. Wiring faults or small wires create voltage drop. If your LiFePO4 is not charging well, verify the charger profile and look at a DC-DC unit built for lithium chemistry.
Mistakes to avoid (undersizing controller, charging LiFePO4 with old alternator setups)
Do not go too small on the charge controller compared to panel output. Do not rely on old alternator setups to fully charge LiFePO4 without a DC-DC charger set for lithium profiles.
Cost, weight, and space estimates + component checklist
Ballpark costs for budget / balanced / high-end weekend setups
Budget builds are lowest cost up front but heavier and shorter lived. Mid-range builds are mid-range and give the best tradeoff for repeat weekend use.
High-end compact builds cost more but give long service life and a few nights of use. Exact numbers vary with brands and local labor.
Weight and roof/space considerations
Plan roof panel placement to avoid shaded areas and watch payload. Heavier batteries should be mounted low and near the van’s center to keep handling steady. Ford’s own Transit Cargo Van specifications outline payload limits and roof height options, which are useful references when planning solar and battery placement on a Transit 250 rig or similar camper conversion.
Printable shopping checklist and wiring notes
Core items: roof panels, MPPT controller, battery (LiFePO4 suggested), and a DC-DC charger if you plan to charge while driving. Add an inverter only if needed, plus a battery monitor with shunt, proper fuses and breakers, and good wiring. Fuse positive runs at the battery and use correct gauge wiring for each run.
Quick reference and next steps
DIY vs professional install — when to call a pro
High-level installs and troubleshooting are fine for skilled DIYers. Call a pro for final wiring checks, shore-power tie-in, or if you are unsure about alternator fit, charge profiles, or code compliance. The Vansmith offers solar/electrical troubleshooting and battery upgrades if you want a trusted pro to inspect or install your system.
Mention: For readers building toward a custom van, check related posts in the Beginners’ guide and Your van build hubs for wiring tips and suggested products. For a full guide, visit Van Life & Living in a Van: A Complete Guide to Life on the Road.
Ready to power your weekend trips? Schedule a consultation with our experts to design the perfect off-grid system for your van.
FAQ
How much solar do I need for weekend trips in a small RV?
For normal weekend use (lights, phone, small fridge) aim for 150–400 W of solar paired with 100–200 Ah usable battery storage. Exact needs depend on fridge type, heater use, and how many nights without charging.
Can the vehicle alternator charge a LiFePO4 battery?
Not directly. Modern LiFePO4 batteries need a managed charge profile. Use a DC-DC charger built for LiFePO4 that gives multi-step charging and handles voltage changes from smart alternators.
Do I need an inverter for weekend van life?
Only if you plan to run AC gear or charge items that need AC. Many weekend setups avoid an inverter by using 12V-ready fridges, USB chargers, and propane stoves to save weight and complexity.
What's the difference between MPPT and PWM charge controllers?
MPPT controllers are more efficient and pull more power from panels, especially in changing light or when panel voltage is higher than battery voltage. For small RV setups MPPT is usually suggested despite higher cost.
Is shore power necessary if I have solar?
Not strictly needed for short weekend trips if your solar and battery are sized right. But shore power is useful for quick top-ups, running heavy AC loads, or during long stretches of bad weather.
What safety steps should I take when installing an off-grid system?
Fuse every positive run at the battery and use correct wire gauges. Install a battery shutoff or kill switch and ensure good airflow for lead-acid batteries. Ground the shore power system per local code. If unsure, get a pro to inspect wiring.
Get a free electrical consult from The Vansmith to size your weekend system and check alternator fit. Book a consult now.