By Caleb, Head Van Designer, January 11, 2026
Overview: Sprinter van walls and ceiling materials

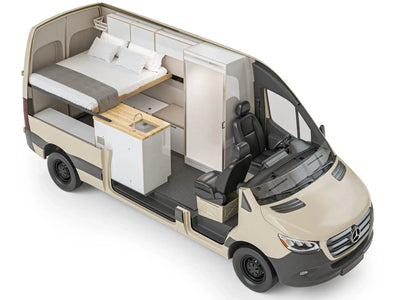
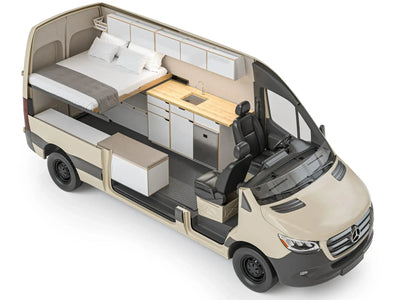
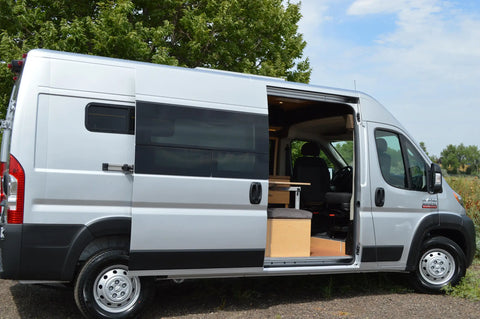
Choosing stuff for a Sprinter build and sprinter inside finishes comes down to balancing weight, toughness, felt warmth, sound performance, moisture control, and cost when you’re picking sprinter van interior materials. For most Vansmith customers, the priority is a high-roof layout with l Trades builds, by contrast, aim for easy-to-clean, tough finishes, so we choose sprinter van interior materials that can take daily abuse. This guide follows the real-world needs we use at The Vansmith and points you to common build plans and upkeep tips.
With these insights, you can pick the right approach for your use case.
Key performance criteria
When evaluating materials, read each option through these lenses:
- Weight: Critical for payload and fuel economy in long builds. (EPA)
- Scratch and abrasion resistance: Important for trades and family vans.
- Tactile warmth: How cozy the surfaces feel to the touch and how they influence perceived thermal comfort.
- Acoustics: Soft finishes and damping layers reduce road and appliance noise.
- Moisture resistance: Strategy for condensation control and rot prevention.
- Cost and repairability: Some finishes are cheap to replace in panels; others are durable but costly to repair.
How intended use (camper vs trades) drives priorities
For camper and vanlife builds we focus on lightweight bases, warm coverings or fabric, and strong moisture control using foam insulation and proper airflow.
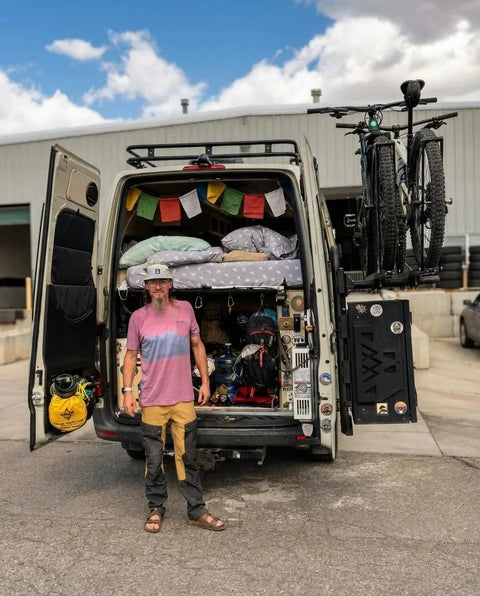
For trades and service vans, the main focus is scratch resistance and easy cleaning—material systems like FRP, aluminum, or strong laminate over a solid base work well here. Many buyers choose a mixed approach: warm, lightweight panels in the living area and easy-to-clean, replaceable panels in the cargo zone.
See our Foundation builds and Sprinter Vans Conversion notes for common layout patterns.
Common substrates and structural options

Plywood (birch, okoume): pros, cons, typical thicknesses and fasteners
Plywood remains a go-to when you need dependable screw holding and strong points for cupboards. Suggested ranges: 1/8" to 1/4" for thin decorative panels over support backing, 1/2" to 3/4" for cupboard backers or high-load support blocks.
Use birch or okoume veneer for nicer looks. Fasten into ribs or use nutserts for consistent connection points.
Plywood gives warm visuals and is straightforward to repair but adds weight and can dent under impact.
Composite panels: honeycomb and foam-core
Honeycomb and foam-core panels (aluminum mix, PVC or Nomex cores) offer big weight savings while still giving a smooth finish for veneers or layers. They’re great for high-roof builds where every pound matters.
Be mindful of screw holding: add thicker backing where you’ll mount cupboards or heavy items. These panels are common in our Lightweight & Warm build plans.
Aluminum and metal panels
Metal panels are tough and easy to clean but feel colder to the touch. They work well for trades vans and wet areas. Use metal where scratch protection is more important than touch warmth, and combine them with soft trim in other spots to avoid a factory feel throughout the living space.
MDF and HDF
MDF/HDF gives a smooth, easy-to-paint surface and costs less than plywood, but it breaks down if in contact with moisture and is heavier for the same thickness. Avoid MDF in areas with possible water contact unless fully sealed.
Plastic/FRP panels for washable, heavy-use interiors
FRP is the sensible choice for work vans: highly scratch-proof, easy to clean, and easy to swap in panels. For trades clients we pair FRP with protective rub rails and swap-out lower panels to protect more expensive finishes above.
Surface finishes and coverings
Veneers and laminates
Thin wood veneer over a lightweight core gives the warm look of real wood with little weight. Thermofoil and strong laminate can mimic wood while adding more scratch protection. Veneers are fixable; deep scratches can often be patched or restored.
Vinyl, faux-leather, and upholstery fabrics
Fabric and vinyl add tactile warmth and reduce noise but can trap moisture against the base if not paired with foam or thinsulate insulation or other breathable setups. In living areas, we often use wool or strong fabric over a solid base like baltic birch plywood; for high-use zones, choose easy-to-clean vinyl with a swap-out panel plan. Just like choosing between sprinter bumper types—whether a fiberglass bumper for impact resistance or an abs plastic bumper for a balance of cost and durability—selecting the right interior materials means weighing long-term toughness, maintenance, and how they’ll feel in daily use.
Paints and polyurethane coatings
Good paint and clear varnish can greatly increase scratch protection on plywood. High-build primers and two-part varnishes give a hard, fixable surface—helpful for top builds that still need strength.
Hard coatings and clear protective films
Ceramic or epoxy coatings and clear protective films can be applied to weak areas to resist scuffs and make cleaning easier. These are often used on lower walls near doors or along loading zones in mixed-use vans.
Insulative finishes
Wool, fleece, and carpet tiles increase felt warmth and sound damping. On camper builds we use them carefully—on ceiling panels or behind headboards—so they improve comfort without trapping moisture against the wood structure.
Weight, structural support, and fastener strategies
Panel thickness vs weight: recommended ranges
Thin decorative panels: 1/8" to 1/4" over a backing frame. Ceiling panels: 1/8" to 3/16" with stringers for span control.
Full support backers for cupboard mounts: 1/2" to 3/4" ply or special backing blocks. Keep weight plans careful—light core panels save a lot of pounds on a build.
Fastening methods
Best methods: screws into studs or factory ribs using nutserts for consistent strength, rivets for metal panels like aluminum bumpers, and strong glues mixed with mechanical fasteners for sandwich panels. For high-load points, always add a thicker backing block or metal bracket attached to the van frame, similar to the support needed for steel bumpers.
Edge protection and sacrificial trim
Use rub rails, metal edge trim, or thin swap-out lower kick panels where impact and scuffs are expected. This protects the main finish and makes upkeep easier over a van’s life.
How cabinet and fixture mounts change substrate requirements
Cupboards and wet fittings need direct fixing to strong backing or bolting through the van ribs. For lightweight panels, plan for hidden backing plates or a continuous support rail behind the panels.
Scratch resistance: materials and protective strategies
High-resistance materials
FRP, metal, and strong laminate top the list for scratch protection. Where you can, protect high-touch areas with swap-out panels so repairs are quick and cheap.
Surface treatments that improve abrasion resistance
Two-part varnishes, epoxy primers, and clear protective films boost a finish’s strength. In trades vans these coatings reduce daily wear and make cleaning easier.
Design details for durability
Guard strips, bumpers, and swap-out lower panels are low-cost details that greatly extend the life of an interior. They also make upkeep simpler for busy, dirt-heavy use cases.
Repairability
Think in panels: easy-to-change sections let you restore an interior quickly after damage. Veneers can be spot-fixed; FRP and metal panels can be swapped out when needed.
Warmth and acoustic comfort
Thermal performance: insulation options
Foam and spray-foam reduce moisture and add heat performance without bulk. Sheep wool and foam sheets both work well; foam in particular helps control moisture and is a common choice in our standard insulation sets. Keep in mind that vapor control and airflow are as important as R-value in a van setting.
Tactile warmth
Soft surfaces like wool, carpet tiles, and fabric increase felt warmth. We pair these surfaces with lightweight core panels to keep the weight down while keeping the cabin cozy.
Acoustic strategies
Combine mass, damping layers, and soft surfaces to reduce road and appliance noise. Separating panels from the metal shell with foam or flexible channels boosts low-bass damping in large roof spans.
Managing condensation
Place the vapor control on the warm side and focus on airflow. In practice that means using foam insulation or an inside vapor layer and making sure you have enough airflow through a rooftop vent fan. Avoid trapping wet insulation against wood; where moisture risk exists use waterproof bases or sealed plywood and ensure seams are sealed.
Installation, moisture management, and long-term maintenance
Best practices for substrate prep and breathable assemblies
Prep all metal surfaces, seal openings, and use breathable glues where you want to allow drying. Use foam where you need a waterproof layer and make sure vents are set up and working to control humidity.
Vapor control strategies for Sprinters
Place vapor control on the inside warm side and pair it with airflow. For most camper builds we use foam on the warm side and make sure there’s steady airflow through a rooftop vent fan. That approach cuts down on moisture risk while keeping inside warmth.
Common failure modes and prevention
Common problems are layers coming apart, mold from trapped moisture, and fastener pull-out. Prevent them with proper sealing, using foam insulation, strong backing at fastener points, and swap-out lower panels in high-wear areas.
Cleaning and repair routines
Follow cleaning habits suited to the finish: wipeable cleaners for FRP and metal, gentle fabric cleaners for fabrics, and avoid soaking veneer seams with water. Keep a small repair kit handy for veneer touch-ups and spare panels for FRP or thin ply sections.
Cost, weight, and sample build scenarios
Estimated cost and weight ranges
Costs vary widely by type. Lightweight core panels with veneer are higher in cost but lower in weight. Plywood is mid-cost and heavier. FRP and metal are strong and often mid-to-high cost based on finish. Weight ranges depend on thickness and backing, so set a pounds budget early in your planning process.
Ready to change your Sprinter inside with expert skill? Explore our services to find the perfect stuff and finishes for your van build.
Four recommended build recipes
Lightweight & Warm
Thin mixed core panels with wood veneer, foam insulation, and wool or fabric touches for sound comfort. Best for full-time travelers who focus on payload and warmth.
Ultra-Durable & Washable
FRP or metal lower panels, strong laminate upper walls, sealed plywood backing for mounts, and swap-out lower kick panels. Ideal for trades vans and family vans that take heavy abuse.
Budget & Repairable
Painted plywood with protective lower trim, simple foam sheet insulation, and clear upkeep access for repairs. Easy to source and simple to fix in the field.
Premium & Quiet
Thicker veneer-backed panels over honeycomb cores, multi-layer sound damping, two-part clear coats, and careful edge trim. Made to feel like a cabin and reduce road noise.
These plans match common choices we see in our workshop and the main goals of our core types: Solo Outdoor Explorer, Adventure Couple, and Nature-Loving Family.
Final recommendations and specification checklist
Choice flow: choose stuff by use-case, weight budget, and upkeep plan. Quick spec checklist for walls and ceilings:
- Substrate: plywood for strength or composite panel for low weight.
- Finish: veneer for warmth, FRP/aluminum for washability.
- Insulation: closed-cell foam or wool depending on moisture risk.
- Fasteners: nutserts or through-bolts into ribs for heavy mounts.
- Edge protection: replaceable lower panels or rub rails in high-wear areas.
Test panels and sample swatches before committing to a full inside. If you’re planning a build with built-in systems (heater, plumbing, cupboards), confirm fixing points and mounting backing first—this avoids costly rework.
For more on insulation choices, check our guide How to Insulate Your Van and our posts on Sprinter sizes and layout tips. If you’re looking at a tough trades setup, our posts on Work Vans and Foundation builds cover common methods and real-world examples.
FAQ
What is the best wall material for a Sprinter van conversion if I want light weight and a warm look?
Use a lightweight core panel (foam- or honeycomb-core) with a thin wood veneer or laminate face. Combine with foam insulation behind the panel and fabric or wool trim for touch warmth. This balances low weight, warm looks, and good strength when properly supported and fastened.
Which surfaces resist scratches and are easy to clean for a trades Sprinter?
FRP (fiberglass reinforced plastic), metal mix panels, or strong laminate over a solid base are best. They withstand scratches, are easy to clean, and can be replaced in panels if badly damaged.
How do I prevent condensation and rot behind interior panels?
Control moisture with foam insulation or a suitable vapor barrier on the warm side (inside) combined with airflow. Avoid trapping wet insulation against wood; use water-resistant bases or sealed plywood in areas prone to moisture and ensure seams are sealed.
Are thin plywood panels strong enough for mounting cabinets and fixtures?
Thin plywood can work if you provide a steady backing or upright studs and use proper fasteners (screws into structure or nutserts). For high-load mounts, reinforce with thicker backing blocks or metal brackets fixed to the van’s ribs.
How do different finishes affect interior warmth and noise?
Soft surfaces (fabric, wool, carpet) increase felt warmth and absorb sound. Hard surfaces (metal, FRP, painted plywood) feel colder and reflect sound. Mixing a solid base with a soft surface finish gives a balance of structure and comfort.

Get started: Book a Vansmith design call to review your sprinter inside goals and receive custom material suggestions.