By Caleb, March 3, 2026
A modular camper van uses parts you can remove and standard parts so owners can change, upgrade, or repair the inside without major tear-out. Modular systems center on rails, rated anchors, and simple plug-in wiring and plumbing links (RVIA) so pieces like beds, kitchens, and power packs can be swapped as needs change.
That freedom cuts long-term rebuild cost, protects resale value, and makes staged add-ons doable for DIY builders and buyers who prefer to invest over time. I often hear from folks who started with a simple weekend setup and, over a few seasons, slowly turned it into a solid full-time rig.
Why modular design matters for modern camper vans

Modular design turns a one-use build into a platform that adapts to changing use cases. For weekend outings you might favor lightweight storage and a simple sleeping module. For long-term travel you might add a heavier kitchen and larger power pack.
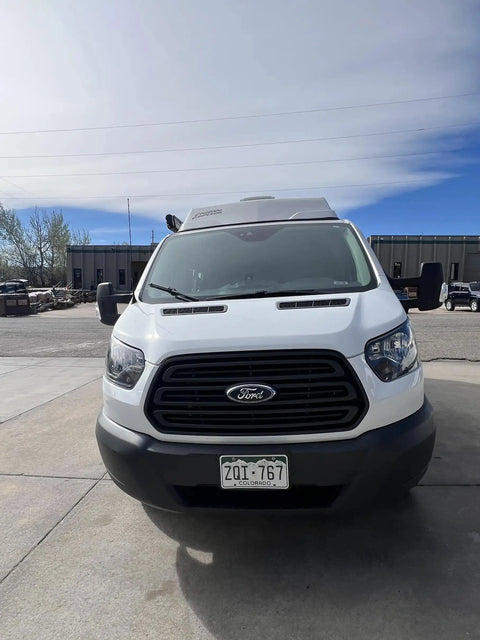
Planning the van around parts that are easy to switch keeps the core rig solid while letting owners add options without redoing the whole inside. This approach is extra useful on Sprinter and Transit platforms where long-term use and add-ons are common among The Vansmith group. According to Mercedes-Benz Sprinter specifications, higher roof and extended wheelbase models offer significantly more interior volume, which makes modular layouts and staged upgrades easier to plan.
- Start with a solid mounting backbone. Install floor rails and rated anchor points into structural members so future modules can bolt in safely without rework.
- Plan your layout in stages. Begin with essential modules (bed, basic storage, simple power) and leave space and anchor capacity for future add-ons like a full kitchen or larger battery bank.
- Standardize electrical connections. Use labeled harnesses, common connector types, and a central bus so new battery packs, inverters, or lighting circuits can plug in with minimal rewiring.
- Keep plumbing and HVAC modular. Choose cassette toilets, plug-in water tanks, and heater modules with quick-disconnect fittings so they can be serviced or upgraded without tearing apart the van.
- Design furniture as removable modules. Build beds, galleys, and storage as standalone units that lock to rails, with no hidden wiring or plumbing inside the cabinetry.
- Overbuild for future loads. Size anchors, wiring, and structure for heavier or additional modules you might want later, even if your initial modular camper van setup is minimal.
- Label everything as you go. Mark electrical connectors, plumbing lines, and mounting points so swapping or upgrading modules is straightforward years down the road.
Definition of modular camper van design
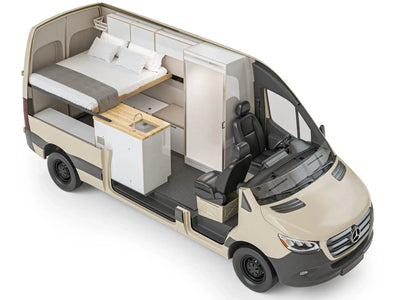
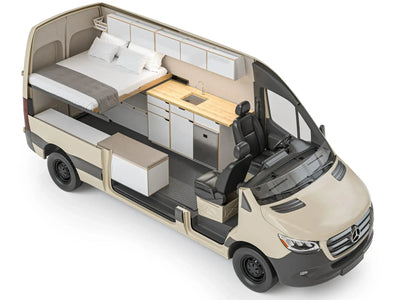
A modular camper van groups inside systems into units you can remove, mounted to standard mounting points. Common parts include built-in units, power packs, plumbing and waste tanks, and heating or vent units. The key is steady hardware and wiring links so units lock into place, seal against the weather, and connect safely to the van systems.
Typical user scenarios that benefit
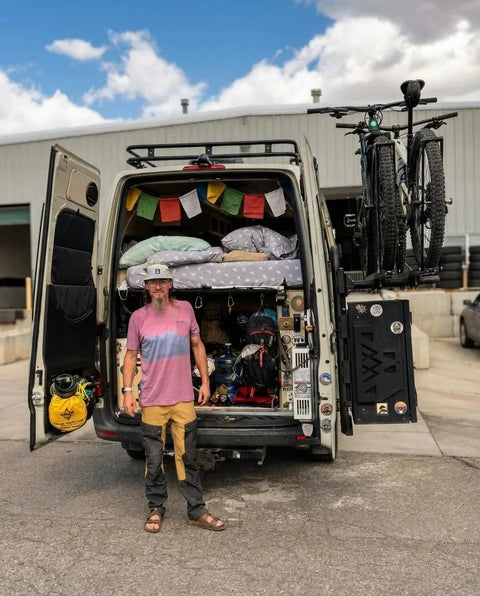
Weekend travelers gain from light, fast modules that put storage and sleeping first. Adventure couples often choose comfort-first modules with better wall and floor heat control and a full kitchen. Families put modular storage, safe anchor points, and durable finishes first.
The option to swap modules helps keep a van useful as life changes from single travel to family use or as owners choose to sell and recoup value.
Core components of modular van systems

Structural mounting systems - rails, struts, and floor anchors
Begin with a robust mounting backbone. Floor rails and rated anchor points provide steady spots for modules and allow for precise fitment.
Overbuilding anchor points by a safety margin gets the van ready for heavier modules in the future and saves time and cost when upgrading. Make sure anchors are set into frame members and that bolts meet auto standards. According to NHTSA guidance on seating and restraint systems, anchorages should be designed to handle crash-level loads, which is a useful benchmark when you’re deciding how strong your modular tie-downs need to be.
Removable furniture modules - beds, kitchens, storage
Furniture modules should lock firmly to rails and include sealing at joining surfaces. Quick-release bolts and guided slots make line-up easier.
Design modules so they can be taken out without exposing wiring or plumbing. When possible, break cabinets into fixable panels to limit the need for full removals.
Modular electrical systems - battery packs, inverter modules, plug-and-play wiring
Electrical modular setups pay the biggest long-term payoff. Use standard plugs, marked wiring, and a central bus that allows new battery modules or inverters to be added with minimal rewiring.
Focus on simple routing and fuse panels you can reach, whether you’re planning basic campervan conversions or more focused Sprinter, Transit, or Promaster builds. Aim for a modular van interior that uses parts and a modular conversion kit built around common trade standards. That way future slide-in camper module installs, swaps, and upgrades stay easy to source and compatible across platforms. For example, Ford Transit upfitting and power options highlight how factory alternator and auxiliary power provisions can support aftermarket electrical modules.
A small note: marking plugs as you install them saves hours later when you want to add capacity.
Plumbing and HVAC modules - cassette toilets, plug-in water tanks, heater modules
Plumbing modules should include solid hardware links and simple quick-release fittings. Pay close care to water seals and wall and floor heat control at module joints to prevent leaks and cold spots. Heater and vent modules should be placed for easy service access and tied into clear duct paths to keep work steady when modules change.
Design strategies that enable future-proof vans

Standardized interfaces
Define hardware and wiring standards before building. Write down plug types, mounting hole patterns, and electrical pinouts.
This makes future swaps easy to plan and cuts the chance of parts that do not work together down the road. Leaving a short note in the build book about common plug types helps future owners and installers.
Overbuilding anchor points for future loads
Anchor points sized for higher loads allow owners to add heavier modules later without frame repair. This is extra key in a modular van conversion where layouts may change over time.
In most modular campervan systems, it’s cheaper and safer to overbuild anchors during the first install. Adding extra support after the fact costs more and can be harder, even if you’re only starting with a simple removable camper module.
Designing for weight distribution and service access
Plan module placement around rig center of gravity and payload limits. Keep heavy systems low and near the axle. Provide access panels for wiring and plumbing service so routine upgrades do not require module removal. EPA fuel economy guidance notes that extra weight and roof loads can reduce MPG, so smart weight distribution and keeping heavy modules low and inside the body helps both handling and efficiency.
Documentation and labeling for future upgrades
Label every connector, harness, and valve. Maintain a simple build book with measurements and bolt types. Clear notes speed up upgrades and help future owners grasp the system.
Practical upgrade paths and staged conversions
Common staged upgrade examples
Many owners follow a power-first path: a modest battery and solar setup that can be expanded. Next comes climate control and wall and floor heat control upgrades, then kitchen or sleeping upgrades. This order lets you gain quick off-grid ability and cuts the chance of redoing prior work.
How to choose modules that stack over time
Pick modules that share the same mounting footprint and electrical connection. Favor parts with clear upgrade paths so you can trade up a battery pack without changing the inverter or harness layout.
Case study examples of staged upgrades
Short examples: convert a simple day-use van into a full-time rig by adding a larger battery module, a cassette toilet module, and an insulated wall kit. Another common path is starting with removable bed and storage modules, then swapping the storage for a full kitchen when longer trips begin.
Trade-offs and pitfalls of modular builds
Weight and space inefficiencies
Modular hardware adds weight and can reduce usable inside space compared with built-in cabinets. Careful material choice and simple module design help soften these tradeoffs.
Water-tightness and insulation challenges
Module joints are likely leak paths and thermal bridges. Use full seals, overlapping flanges, and insulated panels where modules meet the shell.
Cost vs permanence
Modular systems can cost more up front because of doubled-up hardware and rated bolts. If your needs are known and not likely to change, a fixed build may be more efficient. For owners who value flexibility, the trade-off is usually worth it.
Ensuring safety and compliance
Design modules to meet electrical and gas appliance standards and secure passenger anchors where needed. Test systems after any major swap and follow maker instructions for rated parts. Resources from organizations like AAA on vehicle safety and maintenance can help you build a simple inspection routine into your modular upgrade plan.
Selecting components and suppliers
What to look for in modular furniture and mounting systems
Choose suppliers with clear paperwork, rated bolts, and proven service support. Warranty and parts supply matter most when modules are meant to be swapped again and again.
Electrical component standards and upgrade-friendly choices
Prefer parts that use common trade plugs and that expose clear service points. Modular battery systems that allow side-by-side additions make capacity upgrades easier.
Ready to design a modular camper van that can grow with your trips? Contact us to talk through options or explore our services to see what’s possible.
Vendor comparison checklist
Compare warranty terms, paperwork quality, and fit notes. Look for vendors who provide hardware drawings and pinouts so you can plan upgrades with confidence.
Implementation checklist and maintenance plan
Pre-build checklist
Measure twice. Plan anchor locations.
Budget weight and payload. Choose mounting standards and document them in the build book.
Post-install testing
Pressure test plumbing, bench test electrical modules, and load-test anchor points. Verify seals after road shake and retorque bolts after first miles.
Long-term maintenance and upgrade schedule
Create a schedule for battery service gaps, seal checks, and bolt checks. Keep your documentation up to date as modules change.
Conclusion, Making the right modular choices for your van goals
Modular design gives owners options: stay lightweight for short trips, build toward full-time ability later, or tailor the van for resale value. For many Vansmith customers who prefer Sprinter or Transit platforms, a modular approach gives the best mix of flexibility and long-term value.
If you want help planning a modular layout or choosing mounting standards, our conversion-van resources and The Vansmith shop guidance can help. Together, we can design a staged, upgrade-friendly system that fits your adventures.
FAQ
What is a modular camper van?
A modular camper van uses parts you can remove and swap-ready modules (furniture, power packs, plumbing units) mounted on standard mounting systems. This lets the inside be reset, upgraded, or repaired without major demolition.
Are modular van systems less safe or durable than permanent builds?
Not always. A well-built modular system uses rated anchors, beefed-up frame points, and secure bolts. Durability depends on part quality, correct install, and making sure modules do not hurt insulation, wiring, or gas systems.
How do modular systems help future-proof my van?
They split systems behind standard interfaces so you can swap in better batteries, efficient stoves, or upgraded HVAC modules without redoing the whole interior. Clear labeling and common hardware and wiring plugs reduce friction for future upgrades.
What are the common drawbacks to expect with modular builds?
Possible downsides include extra weight from doubled-up mounting hardware and slightly reduced usable space compared with built-in cabinets. There is also upfront cost for modular hardware and the need to manage water seals and insulation at module joints.
Which components should I prioritize when planning staged upgrades?
Start with power: battery, charging, and an inverter. Then address climate control and insulation, and finally kitchen or sleeping modules. Putting electrical first makes it easier to add future tech like more battery capacity or smart energy management.