Van insulation might not be the most exciting part of your conversion, but it's probably the most important. Get it right, and you'll enjoy comfy temps, low condensation, and quiet road trips. Get it wrong, and you'll deal with uncomfortable temperature swings, moisture problems, and potentially expensive repairs down the road.
After nearly a decade of van builds in Colorado—where we see all kinds of weather from blazing summer heat to below-zero mountain nights—we've learned what works and what doesn't for van life insulation. This in-depth guide covers the best insulation for van life and proven install methods. It also explains how to avoid the common mistakes that can turn your dream van into a condensation nightmare.
Why Van Insulation Matters More Than You Think

Van insulation does much more than just keep you warm or cool. In the tight space of a van, insulation affects comfort, health, energy use, and even how long your conversion lasts. Here's why getting it right is crucial:
Temperature Control and Comfort
A well-insulated van keeps temps steady with less energy from heating or cooling systems. This means your battery bank lasts longer, your propane use goes down, and you stay comfortable in a wider range of weather.
Condensation Prevention
This is the big one that many DIY builders don’t fully see coming. Without proper insulation, warm inside air hits cold metal and creates moisture. This moisture can lead to:
-
Mold and mildew growth
-
Rust and corrosion issues
-
Unpleasant odors and health problems
-
Damage to interior finishes and belongings
Noise Reduction
Good van insulation cuts road noise, engine noise, and outside sounds. This makes for calmer sleep, easier talking, and better quality of life on the road.
Energy Efficiency
Proper insulation eases the load on your heating and cooling systems, giving your battery more life and cutting fuel use (NREL). In a van where energy use is crucial, this savings translates to longer off-grid capability.
Understanding Van-Specific Insulation Challenges
Vans present unique insulation challenges that differ from traditional building applications:
Thermal Bridging
Van walls, floors, and ceilings are metal, which moves heat very well. Without fixing thermal bridging, your insulation's power can be greatly cut as heat moves through the metal frame.
Space Constraints
Every inch matters in van conversions. Insulation options must give the best heat protection in thin layers while still fitting around the van's current structure.
Vibration and Movement
Van insulation must handle constant shaking and movement without settling, shifting, or breaking down. Materials that work fine in still buildings may fail in moving setups.
Moisture Management
Vans see more extreme temp swings and moisture changes than regular buildings. Your insulation system must handle these situations without trapping moisture.
Best Van Insulation Materials: Pros and Cons
Spray Foam Insulation
Closed-Cell Spray Foam Pros:
-
Excellent thermal performance (R-6 to R-7 per inch) (NREL)
-
Creates air and vapor barrier simultaneously
-
Fills irregular spaces completely
-
Provides structural reinforcement
-
Minimizes thermal bridging
Closed-Cell Spray Foam Cons:
-
Expensive installation cost
-
Requires professional application
-
Difficult to access systems later
-
Can trap moisture if vapor barrier fails
-
Off-gassing concerns during application
Best Use Cases: Spray foam works well for van lifers who put top heat performance first and are willing to pay for pro install. It's especially good in harsh climate conditions.
Havelock Wool (Natural Fiber Insulation)
Havelock Wool Pros:
-
Naturally manages moisture without vapor barriers
-
Excellent thermal performance (R-3.6 per inch) (Havelock Wool)
-
Absorbs harmful chemicals and odors
-
Fire resistant without chemical treatments
-
Sustainable and environmentally friendly
-
Easy to work with and adjust
Havelock Wool Cons:
-
Higher cost than synthetic alternatives
-
Requires protection from rodents
-
Limited availability in some regions
-
Can settle over time if not properly installed
Why The Vansmith Recommends It: We include Havelock Wool in our Green Package because it naturally handles the moisture problems that hit many van conversions. Its power to control humidity while providing excellent insulation makes it ideal for van use.
Polyisocyanurate (Polyiso) Rigid Foam
Polyiso Pros:
-
High R-value per inch (R-6 to R-6.5)
-
Relatively affordable
-
Easy to cut and install
-
Creates thermal break when properly installed
-
Moisture resistant
Polyiso Cons:
-
Performance decreases significantly in cold temperatures
-
Requires careful sealing to prevent thermal bridging
-
Can be difficult to fit around irregular van surfaces
-
May off-gas initially
Best Uses: Works well in mild weather and as part of a layered insulation setup. Less strong for extreme cold uses.
XPS (Extruded Polystyrene) Rigid Foam
XPS Pros:
-
Consistent performance across temperature ranges
-
Moisture resistant
-
Relatively affordable
-
Easy to work with
-
Good compressive strength
XPS Cons:
-
Lower R-value than polyiso (R-5 per inch)
If you’d like expert help choosing the right stuff and putting in the best van insulation for your build, contact us to talk through your project.
-
Can be damaged by UV exposure
-
Requires careful installation to avoid thermal bridging
-
Environmental concerns with manufacturing process
Good For: Budget-minded builders in mild weather who need solid results without premium cost.
Reflective Insulation (Reflectix and Similar)
Reflective Insulation Pros:
-
Lightweight and thin
-
Easy to install
-
Reflects radiant heat effectively
-
Moisture resistant
-
Inexpensive
Reflective Insulation Cons:
-
Minimal conductive/convective insulation value
-
Only effective against radiant heat
-
Can create condensation issues if improperly installed
-
Often oversold as complete solution
Reality Check: Reflective insulation works as part of a full system but should never be your only insulation. It's good against radiant heat but gives little protection against heat that moves through metal.
Fiberglass Insulation
Why We Don't Recommend Fiberglass: While common in buildings, fiberglass insulation is poorly suited for van use due to:
-
Moisture absorption and retention
-
Settlement and compression issues
-
Difficult installation in van cavities
-
Health concerns during installation
-
Poor performance when compressed
Van Insulation Installation Methods
The Layered Approach
The most effective van insulation plans use several layers and materials to handle different types of heat transfer:
Layer 1: Thermal Break Install rigid foam insulation right against van walls to cut thermal bridging through the metal structure.
Layer 2: Cavity Fill Fill open gaps with high-performance insulation like Havelock Wool or good spray foam.
Layer 3: Interior Barrier Install inside wall panels that add extra insulation value and help control vapor.
Addressing Thermal Bridging
Wall Insulation Strategy:
-
Install 1-2 inches of rigid foam directly against van walls
-
Use adhesive or mechanical fasteners appropriate for your van
-
Seal all joints with appropriate tape
Frequently Asked Questions
What is the best van insulation for year-round van life?
The best van insulation is a system that balances temperature control, moisture management, and space efficiency. In practice, that means using materials that perform well in thin layers, don’t trap moisture against the metal, and can handle constant vibration and movement without breaking down.
Why is van insulation so important in a camper van build?
In a small metal box like a van, insulation affects comfort, condensation, noise, and how long your build lasts. Done right, it keeps temperatures more stable, reduces moisture that can cause rust and mold, and cuts road noise so the space feels more like a home than a cargo van.
How does insulation help prevent condensation in a van?
Insulation keeps warm interior air from directly hitting cold metal surfaces, which is what creates condensation. A good insulation setup, combined with proper moisture management, helps prevent mold, rust, bad smells, and damage to your finishes and gear.
What makes insulating a van different from insulating a house?
Vans are metal, which transfers heat quickly and creates thermal bridging if it’s not addressed. You also have tight space constraints, constant vibration and movement, and bigger temperature swings than most buildings, so materials and methods that work in houses can fail in a moving van.
How does good van insulation improve energy efficiency?
Proper insulation reduces how hard your heating and cooling systems have to work to keep the van comfortable. That means your battery bank lasts longer, your propane or fuel use goes down, and you can stay off-grid longer without sacrificing comfort.
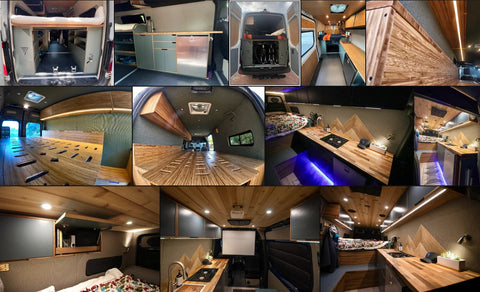
Once your insulation is done, the next step is interior panels. Our DIY van conversion kits include wall panels, cedar ceiling slats, and floor kits designed to install over properly insulated Sprinter and Transit vans.