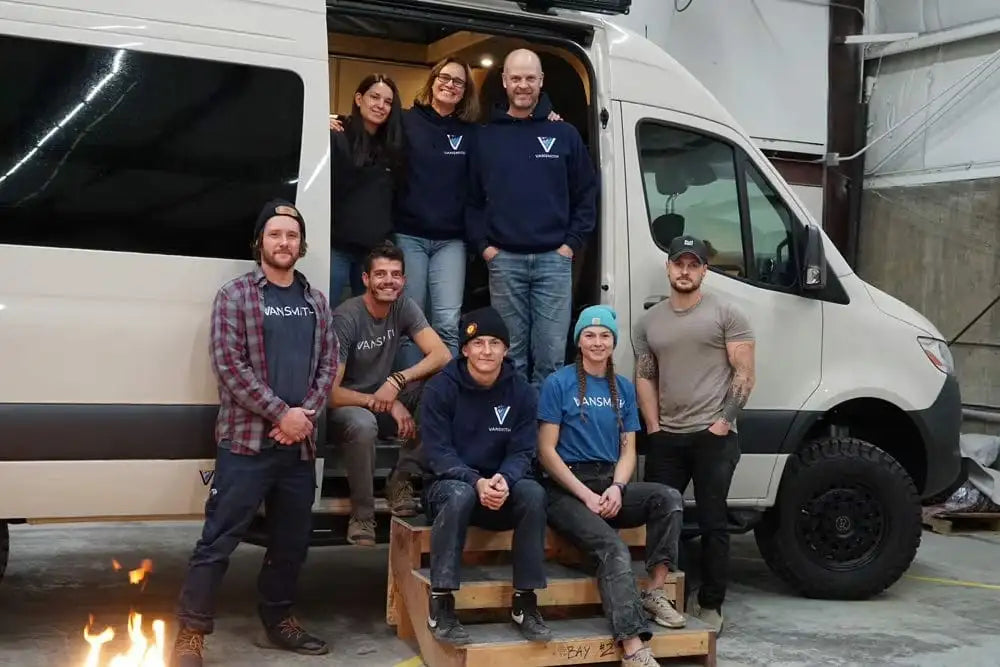
Winter van life opens up incredible adventure opportunities from snow-covered national parks to cozy mountain retreats but it also presents unique challenges that can turn your dream trip into a nightmare without proper preparation. After nearly a decade of building custom conversions at The Vansmith and helping Colorado adventurers tackle mountain winters, we've learned that successful winter van living depends on thorough winterization preparation.
Whether you're planning weekend ski trips or extended winter adventures, properly winterized vans ensure your water systems stay functional, your living space remains comfortable, and your vehicle operates reliably in harsh conditions. The key is addressing both external protection and internal systems before cold weather arrives.
Don't get caught with busted pipes in the springtime or find yourself stranded in a snowstorm with a dead battery. Follow these essential winterization steps to keep your van adventure-ready all winter long, protecting both your investment and your safety during cold-weather travels.
1. External Winterization
Your van's exterior faces the brunt of winter's assault salt, snow, ice, and freezing temperatures that can cause serious damage without proper protection. External winterization creates a protective barrier against harsh conditions while ensuring reliable vehicle operation.
Exterior Protection
Wash & Wax for Winter Defense A thorough wash and quality wax application provides crucial protection against road salt and corrosive winter chemicals. Clean your van completely, paying special attention to the undercarriage where salt accumulation causes the most damage. Apply a high-quality carnauba or synthetic wax to create a protective barrier that helps salt and grime slide off rather than bonding to your van's finish.
Undercoating Anti-Rust Protection Apply anti-rust spray or professional undercoating to your van's chassis, paying particular attention to exposed metal surfaces and weld joints. Road salt aggressively attacks metal components, and Colorado's mountain roads use substantial amounts of deicing chemicals. Quality undercoating prevents rust formation and extends your van's life significantly.
Seal Inspection and Maintenance Inspect all door, window, and roof seals for cracks or gaps that allow moisture infiltration. Apply silicone lubricant to rubber seals to prevent freezing and cracking. Pay special attention to door seals, as frozen seals can prevent doors from opening properly during emergencies.
Windshield and Wiper Protection Use windshield covers to prevent ice buildup that can crack glass during rapid temperature changes. Lift windshield wipers away from the glass when parked to prevent rubber blades from freezing to the windshield. Replace old wiper blades with winter-rated blades designed for ice and snow removal.
Mud Flap Installation Add mud flaps to reduce road salt and slush spray that damages your van's body and creates hazardous driving conditions for following vehicles. Quality mud flaps protect your van's finish while improving road courtesy during winter travels.
Tires & Suspension
Winter Tire Installation Install snow-rated tires marked with M+S (Mud and Snow) or 3PMSF (Three Peak Mountain Snow Flake) symbols. Winter tires use specialized rubber compounds that remain flexible in cold temperatures and tread patterns designed for snow and ice traction. All-season tires become hard and lose traction below 45°F, making winter tires essential for safe mountain travel.
Tire Pressure Monitoring Cold temperatures reduce tire pressure by 1-2 PSI for every 10°F temperature drop. Check and adjust tire pressure weekly during winter months, inflating to manufacturer specifications. Proper tire pressure ensures optimal traction, handling, and fuel economy while preventing dangerous blowouts.
Tire Chain Preparation Carry appropriate tire chains for your tire size and practice installation before you need them in emergency conditions. Colorado law requires chains or adequate traction devices on many mountain roads during winter months. Ensure chains fit properly and learn installation procedures in comfortable conditions.
Fluid & Engine Preparation
Antifreeze Concentration Check Test your engine coolant's freeze protection using a hydrometer or test strips. Ensure coolant protects to at least 10°F below your expected minimum temperatures. Weak antifreeze can freeze and crack your engine block, creating expensive repairs that could strand you in remote locations.
Winter-Grade Oil Changes Switch to lower-viscosity oil designed for cold weather operation. Use 5W-30 instead of 10W-30, or 0W-20 in extremely cold conditions. Thick oil flows poorly in cold temperatures, reducing lubrication effectiveness and making engines harder to start.
Diesel Fuel Preparation Diesel owners must use anti-gel additives to prevent fuel line freezing and filter clogging. Diesel fuel can gel at temperatures as warm as 15°F, potentially stranding you with a full tank of unusable fuel. Add anti-gel additives before temperatures drop and consider winter-blend diesel when available.
Battery Testing and Protection Test battery capacity and charging system performance before winter arrives. Cold weather reduces battery capacity by 30-50%, making marginal batteries likely to fail. Consider battery thermal wraps or trickle chargers for extreme cold conditions, and ensure terminals are clean and corrosion-free.
2. Internal Winterization
Your van's interior systems require specific winterization procedures to maintain comfort and functionality during cold weather. Proper internal winterization prevents frozen pipes, reduces condensation, and creates a warm, livable environment.
Insulation & Heating
Window Insulation Upgrades Install thermal curtains or Reflectix panels over windows to reduce heat loss and prevent condensation. Windows represent the largest source of heat loss in most vans, and proper insulation can reduce heating costs by 30-40%. Custom-fitted insulated window covers from companies like This Van Life provide maximum effectiveness and professional appearance.
Heater System Testing Test your van's heating system thoroughly before winter camping trips. For Webasto heater owners, run the system on high for 30 minutes monthly to burn soot from the combustion chamber. Never run heaters for less than 20-30 minutes, and avoid leaving them on low settings for extended periods, which can cause soot buildup and reduced efficiency.
Condensation Prevention Use moisture absorbers like DampRid or small 12V dehumidifiers to control humidity levels. Winter camping creates substantial moisture through breathing, cooking, and wet clothing that can lead to mold, mildew, and ice formation. Proper ventilation combined with moisture control maintains healthy interior conditions.
Plumbing & Water Systems: The Vansmith Method
Step 1: Drain Your Water Tank Open the wheel well water box access panel in your van's rear and turn the red nozzle parallel to the water line, allowing your water tank to drain directly to the ground. Park on a slight incline with the front of the van higher than the rear to ensure complete drainage from your water tank, water heater, water lines, shower, and portable toilet.
Step 2: Clear Water Lines Using Your Water Pump Turn your water pump on and open water fixtures one at a time. Run each fixture on both hot and cold settings until water no longer flows, then turn off the fixture and repeat with remaining fixtures. This process ensures all water lines are completely drained and ready for antifreeze.
Step 3: Add RV Antifreeze to Your Water Tank Close the drain valve for your water tank don't forget this step or antifreeze will flow directly to the ground. Use an adapter and small garden hose to pour RV-specific, non-toxic antifreeze into your water tank through the water fill port. One gallon is typically sufficient, though a second gallon provides extra security for peace of mind.
Step 4: Pump Antifreeze Through Your Water System Turn your water pump on and open water fixtures one at a time, running each on hot and cold until pink antifreeze flows from the fixture. Turn off the fixture and repeat with all remaining fixtures, ensuring complete antifreeze circulation through your entire water system.
Step 5: Complete System Drainage (Advanced Protection) For maximum protection, drain the system entirely once again. Drain the water tank, turn on the water pump, and run each fixture until they no longer produce antifreeze. Turn off the water pump, leave fixtures open, unscrew water pump fittings, remove the strainer cap, empty your gray water tank, and keep the tank drain valve open.
Bedding & Comfort
Cold-Weather Sleeping Systems Use sub-zero-rated sleeping bags or 12V heated blankets designed for RV use. Layer sleeping systems with insulating pads beneath mattresses to prevent heat loss through the floor. Consider two-person sleeping bags or bag liners that add 10-15°F of warmth rating.
Floor Insulation Add thick rugs or foam mats to retain heat and provide comfort when walking barefoot. Cold floors create significant heat loss and discomfort, especially in vans with metal flooring. Insulating floor coverings can increase perceived interior temperature by 5-10°F.
3. Tools & Emergency Equipment
Winter van travel requires specialized tools and emergency equipment to handle snow, ice, and extreme cold conditions safely. Proper preparation prevents minor inconveniences from becoming dangerous situations.
Must-Have Winter Tools
Snow Removal Equipment Carry a quality snow brush and ice scraper sized for your van's large windshield and windows. Add a compact folding shovel for digging out from snow accumulation or creating level parking spots. Telescoping shovels with metal blades handle heavy, wet snow better than lightweight plastic versions.
Traction Enhancement Tools Pack sand, kitty litter, or commercial traction mats for situations where tires lose grip on ice or snow. Recovery boards like Maxtrax provide excellent traction for stuck vehicles and can be used repeatedly. Understanding how to use traction aids effectively can prevent minor stuck situations from requiring expensive recovery services.
Emergency Preparedness Kit
Power and Starting Equipment Carry a portable jump starter rated for your van's engine size. Cold weather reduces battery capacity significantly, making dead batteries common winter problems. Quality jump starters can start engines multiple times on single charges and often include USB ports for device charging during emergencies.
Warmth and Visibility Equipment Pack emergency blankets, hand warmers, and battery-powered flashlights or headlamps with extra batteries. Space blankets reflect body heat effectively and pack extremely small. Chemical hand warmers provide hours of heat without power consumption and can be life-saving during breakdowns.
Medical and Communication Supplies Expand your first-aid kit with cold-weather additions like thermal blankets and hypothermia treatment supplies. Ensure communication devices remain charged and consider satellite communicators for areas without cell coverage. Cold weather can turn minor injuries into serious problems without proper treatment supplies.
Recovery Equipment
Vehicle Recovery Gear Carry tow straps rated for your van's weight and recovery points for attachment. Tow straps should be rated for at least twice your van's weight to provide safety margins during recovery operations. Learn proper recovery techniques before you need them in emergency situations.
Self-Recovery Tools Recovery boards work in snow, mud, and sand to provide traction for self-recovery. These boards can often get you unstuck without requiring outside assistance, maintaining your independence during remote travels. Practice using recovery boards in safe conditions to understand their capabilities and limitations.
4. Equipment & Gadgets for Winter Van Life
Modern technology offers numerous solutions for winter van living challenges. Smart equipment selection can dramatically improve comfort, safety, and reliability during cold-weather adventures.
Heating and Power Solutions
Engine Block Heaters Block heaters keep engines warm overnight in extreme cold, ensuring reliable starting and reducing engine wear. Plugin block heaters require 120V shore power but can be essential for temperatures below 0°F. Battery-powered engine heaters offer similar benefits without electrical connections.
12V Electric Blankets Low-power electric blankets provide efficient heating for sleeping without running fuel-consuming heaters all night. Quality 12V blankets draw 3-5 amps, making them practical for battery-powered heating. Use programmable timers to automatically warm beds before wake-up times.
Portable Power Stations Backup power stations provide emergency power for phones, devices, and essential equipment when main batteries fail. Choose units with both 12V and 120V outputs, cold-weather operation ratings, and solar charging capabilities. Power stations can provide critical power during extended cloudy periods when solar charging is limited.
Monitoring and Communication
Weather Monitoring Systems Use weather apps and alerts to monitor storms and road conditions ahead of your travel routes. Real-time weather radar helps avoid dangerous conditions, while road condition reports prevent getting stuck in impassable areas. Subscribe to weather alert services for your travel regions.
Battery Disconnect Systems Install battery disconnect switches to prevent parasitic power draw during storage periods. Many van systems draw small amounts of power continuously, which can discharge batteries during extended storage. Disconnecting batteries preserves charge and extends battery life.
Final Winter Van Life Tips
Successful winter van living requires ongoing attention to details and smart camping practices that work with winter conditions rather than fighting against them.
Smart Parking Strategies Park facing south when possible to maximize solar gain for warming and battery charging. Avoid low spots where snow accumulates and creates difficult exit conditions. Choose level spots that don't require extensive digging or recovery efforts when departing.
Snow Management Remove snow from your van's roof regularly to prevent excessive weight and potential roof damage. Snow accumulation can add hundreds of pounds to your van's weight and cause structural problems. Use a roof rake or soft brush to remove snow safely without damaging roof equipment.
System Testing Protocols Test all systems heating, battery, tires, and water before major winter trips. Run through complete system checks in controlled conditions where problems can be addressed easily. Practice emergency procedures like tire chain installation and recovery techniques before you need them.
Professional Winterization Services If winterizing your van's water system seems overwhelming, visit The Vansmith's Boulder shop for professional winterization services. Our experienced team can quickly winterize your van and get you back on the road with confidence, ensuring proper protection for your valuable water system components.
Heater Maintenance Pro Tips For Webasto heater owners, remember these critical operating guidelines:
- Run heaters on high for 30 minutes monthly to burn out soot buildup
- Never operate heaters for less than 20-30 minutes per cycle
- When shutting down from low settings, run on high for 10-20 minutes first
- Avoid extended low-setting operation that causes soot accumulation
Winter van life offers some of the most rewarding outdoor experiences available, from snow-covered mountain vistas to cozy evenings by the heater while snow falls outside. Proper winterization ensures these experiences remain comfortable and safe rather than becoming survival situations.
Remember that winter conditions can change rapidly, especially in mountain environments. Stay flexible with travel plans, monitor weather conditions continuously, and always err on the side of caution when conditions become questionable. With proper preparation and respect for winter's challenges, your van can provide a warm, comfortable base for incredible cold-weather adventures.
The investment in proper winterization pays dividends through reliable operation, comfortable living conditions, and peace of mind that allows you to focus on enjoying winter's unique beauty rather than worrying about equipment failures. Start your winterization process early, before temperatures drop, and test all systems thoroughly before heading out on winter adventures.
Need professional winterization services? Visit The Vansmith at 7209 Valtec Court, Unit B, Boulder, CO 80301, or contact us at info@thevansmith.com or 855-826-7684. We'll get your van winter-ready quickly so you can focus on planning your next cold-weather adventure.


