When summer hits hard and the road takes you through hot deserts or humid forests, having a solid vanlife cooling setup can make or break your trip. Putting a 12V AC unit in your vanlife rig is one of the smartest changes you can make. In this guide, we’ll walk you through how to choose, compare, and put in a 12V camper van air conditioner, step by step.
Why 12V AC Units Are the Future of Vanlife Cooling

Gone are the days of relying on noisy, power-hungry 120V RV air conditioners and sketchy campground hookups. Today’s best 12V air conditioners for vans, like the Nomadic X2 or Mabru RV 12000, give strong, efficient cooling without needing shore power or an onboard generator.
Benefits of a 12 volt air conditioner for van setups:
- Designed to run directly off your battery bank
- Super energy efficient (great for solar-based builds)
- Quiet operation for stealth camping or off-grid use
- Easy rooftop installation
Key Factors to Consider Before Buying a 12V AC Unit

Not all van air conditioning units are created equal. Before pulling the trigger, here are a few things to weigh:
- Cooling Capacity (BTUs)
- A 12V unit typically ranges from 6,000 to 12,000 BTUs (Renogy)
- For full-size vans like Sprinters or Transits, aim for at least 10,000 BTUs
- Smaller builds may do fine with less, especially with good insulation
Type of Unit
There are two main options:
- Rooftop Units: Permanent, sleek install. Ideal for full-timers.
- Small Portable Air Conditioner for Campers: Easier to move, but less efficient and require venting
Energy Efficiency
Look for inverter-style compressors and brushless fans. These cut power draw and extend battery life. (Victron Energy)
Noise Level
Some units run very quiet, others not so much. Look for sound ratings under 60 dB for a calm night.
Power System Compatibility
Before you install anything, make sure your battery setup (even if you’re running lithium) can handle the draw. You'll likely need:
- At least 200Ah of lithium batteries
- 300W+ solar
- A DC-DC charger for alternator charging
Best 12V Camper Van Air Conditioners Compared
Choosing the best 12V air conditioner for a camper van involves more than comparing cooling capacity. Power consumption, installation requirements, weight, climate, and battery capacity all affect which system will work best in a van.
The table below compares popular cooling options for camper vans. Keep in mind that the Fresair S6 uses evaporative cooling rather than compressor-based air conditioning, so its performance should not be compared directly by BTU rating.
|
Unit |
Type |
Cooling Capacity |
Power Draw |
Weight |
Installation Type |
Current Listed Price* |
|
Mabru RVSC12DC |
12V DC inverter compressor AC |
12,000 BTU |
380–750W, approximately 32–63A at 12V |
90 lbs |
Rooftop |
Around $2,600 |
|
Nomadic Cooling X2 12V |
12V DC compressor AC |
8,188 BTU |
27A Eco / 55A Max; 720W rated power |
44 lbs |
Rooftop, 14" × 14" roof opening |
Around $3,100 |
|
Fresair S6 |
12V evaporative air cooler |
Not rated in BTU |
Less than 8A at maximum power |
25 lbs |
Rooftop evaporative cooling system |
Check current availability and pricing |
|
ZERO BREEZE Mark 2 |
Portable compressor AC |
2,300 BTU |
240W rated consumption |
16.5 lbs |
Portable, not a rooftop AC |
$999 regular price; promotional pricing may vary |
Compressor AC vs. Evaporative Cooling: Which Do You Actually Need?
Not every camper van cooling system works the same way. Understanding the difference between compressor air conditioning and evaporative cooling can prevent you from buying a system that performs well in one climate but struggles in another.
The Mabru RV 12000 and Nomadic Cooling X2 are compressor-based air conditioners. Like residential AC systems, they use a refrigeration cycle to remove heat from the interior. This makes compressor systems the more dependable choice for travelers who need cooling across a wide range of temperatures and humidity levels.
The Fresair S6 works differently. It is an evaporative cooling system that uses water and airflow rather than a conventional refrigerant-based cooling cycle. Its low electrical demand makes it attractive for vans with smaller battery systems, but climate plays a major role in performance.
Choose a Compressor Air Conditioner If:
A compressor-based 12V AC is generally the better choice if you:
-
Travel regularly through humid regions.
-
Spend significant time in hot summer conditions.
-
Need predictable cooling across different climates.
-
Have sufficient battery capacity and charging capability.
-
Want to cool a well-insulated van for extended periods.
The trade-off is electrical demand. Before selecting a compressor AC, calculate the complete electrical load of the van rather than considering the air conditioner alone. Refrigeration, lighting, cooking equipment, laptops, water pumps, and other appliances also draw from the same battery bank.
Choose an Evaporative Cooler If:
An evaporative cooling system may make more sense if you:
-
Travel primarily through dry climates.
-
Spend significant time in the Southwest or high-desert regions.
-
Want to minimize electrical consumption.
-
Have limited battery capacity.
-
Understand that performance will vary with humidity.
For travelers moving frequently between dry and humid climates, a compressor AC generally provides more consistent performance. For primarily dry-climate travel, the much lower electrical demand of an evaporative system can be a meaningful advantage.
Don't Compare 12V Air Conditioners by BTU Alone
Cooling capacity is important, but the highest BTU rating doesn't automatically identify the best camper van air conditioner.
A complete comparison should consider:
-
Cooling capacity
-
Continuous and peak electrical draw
-
Battery bank capacity
-
Solar and alternator charging capacity
-
Roof weight
-
Installation requirements
-
Interior volume
-
Van insulation
-
Local temperature and humidity
-
Expected daily AC runtime
For example, a powerful air conditioner may cool the van quickly but place greater demand on the battery system. A lower-draw system may run longer from the same battery bank but may take more time to reduce interior temperature.
The right system is the one that matches the van's entire electrical and thermal design.
How Much Battery Capacity Does a 12V Camper Van AC Need?
Battery requirements depend on the air conditioner's actual power consumption, desired runtime, outside temperature, insulation, and the performance of the van's charging system.
Start by calculating:
AC power consumption × expected runtime = estimated daily AC energy requirement
That number then needs to be considered alongside every other electrical load in the van.
A camper van used for short evening cooling periods has very different requirements from a van where the owner expects air conditioning to operate throughout a hot afternoon. Solar alone may not always replace the energy consumed by extended AC use, particularly when panels are shaded, weather conditions are poor, or roof space limits total solar capacity.
For frequent air conditioner use, evaluate the complete system together: battery storage, alternator charging, shore power, solar input, inverter requirements where applicable, and the energy demand of other appliances.
Installation Factors to Consider Before Buying a 12V AC Unit
Before choosing a unit based on cooling performance, check whether it physically and electrically fits the van.
Roof Space
Solar panels, roof racks, fans, skylights, and storage equipment compete for limited roof space. Plan the entire roof layout before selecting the AC location.
Roof Weight
Air conditioners vary considerably in weight. Roof capacity, mounting location, and weight distribution should be considered during installation planning.
Electrical Compatibility
Confirm that the air conditioner voltage matches the van's electrical architecture. A 12V system should not be treated as interchangeable with a 24V or 48V version of the same product line.
Condensation and Drainage
Compressor air conditioners remove moisture from interior air. Proper drainage design is essential to prevent water intrusion and moisture-related problems.
Service Access
Consider how the unit will be inspected, cleaned, repaired, or replaced after installation. A system that is difficult to access can make future maintenance unnecessarily complicated.
A Note on Product Generations and Changing Specifications
The 12V camper van air-conditioning market is changing quickly. Manufacturers regularly update cooling capacity, drainage systems, electrical specifications, exterior housings, and product generations.
Before purchasing, confirm the exact voltage and generation of the unit you're considering. Products with similar names may have different specifications depending on whether they are designed for 12V, 24V, or 48V electrical systems.
Our Top Three 12V Air Conditioners for Camper Vans
The best 12V air conditioner for your van depends on how you travel, how much battery capacity you have, and whether you want a permanent rooftop system or a portable cooling solution.
For most camper van setups, these are three strong options to consider:
Best for Efficiency and Proven Reliability: Dometic RTX 2000
The Dometic RTX 2000 is a strong choice for travelers who want an established rooftop cooling system designed for battery-powered use. Its variable-speed inverter compressor adjusts output based on cooling demand, helping reduce unnecessary energy use once the interior reaches the desired temperature.
It offers multiple operating modes, including Eco and Boost modes, which makes it easier to balance cooling performance with available battery capacity. For full-time travelers and people who regularly camp in warm climates, the RTX 2000 offers a practical balance of efficiency, cooling performance, and established manufacturer support.
Best for: Full-time van life, warm-weather travel, and owners who prioritize proven rooftop equipment.
Best All-Around Value and Flexibility: Velit 2000R
The Velit 2000R is a practical option for camper van owners who want a rooftop DC air conditioner with a strong balance of cooling performance and electrical efficiency.
The 12V version typically draws around 30 amps on low and 50 amps on high, although maximum consumption can vary with ambient temperature and operating conditions. It also fits a standard 14-by-14-inch roof opening, which can simplify installation in vans that already have a compatible roof vent opening.
For travelers who want a permanent rooftop AC without moving to a large 120V system and inverter setup, the Velit 2000R offers a useful middle ground between performance, installation flexibility, and electrical demand.
Best for: Couples, weekend travelers, and medium to full-size camper vans with capable lithium battery systems.
Best Portable and No-Install Option: Zero Breeze Mark 3
The Zero Breeze Mark 3 is designed for travelers who want portable cooling without cutting a permanent opening in the van roof. It provides 5,280 BTU of cooling capacity and weighs less than 22 pounds, making it significantly easier to move than a permanent rooftop unit.
Because it is designed for targeted cooling rather than whole-vehicle climate control, it works best in smaller enclosed areas, sleeping zones, compact vans, and situations where installation flexibility matters more than maximum cooling output.
Runtime depends on operating mode and battery configuration. Higher-output cooling modes naturally shorten battery runtime, while lower-output modes can extend operation for several hours.
Best for: Small vans, weekend camping, rental vans, sleeping-area cooling, and travelers who do not want permanent installation.
12V AC vs 120V AC: Which Is Better for a Camper Van?
Both 12V and 120V air conditioners can cool a camper van effectively, but they place very different demands on the electrical system.
A 12V air conditioner runs directly from the van's DC battery system. Because it does not need an inverter to change battery power from DC to AC, the system avoids inverter conversion losses and can be simpler to integrate into an off-grid electrical system.
A 120V air conditioner may provide higher cooling capacity, but running one away from shore power usually requires a large inverter and a substantial battery bank. Starting loads and continuous power demand must also be considered when designing the electrical system.
For most off-grid camper vans, a well-matched 12V unit is the more practical option. A 120V system can make sense when the van regularly connects to campground shore power or has an electrical system specifically designed for high AC loads.
|
Factor |
12V AC |
120V AC |
|
Battery operation |
Direct DC connection |
Requires inverter when off-grid |
|
Off-grid efficiency |
Generally better |
Conversion losses through inverter |
|
Electrical complexity |
Lower |
Higher |
|
Cooling options |
Growing range of van-specific units |
Wider selection of high-output units |
|
Best use |
Off-grid camper vans |
Shore-power-heavy travel or large electrical systems |
Compressor AC vs Evaporative Cooling: Which Do You Actually Need?
Not every van cooling system works the same way. The most important distinction is between a true compressor air conditioner and an evaporative cooler.
A compressor air conditioner uses refrigerant to remove heat and humidity from the interior. It can provide meaningful cooling in dry or humid conditions, making it the more dependable choice for travelers crossing different climates.
An evaporative cooler uses water and airflow to reduce air temperature. It consumes much less electricity than a compressor AC, but its effectiveness depends heavily on humidity. As outside humidity rises, evaporative cooling becomes less effective.
Choose a compressor air conditioner if you:
-
Travel through both dry and humid regions.
-
Need consistent cooling in changing weather.
-
Spend summers in the Southeast, Midwest, or other humid areas.
-
Have enough battery and charging capacity for sustained AC operation.
Consider an evaporative cooler if you:
-
Primarily travel in dry regions such as the Southwest or high desert.
-
Want very low electrical consumption.
-
Need temperature relief rather than full climate control.
-
Are comfortable managing the system's water requirements.
For travelers who move between regions throughout the year, a compressor-based AC is usually the more versatile choice.
How Much Battery Capacity Does a 12V Camper Van AC Need?
Battery capacity should be based on the air conditioner's actual power consumption and the number of hours you expect to use it.
A 12V air conditioner drawing 40 amps uses approximately 480 watts:
12 volts × 40 amps = 480 watts
If that AC ran continuously for five hours, it would theoretically consume about 2.4 kWh of energy. Real-world consumption may be lower if the compressor cycles after reaching the target temperature, but cycling depends on insulation, weather, sun exposure, interior temperature, and thermostat settings.
As a general planning framework:
|
Battery Capacity |
Approximate Nominal Energy |
Practical AC Use |
|
200Ah at 12V |
2.4 kWh |
Short cooling sessions and pre-cooling |
|
400Ah at 12V |
4.8 kWh |
Several hours of moderate AC use |
|
600Ah at 12V |
7.2 kWh |
Longer cooling periods with adequate charging support |
These figures are planning examples, not guaranteed runtime estimates. Your refrigerator, lights, water pump, fans, induction cooking, charging devices, and other electrical loads also use battery capacity.
For regular summer AC use, we recommend planning the entire electrical system around the cooling load rather than adding an air conditioner after the battery system has already been designed.
How Long Can a 12V Air Conditioner Run on a Battery?
There is no single runtime number that applies to every van.
Runtime depends on:
-
Battery capacity.
-
AC power draw.
-
Compressor duty cycle.
-
Outside temperature.
-
Desired interior temperature.
-
Van insulation.
-
Window area and coverings.
-
Solar production.
-
Alternator charging.
-
Other electrical loads.
A simple estimate can be calculated using:
Battery energy in watt-hours ÷ average AC power draw in watts = approximate runtime in hours
For example, a 400Ah 12V battery bank contains approximately 4,800Wh of nominal energy. If the AC averages 500 watts over time, the theoretical calculation is:
4,800Wh ÷ 500W = 9.6 hours
Real usable runtime will be lower once system losses, other electrical loads, reserve capacity, changing compressor demand, and charging conditions are considered.
This is why we recommend sizing a van's battery, solar, and alternator charging systems together.
How Much Solar Do You Need to Run a 12V Air Conditioner?
Solar can extend AC runtime, but rooftop solar alone should not automatically be treated as an unlimited power source for air conditioning.
For example, an 800-watt solar array does not continuously produce 800 watts throughout the day. Panel angle, roof layout, shade, clouds, heat, season, and charge-controller efficiency all affect actual production.
A practical AC electrical system may combine:
-
A properly sized lithium battery bank.
-
Rooftop solar.
-
DC-to-DC alternator charging.
-
Shore power charging when available.
Solar is particularly useful for reducing daytime battery drain while the van is parked in strong sun. Alternator charging can also support a useful strategy: pre-cooling the van while driving, then allowing the AC to maintain the temperature after parking.
The right solar capacity depends on your complete daily electrical budget, not the air conditioner alone.
Choosing the Right BTU Rating for Your Van Size
More BTUs are not automatically better. The right cooling capacity depends on interior volume, insulation, windows, climate, roof height, and how the van is used.
As a general planning guide:
|
Van Setup |
Suggested Cooling Range |
Typical Use |
|
Compact van or sleeping zone |
2,500–6,000 BTU |
Targeted cooling and mild climates |
|
Medium camper van |
6,000–9,000 BTU |
General travel with good insulation |
|
Full-size high-roof van |
8,000–12,000+ BTU |
Hot-weather travel and larger interiors |
These ranges should be treated as starting points rather than universal rules.
A poorly insulated van with large uncovered windows may require more cooling than a larger van with good insulation, insulated window covers, and controlled solar heat gain. Climate matters too. Cooling a van in dry Colorado conditions is different from managing heat and humidity along the Gulf Coast.
The goal is to choose enough cooling capacity for your real travel conditions without installing a system that places unnecessary demand on the battery bank.
Types of 12V Air Conditioners for Camper Vans
There are several ways to add DC cooling to a camper van.
Rooftop Air Conditioners
Rooftop units are the most common permanent option. They preserve interior floor space and can distribute cool air from above.
The tradeoffs include roof space, installation complexity, aerodynamic drag, and competition with solar panels, roof fans, racks, and other accessories.
Portable Air Conditioners
Portable systems do not require a permanent roof opening and can be moved between vehicles or used for targeted cooling.
They are useful for compact spaces and sleeping zones, but generally have lower whole-van cooling capacity than larger rooftop systems.
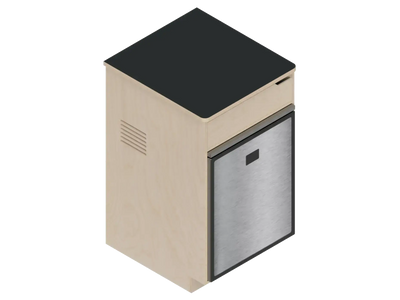
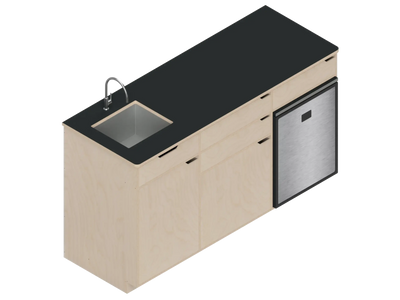
Under-Bench Air Conditioners
Under-bench systems keep the roof open for solar panels, storage, and ventilation fans. They can also help maintain a lower exterior profile.
Installation requires careful planning for ducting, condensate drainage, and exterior heat rejection.
Split Air Conditioning Systems
Split systems separate the evaporator and condenser. This can provide installation flexibility and reduce interior noise, but the installation is generally more complex.
For most camper van owners, rooftop and portable systems remain the most straightforward choices.
Best 12V AC Setup by Van Size and Travel Style
The best cooling system depends on more than van size.
|
Travel Style |
Recommended Approach |
|
Compact van or weekend traveler |
Portable AC or smaller DC compressor system |
|
Couple traveling seasonally |
Efficient rooftop 12V AC with moderate battery capacity |
|
Full-time traveler |
Rooftop compressor AC with a larger battery and multiple charging sources |
|
Hot and humid climate travel |
Compressor AC with strong battery and alternator charging |
|
Southwest and high-desert travel |
Compressor AC or evaporative cooling, depending on comfort expectations |
|
Solar-focused roof layout |
Compact rooftop unit or under-bench system |
|
No permanent modifications |
Portable battery-powered AC |
A traveler who only needs cooling for sleeping has different electrical requirements than someone traveling with pets who needs dependable temperature management during the day. Start with the use case, then design the cooling and electrical systems around it.
12V Cooling Alternatives When Full Air Conditioning Isn't Practical
A full air-conditioning system is not necessary for every van or travel style.
In mild and moderate climates, a combination of ventilation and heat-management strategies may provide enough comfort while using far less electricity.
Practical alternatives include:
-
Roof ventilation fans.
-
Cross-ventilation through screened windows.
-
Insulated window covers.
-
Exterior awnings.
-
Strategic parking in shade.
-
Portable 12V circulation fans.
-
Evaporative cooling in dry climates.
-
Improved wall, ceiling, and floor insulation.
A roof fan is particularly effective for removing accumulated hot air before turning on the AC. Pre-ventilating the interior reduces the initial cooling load and allows the air conditioner to spend less time running at maximum output.
Common 12V Air Conditioner Problems and Troubleshooting
Even a well-installed 12V air conditioner can develop performance issues. Start with the simplest checks before assuming the unit itself has failed.
The AC Does Not Turn On
Check:
-
Battery state of charge.
-
Battery voltage under load.
-
Fuse or circuit breaker.
-
Cable connections.
-
Manufacturer low-voltage protection.
-
Controller and thermostat settings.
Voltage drop caused by undersized cable or long wire runs can prevent a high-draw appliance from operating correctly even when the battery appears charged.
The AC Runs but Doesn't Cool the Van
Check for:
-
Dirty air filters.
-
Blocked intake or supply vents.
-
Open windows or doors.
-
Direct sun through uncovered glass.
-
Poor insulation.
-
Extreme outside temperatures.
-
Refrigerant or compressor problems requiring professional diagnosis.
Before judging AC performance, close the van, cover high-solar-gain windows, and allow enough time for the system to reduce both surface and air temperatures.
The Unit Shuts Down Under Heavy Load
Possible causes include:
-
Low battery voltage.
-
Voltage drop.
-
Undersized wiring.
-
Loose electrical connections.
-
Battery-management-system limits.
-
Insufficient electrical-system capacity.
Repeated shutdowns should be diagnosed rather than treated as normal behavior.
Water Is Leaking Inside the Van
Inspect the condensate drain, mounting angle, rooftop gasket, and drainage path. Water inside the van can come from AC condensation or from an installation seal issue, so identifying the source is important before applying more sealant.
The AC Makes Unusual Noise or Vibration
Check the mounting hardware and inspect for loose interior components. Rooftop units experience continuous road vibration, so periodic inspection is important.
If the sound comes from the compressor or refrigerant circuit, contact a qualified service technician.
How to Clean and Maintain a 12V Camper Van Air Conditioner
Routine maintenance helps a 12V air conditioner cool more effectively while reducing unnecessary electrical demand.
Clean the Air Filter Regularly
A dirty filter restricts airflow and forces the system to work harder. Inspect the filter regularly during heavy summer use and clean it according to the manufacturer's instructions.
Allow washable filters to dry completely before reinstalling them.
Inspect Rooftop Seals
Check the roof gasket and surrounding installation area for signs of water intrusion, cracking, or movement. Road vibration and temperature changes can affect rooftop installations over time.
Keep Airflow Paths Clear
Do not block intake or supply vents with bedding, luggage, cabinets, or other gear. Good airflow is essential for effective cooling.
Check Condensate Drainage
Make sure drainage paths remain clear and that water is moving away from the interior correctly.
Monitor Electrical Performance
A battery monitor can help identify changes in AC consumption over time. Unexpected increases in power draw or repeated low-voltage shutdowns may indicate an electrical or mechanical issue.
Schedule Professional Service When Needed
Loss of cooling capacity, refrigerant leaks, compressor problems, and sealed-system repairs require specialized tools and knowledge. These issues should be handled by a qualified technician.
A well-designed cooling system is more than an air conditioner mounted on the roof. Battery capacity, charging sources, insulation, ventilation, roof layout, and travel climate all work together. At The Vansmith, we consider the entire van as a system so cooling performance, electrical capacity, and day-to-day usability support the way you actually travel.
Portable vs Rooftop 12V ACs: What’s Right for You?
Portable Units
- Lightweight
- No permanent install
Lower BTU output
Often louder
Need window/door venting
Rooftop Units
- High-performance cooling
- Professional look
- Long lifespan
Requires roof cutout
More power draw
If you’re a weekend warrior with low power needs, a small unit might work. But for full-time travelers or serious road trippers, a rooftop 12 volt air conditioner for van setups is worth every penny.
Budget Guide: Total Setup Cost
Here’s a rough breakdown:
- AC Unit: $2,000–$3,500
- Professional Install (optional): $1,000–$2,000
- Battery + Solar Upgrade: $2,000–$4,000
- DIY Tools & Hardware: $100–$300
Total DIY Cost: ~$3,000–$5,500
Total Pro Install: ~$5,000–$8,000
Looking to leave the install to the pros? Our Repairs & Installation Service offers full HVAC upgrades in Boulder, Colorado. Book your appointment here
Installing a 12V AC Unit in Vanlife: Step-by-Step Guide
Ready to get hands-on? Putting in a 12V AC unit in vanlife builds isn’t impossible, just follow the steps below.
Bench Test the AC
- Test the unit on the ground before installing to confirm it powers up and functions.
Determine Your Location
- Most go rooftop, centered for balance
- Avoid solar panels or structural beams
Prepare the Opening (Rooftop Units)
- Mark your cut carefully
- Use a jigsaw or oscillating tool
- Seal any exposed metal edges
Install the Gasket
- Comes with your AC unit
- Prevents leaks,do not skip this!
Mount the AC Unit
- Carefully lower it into place
- Secure using provided hardware
- Add butyl tape or lap sealant as needed
Wiring
- Route to your DC fuse panel or breaker box
- Use properly sized wire and fuses (check manual)
- If wiring is complex, consult an expert
Ducting and Venting (if applicable)
- Some units have optional ducting for multi-zone cooling. Others vent directly.
Insulation
- Without good insulation, your AC will work overtime. Focus on:
- Ceiling and walls
- Window covers
- Thermal breaks in floors
Final Testing
- Fire it up
- Check amperage draw
- Verify cooling performance
Maintenance Tips for Longevity
- Clean filters monthly
- Inspect seals twice a year
- Don’t run the AC with voltage under 11.5V
- Use a voltage cut-off relay to protect batteries
Final Thoughts: Choosing the Best Van Life Air Conditioner for Your Setup
Finding the best van life air conditioner depends on your travel style, layout, and budget. If you’re planning long-haul summer travel or full-time vanlife, putting money into the best 12V air conditioner for van comfort is key. Need help planning the rest of your off-grid setup?
Check out our Customize Your Van page to explore battery systems, insulation, and all the other pieces.
At The Vansmith, we build with purpose, and we build for adventure. Whether you’re adding camper van AC or planning a full electrical redo, we’re here to help you stay cool, comfy, and wild on the road.
FAQs
How much does it cost to add AC to a van?
Costs range from $3,000–$8,000 depending on the unit, battery system, and whether you DIY or hire a pro.
Can you install air conditioning in a van?
Yes! Both rooftop and portable 12V AC units can be installed in vans, depending on your layout and power setup.
How much power does a 12V AC unit use?
Units like the Nomadic X2 draw around 55 amps at 12V. You’ll want a solid lithium battery bank and solar to keep it running efficiently.