Starting a van conversion can feel like standing at the base of a mountain, looking up at the summit, asking how you'll ever make it to the top. The good news? Thousands of people have already turned vans into campers before you, and with good planning and the right van conversion checklist, your DIY van build can be both doable and very satisfying.
Whether you're planning a full DIY van build or just want to see what goes into a pro conversion, you need a complete van conversion checklist. It makes sure you don't miss key steps or forget must-have materials. It also keeps you from getting stuck halfway through your build wondering what comes next.
After nearly a decade of building vans in Colorado and helping hundreds of DIY builders through their conversions, we've learned that planning is everything. The gap between a smooth build and a tough time often comes down to having the right van conversion checklist and following it step by step.
Phase 1: Planning and Design (Before You Touch a Tool)

The most effective van builds start long before the first cut is made or the first screw is driven. This planning phase is where dreams become real plans.
Design and Layout Planning
Create Your Floor Plan
- Measure your van's interior dimensions precisely
- Account for wheel wells, door openings, and ceiling curves
- Sketch multiple layout options before committing
- Consider how you'll actually live in the space daily
- Plan for storage of all your essential gear
Develop Your Systems Integration Plan
- Map electrical runs before building cabinetry
- Plan plumbing routes to avoid conflicts with other systems
- Consider ventilation needs for all appliances
- Ensure adequate access panels for future maintenance
Research and Compliance
- Check local regulations for van changes (DOT)
- Understand insurance implications of your conversion (AAA)
- Research inspection needs in your area
- Plan for any required permits
Budget and Timeline Planning
Create a Realistic Budget
- Material costs: typically $15,000-$45,000 depending on choices
- Tool investment: $2,000-$5,000 for complete workshop setup
- Unexpected expenses: budget 20% extra for surprises
- Professional help: factor in costs for tasks beyond your skill level
Develop a Realistic Timeline
- DIY builds typically take 3-12 months working weekends
- Full-time builds can be completed in 2-6 months
- Factor in learning curves, mistakes, and do-overs
- Consider seasonal factors affecting your workspace
Phase 2: Essential Tools and Workspace Setup
Having the right tools and workspace can make the difference between a enjoyable build and a frustrating struggle. You don't need a expert shop, but you do need the basics.
Essential Power Tools Checklist
Cutting Tools
- Circular saw (7¼" for general cutting)
- Jigsaw with metal and wood blades
- Angle grinder for metal work
- Oscillating multi-tool for detail cuts
- Hole saw kit for round penetrations
Drilling and Fastening
- Cordless drill/driver (18V minimum suggested)
- Impact driver for heavy-duty fastening
- Complete drill bit set including step bits
- Countersink bits for expert finishes
- Rivet gun for metal connections
Finishing Tools
- Random orbital sander
- Various grit sandpaper (120, 220, 320)
- Router for edge profiling (optional but helpful)
- Trim router for small detail work
Essential Hand Tools Checklist
Measuring and Layout
- 25-foot measuring tape
- Speed square
- Level (2-foot and 4-foot)
- Chalk line for long, straight lines
- Stud finder for locating van frame members
Cutting and Shaping
- Utility knives with extra blades
- Hand saw for quick cuts
- Metal snips for thin materials
- Files and rasps for shaping and smoothing
Assembly Tools
- Socket set (metric and standard)
- Combination wrench set
- Screwdriver set (Phillips, flathead, Torx)
- Pliers set including needle-nose and wire strippers
- Clamps in various sizes
Workspace Setup Checklist
Essential Workspace Requirements
- Level surface large enough to work on 4x8 sheets
- Adequate lighting (portable LED work lights work well)
- Power access for tools
- Ventilation for dust and fumes
- Storage for materials and tools
Nice-to-Have Workspace Additions
- Workbench with vise
- Material storage racks
- Air compressor for pneumatic tools
- Dust collection system
Phase 3: Materials and Components Checklist

Picking the right materials is key for both build quality and long-term strength. Here's what you'll need for each major system.
Structural and Insulation Materials
Framing Materials
- Furring strips (1x2 or 1x3 pine or cedar)
- Metal angle brackets for connections
- Self-tapping screws in various lengths
- Construction adhesive for additional bonding
Insulation Options
- Polyiso rigid foam (R-6 per inch)
- Reflectix radiant barrier
- Spray foam for gaps and irregular spaces
- Thinsulate for sound dampening (premium option)
- Havelock Wool for eco-friendly option
Vapor Barrier and Air Sealing
- Plastic sheeting (6-mil minimum)
- Tyvek housewrap for breathable barrier
- Acoustic sealant for permanent air sealing
- Tape for sealing joints and penetrations
Electrical System Components
Basic Electrical System
- 12V deep cycle batteries (lithium suggested)
- Solar panels (300W minimum for basic system)
- Charge controller (MPPT type preferred)
- Inverter for AC power needs
- 12V fuse block and fuses
- Marine-grade wire in various gauges
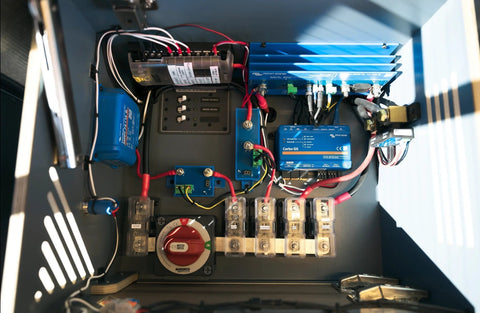
The Vansmith Standard Power Package Most Vansmith builds include a 2kWh lithium smart power system with:
- 300W solar panel system
- Ship-to-shore charging capability
- Alternator charging integration
- EcoFlow system components
- Upgradeable to 5kWh or 10kWh systems
Electrical Installation Materials
- MC4 connectors for solar connections
- Wire nuts and terminal blocks
- Heat shrink tubing for connections
- Electrical tape in multiple colors
- Cable management clips and ties
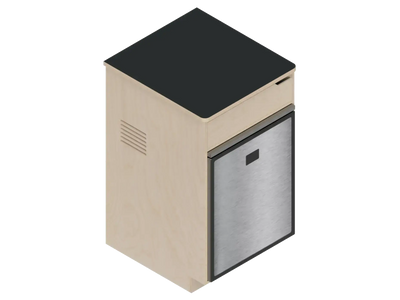
Plumbing System Components
Basic Plumbing System
- Fresh water tank (20-40 gallons typical)
- Grey water tank (15-30 gallons typical)
- 12V water pump
- PEX tubing and fittings
- Shut-off valves and connections
Water Heating Options
- Propane tankless water heater
- 12V electric water heater
- Webasto diesel water heater
- Simple propane camping water heater
Cabinetry and Interior Materials
Cabinet Construction Materials
- Baltic Birch plywood (premium choice)
- Cabinet-grade plywood (budget option)
- Formica or laminate for countertops
- Edge banding for expert finish
- Quality cabinet hardware (Blum suggested)
Interior Finishing Materials
- Cedar planks for ceiling treatment
- Wood stain and polyurethane finish
- Interior-grade adhesives
- Trim pieces for finishing edges
- Fabric for upholstery and wall covering
Phase 4: System-by-System Build Checklist
Breaking your build into doable phases prevents stress and makes sure tasks happen in the right order.
Phase 4A: Preparation and Insulation
Van Preparation Tasks
- Remove all interior panels and components
- Clean and treat any rust or corrosion
- Install any additional windows or vents
- Run initial electrical conduit before insulation
Insulation Installation
- Install floor insulation first
- Wall insulation comes next
- Ceiling insulation last
- Seal all gaps with spray foam
- Install vapor barrier if required
Phase 4B: Electrical System Installation
Rough Electrical Work
- Install battery bank and charging systems
- Run all wire routes before walls go up
- Install outlet and switch boxes
- Test all circuits before covering with walls
- Label all wires for future reference
Final Electrical Connections
- Install light fixtures and switches
- Connect outlets and USB charging ports
- Install monitoring systems
- Test entire system under load
- Create electrical system documentation
Phase 4C: Plumbing System Installation
Rough Plumbing Work
- Install tanks and mounting systems
- Run supply and drain lines
- Install pump and pressure systems
- Test for leaks before closing up walls
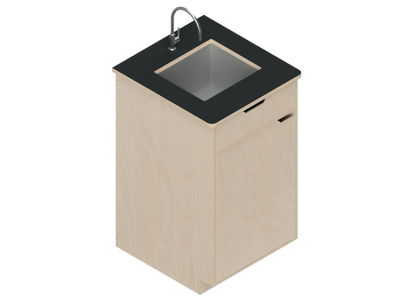
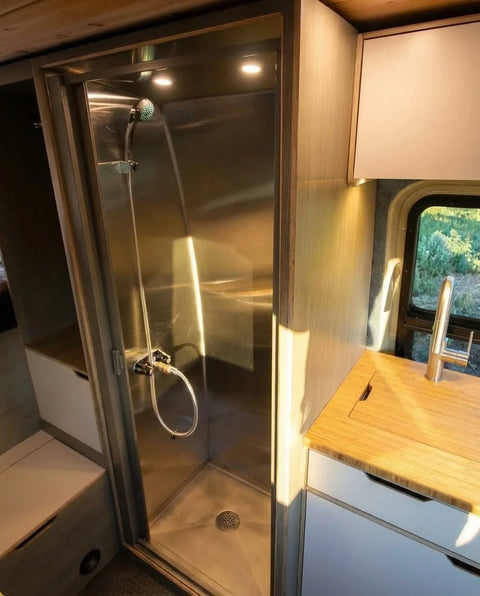
Final Plumbing Connections
- Install sink and faucet
- Connect hot water heater
- Install any shower components
- Test entire system thoroughly
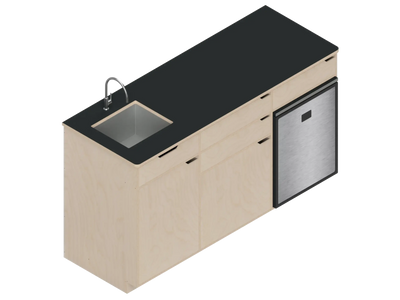
Phase 4D: Interior Construction
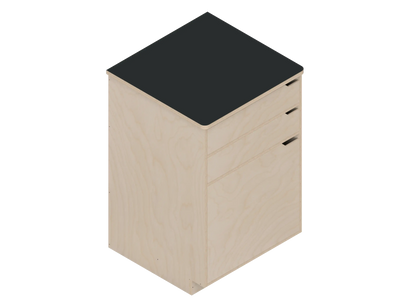
Cabinetry Installation
- Build and install lower cabinets first
- Install countertops
- Add upper cabinets and storage
- Install all hardware and adjust doors/drawers
Interior Finishing
- Install ceiling treatment
- Add wall covering or paint
- Install flooring materials
- Add trim and finishing touches
Phase 5: Systems Testing and Final Details
The final phase is crucial—thorough testing prevents problems on the road.
Comprehensive Systems Testing
Electrical System Testing
- Test all circuits under normal loads
- Verify charging systems work correctly
- Check voltage drops on long wire runs
- Test inverter performance with appliances
Plumbing System Testing
- Pressure test all connections
- Verify pump operation and pressure
- Test hot water system operation
- Check for leaks over 24-48 hours
Climate Control Testing
- Test heating system operation
- Verify ventilation fan performance
- Check insulation effectiveness
- Monitor humidity levels
Final Quality Control
Safety Inspections
- Verify all electrical connections are secure
- Check that all plumbing connections are tight
- Ensure proper ventilation for propane appliances
- Test carbon monoxide and propane detectors
Functional Testing
- Test all cabinet doors and drawers
- Verify bed mechanism operation
- Check storage accessibility
- Test all appliances under load
DIY vs. Professional: Making the Right Choice
While this van conversion checklist can guide a complete DIY build, it's key to see when pro help makes sense.
Tasks Well-Suited for DIY
Good DIY Projects
- Interior construction and cabinetry
- Insulation install
- Interior finishing work
- Basic electrical connections (with proper knowledge)
Tasks Better Left to Professionals
Consider Professional Help For
- Complex electrical system design
- Propane system install
- Major structural changes
- Specialized systems like air conditioning
The Vansmith DIY Solution The Vansmith offers pro-level DIY parts that bridge the gap between full DIY and pro builds. Our DIY kits start at $200 for single parts and scale up to complete system bundles, giving you pro quality with DIY satisfaction.
Common Mistakes to Avoid
Learning from others' mistakes can save you time, money, and frustration.
Planning Mistakes
Inadequate Space Planning
- Not accounting for actual living patterns
- Forgetting about storage for daily items
- Underestimating space needs for clothing and gear
Electrical System Undersizing
- Not calculating actual power needs
- Choosing battery capacity based on price rather than needs
- Forgetting about parasitic loads and inefficiencies
Construction Mistakes
Poor Material Choices
- Using exterior materials inside (off-gassing concerns)
- Choosing inappropriate fasteners for vibration environments
- Underestimating insulation needs
Inadequate Testing
- Not pressure testing plumbing systems
- Skipping load testing of electrical systems
- Rushing final quality control inspections
Seasonal Considerations for Van Builds
Timing your build can much impact the time and timeline.
Best Seasons for Building
Fall and Winter
- Indoor work is comfy
- Materials may be discounted
- More time available for planning and research
Spring
- Good weather for outdoor work
- Motivation is high for upcoming adventure season
- Material availability is typically good
Challenges by Season
Summer Challenges
- Hot workspace conditions
- Higher material costs
- Pressure to finish quickly for summer adventures
Winter Challenges
- Cold workspace conditions
- Limited outdoor work chances
- Potential material supply issues
Getting Help When You Need It
Even the most experienced DIY builders occasionally need expert assistance.
When to Seek Professional Help
Safety-Related Tasks
- High-voltage electrical work
- Propane system install and testing
- Structural changes affecting safety
Complex Technical Tasks
- Custom electrical system design
- Advanced plumbing systems
- Specialized equipment install
Finding Qualified Help
Electrical Work
- Look for certified RV or marine electricians
- Verify time with 12V DC systems
- Ask for references from other van builders
Plumbing Work
- Find technicians familiar with RV/marine systems
- Verify licensing and insurance
- Check references for mobile or recreational vehicle work
The Vansmith Advantage: Professional Components for DIY Builders
Knowing that many people want the pride of DIY building with pro-level results, The Vansmith offers full DIY part systems.
DIY Component Options
Individual Parts Starting at $200, you can purchase single shop-built parts:
- Cabinet doors and drawer fronts
- Custom-cut cabinetry pieces
- Professional hardware systems
- Specialized mounting solutions
Complete System Packages For those wanting more complete options, full DIY bundles provide all you need for pro-level installs while keeping the DIY feel.
Professional Support for DIY Builders
Technical Guidance
- Installation instructions and diagrams
- Technical support via phone and email
- Access to expert tips and techniques
Quality Assurance
- Components manufactured to expert standards
- Materials tested for van conversion environments
- Warranty support for component quality
Ready to Start Your Van Build Journey?
Having a complete van conversion checklist is your roadmap to success, but keep in mind that every build is unique. Use this checklist as your base, but don't be afraid to adapt it to your exact needs, skills, and situation.
If you’d rather skip the guesswork and start with a proven van conversion checklist and build plan, explore our services or contact us to talk through your project.
The most key item on any van conversion checklist isn't a tool, material, or part—it's patience. Take your time, do things right the first time, and don't rush key systems. Your van will be your home, your shelter, and your adventure rig for years to come. And if you’re still building your setup step-by-step, our guide to must-have tools and supplies for DIY van builders will help you prepare properly before you start cutting, wiring, or installing anything.
Whether you're planning a complete DIY van build or looking for pro parts to boost your project, The Vansmith is here to support your journey. From single DIY parts starting at $200 to full system bundles, we offer options that match your skills, timing, and budget.
Ready to turn your van conversion dreams into real life? Check out our full set of DIY conversion products, pro parts, and build guides at The Vansmith DIY Collection. Your adventure-ready van is waiting—and with the right checklist, you can build it yourself!
Frequently Asked Questions
What should be included in a basic van conversion checklist before I start building?
Before you touch a tool, your van conversion checklist should cover layout planning, systems integration, research and compliance, and budget and timeline planning. That means measuring your van, sketching layouts, mapping electrical and plumbing runs, checking local regulations and insurance, and setting a realistic budget and build schedule.
How do I plan the layout for my camper van conversion?
Start by measuring your van’s interior precisely, including wheel wells, door openings, and ceiling curves. Sketch multiple layout options and think through how you’ll live in the space day to day, including where you’ll sleep, cook, sit, and store your essential gear.
Why is systems planning important in a van conversion?
Systems planning keeps your electrical, plumbing, and ventilation from fighting each other once you start building. Mapping wire runs and plumbing routes ahead of time, and planning access panels for future maintenance, saves you from tearing apart finished work later.
How much should I budget for a DIY van conversion?
The article suggests material costs typically run between $15,000 and $45,000 depending on your choices, plus $2,000 to $5,000 if you need to build out your tool kit. It’s smart to add about 20% for unexpected expenses and factor in any professional help for tasks beyond your skill level.
How long does a DIY van conversion usually take?
Most DIY builds take 3–12 months if you’re working weekends and evenings. If you can work on the van full time, a build can often be completed in 2–6 months, but you should still plan for learning curves, mistakes, and seasonal weather affecting your workspace.